
Windows 10 Feature updates can be tricky for many reasons. Fellow SC Dudes, Adam Gross, created a free and easy-to-implement solution to help debug and track down Feature Update logs.
This solution will describe how to send SetupDiag Result in your SCCM Inventory during a Windows 10 Feature Update. Along with our previous post to track down Windows 10 Feature Update hard blocks, will greatly ease Windows 10 Servicing.
Windows 10 SetupDiag SCCM Inventory Benefits
- Centralized log for any on-prem Feature Update attempt
- SetupDiag details stored in Hardware Inventory, which can be monitored by SQL query/reports and PowerBI
While we recommend sticking to Feature Update to deliver new Windows 10 builds, this solution will work the exact same if a Task Sequence is used to do an upgrade.
In this post, we’ll detail how to implement the Windows 10 Feature Update script to include it in your SCCM Inventory. This should help you with Feature update failures by identifying errors easily.
Requirements
We will now prepare our environment by downloading the script from Github and store it locally.
- Download SetupDiag from Microsoft
Microsoft has recently announced that SetupDiag will now be included in Windows 10 2004 and up.
While this is good news, the current setup provided here can remain valid or could be modified to match this.
MEMCM 2010 was just released and some analysis from SetupDiag is now included. Again, this requires Windows 10 2004 or higher to work. See Microsoft docs for more details.
- Download the Windows 10 feature Update scripts from Adam’s GitHub repository.
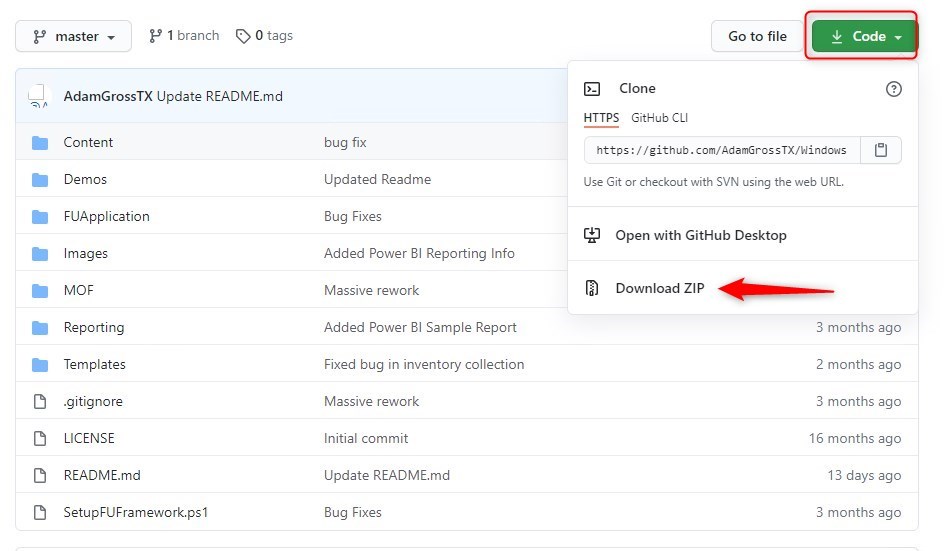
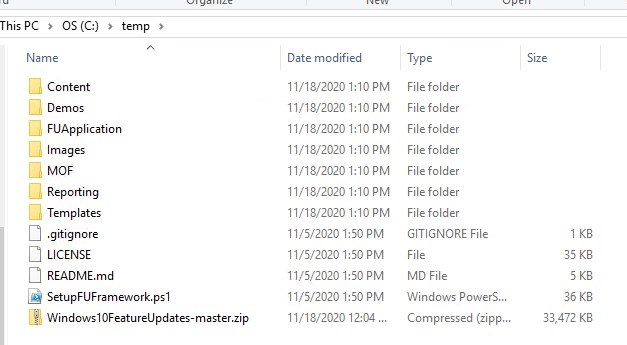
- Extract the content of the ZIP to a short path, like C:\temp\ for example
Configure the script for your environment
Now that the script is downloaded, we must edit it to include our server information :
- Edit SetupFUFramework.ps1 and modify the following section
- Set the following variables to match your environment
- $SiteCode
- $SiteServer
- $ApplicationFolderName
- $ApplicationSourceRoot
- $NetworkLogPath
- This will be used to centrally store logs following a feature update.
- This needs to be a simple share that domain-joined devices can write to it.

- Optional. Modify those value, has those will define the ConfigMgr Application, and local path used by the various scripts.

- Add SetupDiag.exe to the Content/Scripts path.

- Optional – All this can be done at the command line to launch the script
.\SetupFUFramework -SiteCode "PS1" -SiteServer "CM01.ASD.NET" -ApplicationFolderName "FUApplication" -ApplicationSourceRoot "\\CM01.ASD.NET\Media\$($ApplicationFolderName)" -NetworkLogPath "\\CM01.ASD.NET\FeatureUpdateLogs"Execute the SetupFUFramework script
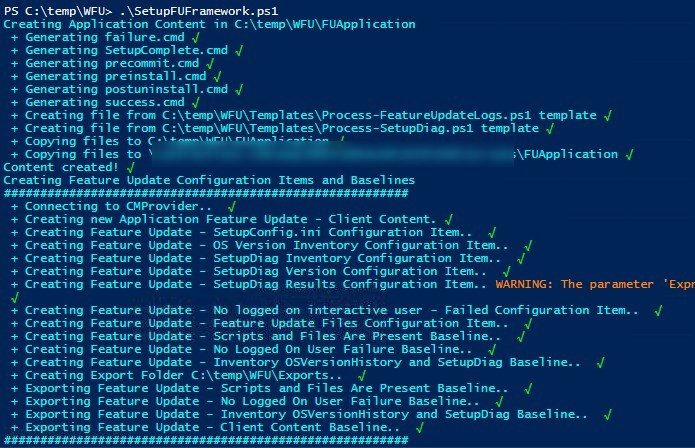
All the magic resides in Adam’s script. We will now run the script to create the application and CI on your SCCM Server. Everything will be done automatically:
- Open a PowerShell command windows as a MEMCM admin
- Navigate to the script location and run it :

- The script will create the following:
- An application named Feature Update – Client Content

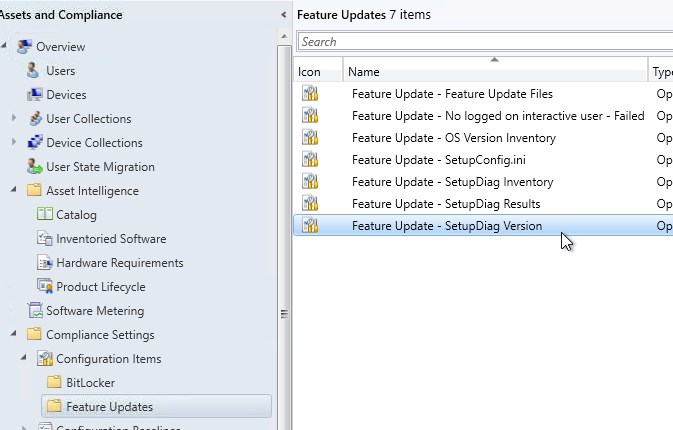
- A set of Configuration Items under a Feature update folder
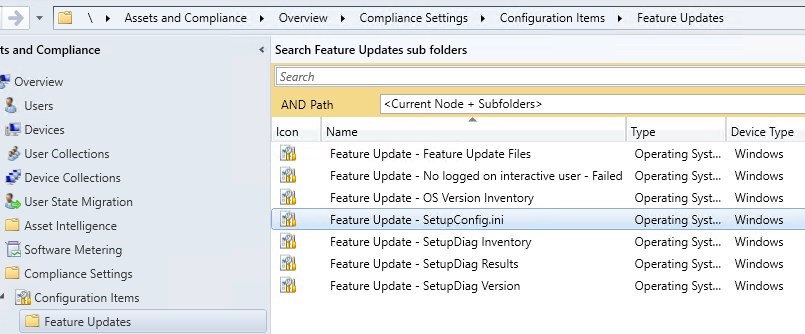
- A set of Configuration Baselines under a Feature Updates folder
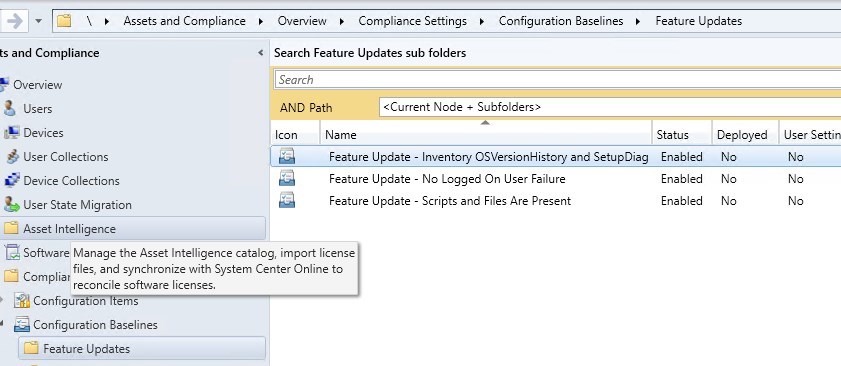
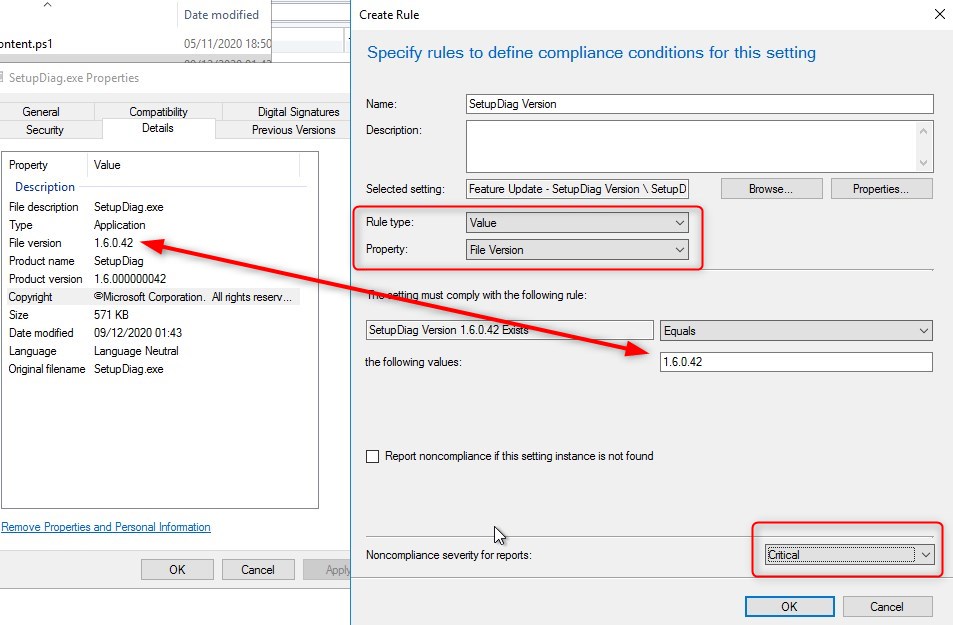
Modify the Feature Update – SetupDiag version CI
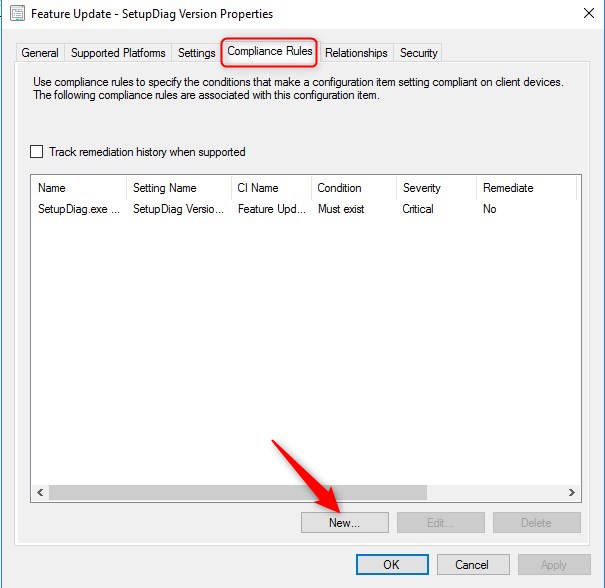
- Edit the Feature Update – SetupDiag Version configuration baseline item. Select Properties
- Under Compliance select New
- Select Feature Update – SetupDiag Version
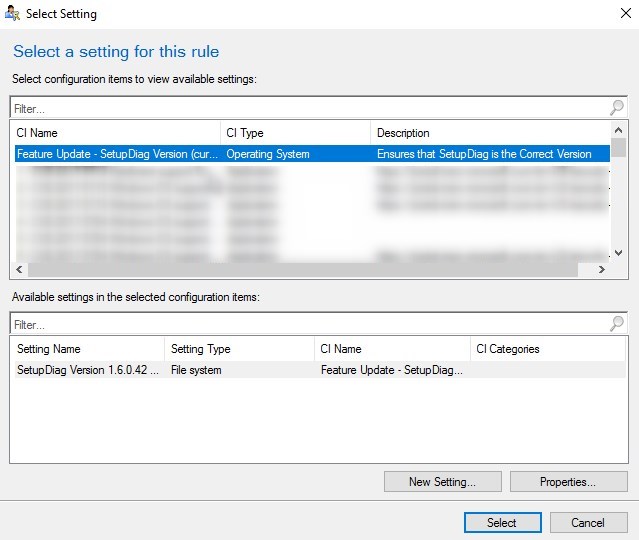
- Set the following:
- Rule Type: Value
- Property: File Version
- the value must match the version of SetupDiag downloaded
- Set Noncompliance to critical
Modify Hardware Inventory
For added value, the hardware inventory must be modified with 2 Custom MOF to be imported. This will allows showing the SetupDiag results in your SCCM Compliance or hardware inventory reports.
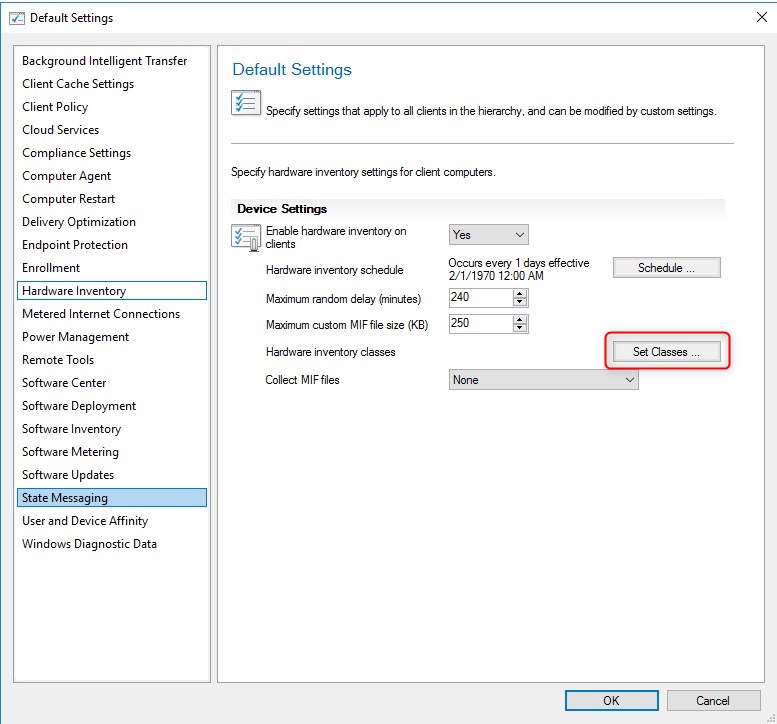
- Go to Administration/Clients settings, and edit the Default Client settings.
- Under Hardware Inventory, select Set Classes
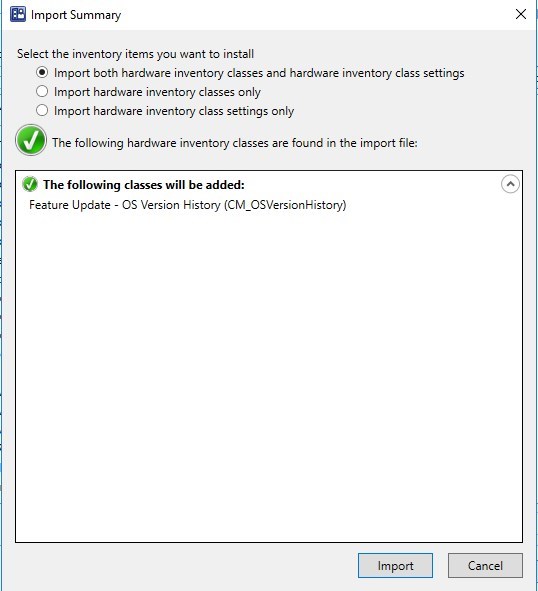
- Select Import
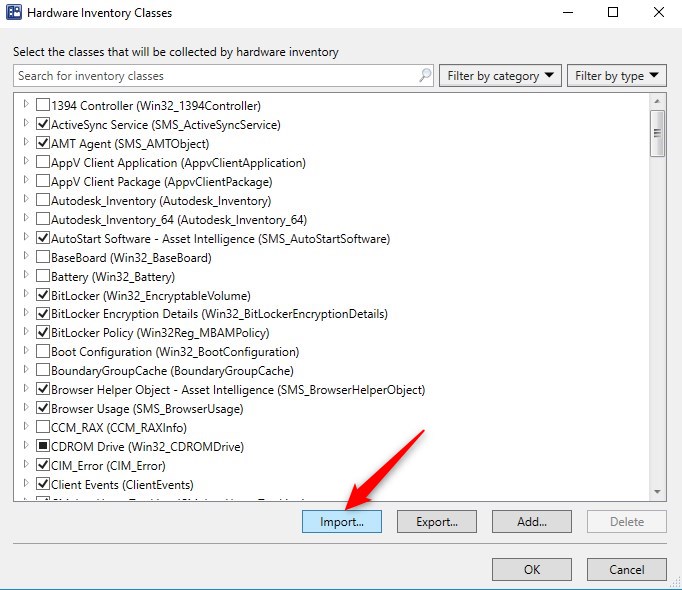
- Select one of the 2 MOF to be imported. They are in the extracted folder\MOF
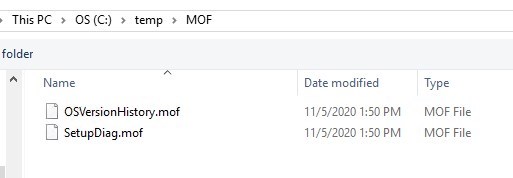
- Once imported, repeat steps for the second MOF file.
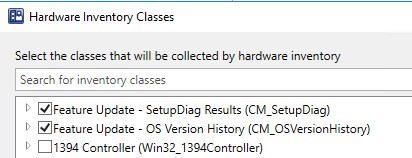
- Once done, they can be check/unchecked if you prefer to test it in custom Client settings prior to rollout to production
Deployments
Once all this is in place, the following components must be deployed on your clients:
- Feature Update – Client Content application, to stage SetupDiag
- Configuration Baselines, to report back compliance
- This could then become hard requirements before initiating a Feature Update
- Client settings for the hardware inventory
Results
With everything in place, Feature Update can be initiated. Once ran, the following should be available.
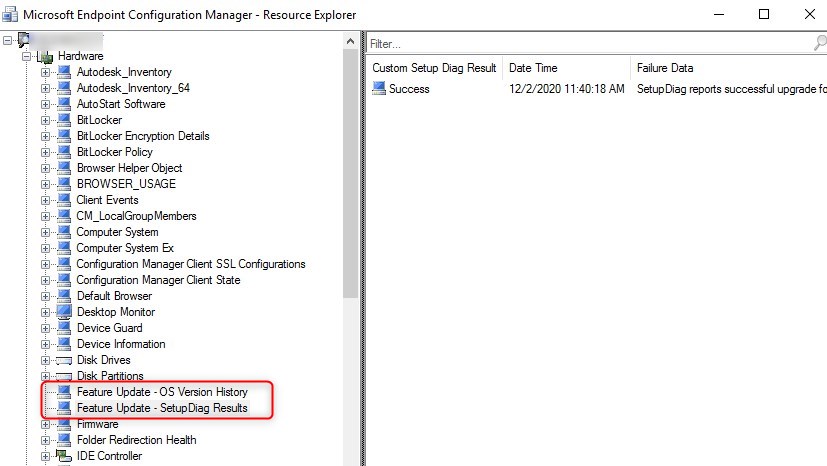
- Under the resource explorer of a device, the details from the Feature update is available. Reminder, this is based of the Hardware inventory cycle!
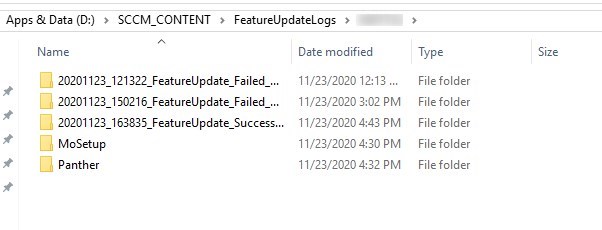
- Logs were copied to a central share .
- You can also run the included PowerBI report to see the results
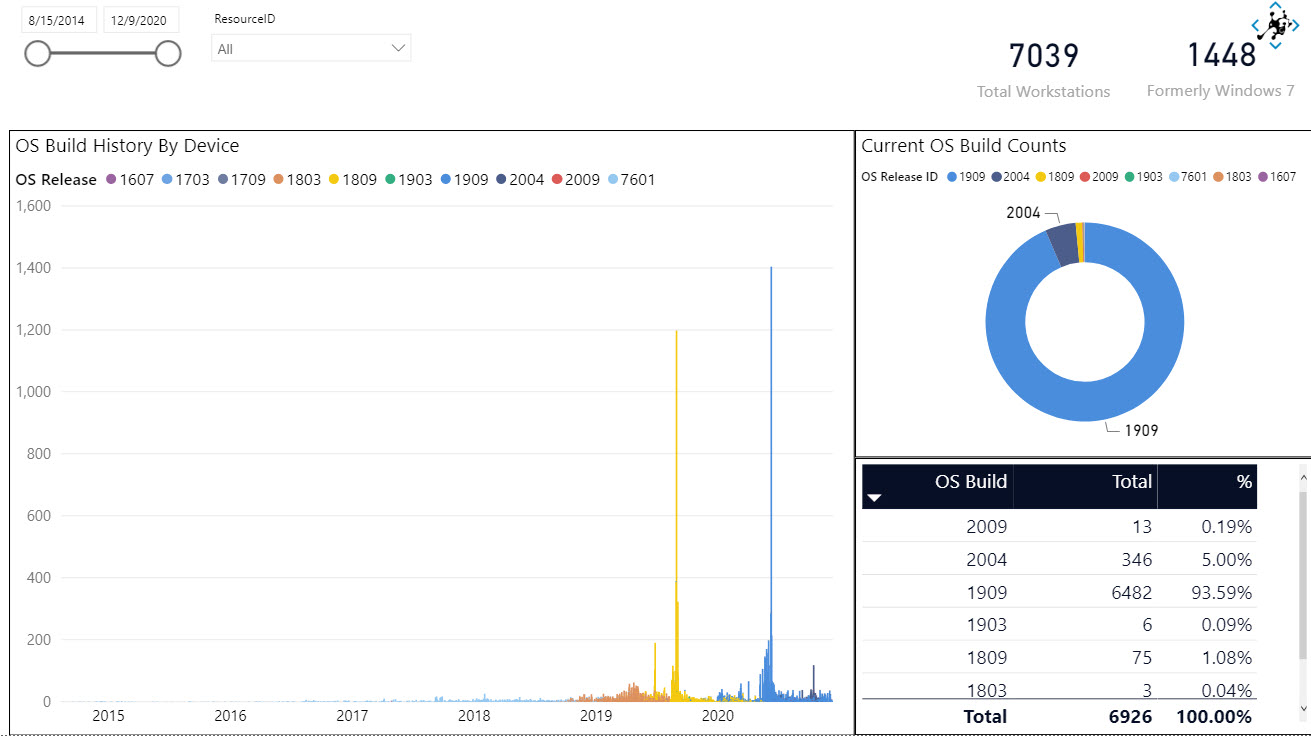
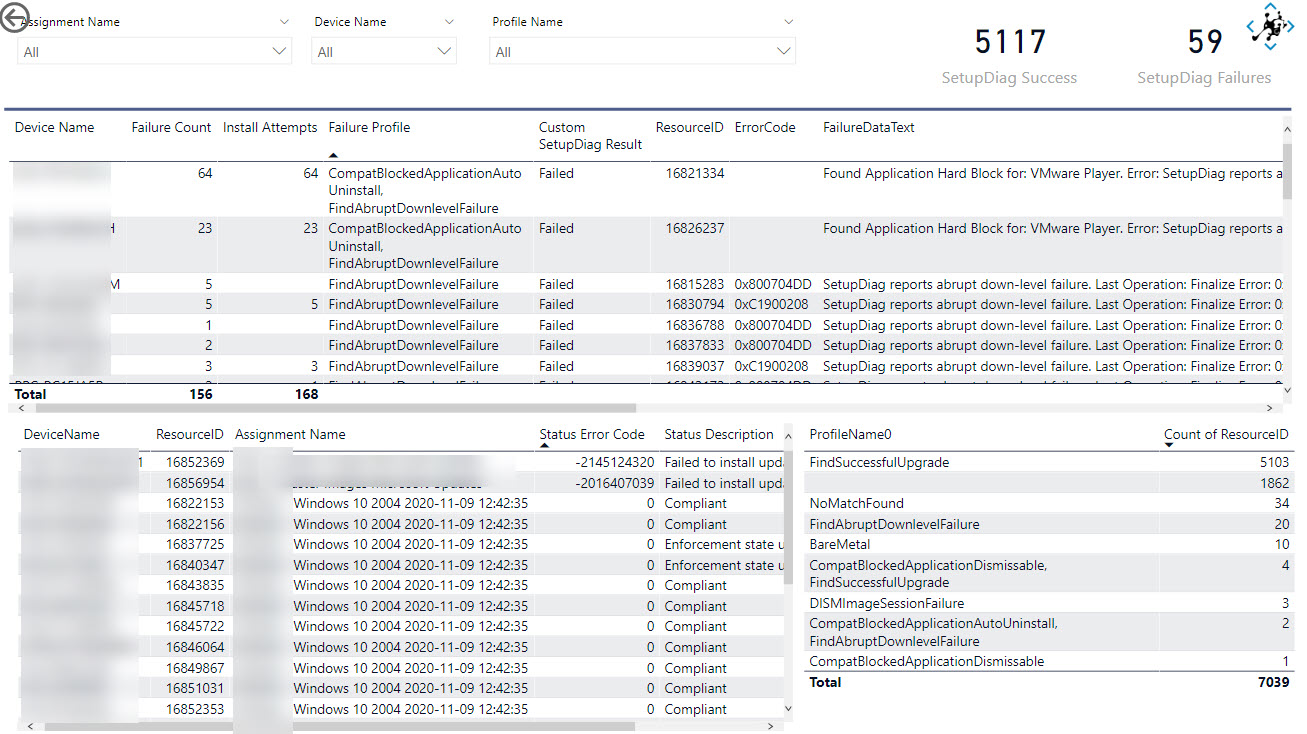
Additional notes
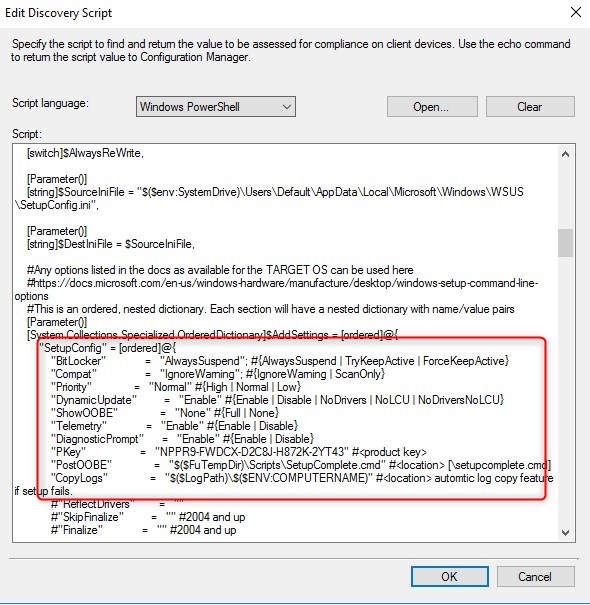
The SetupConfig.ini is key for Windows 10 Feature Update. it drives multiple behaviors. Adam wrote a great post about this. It can be edited under the Configuration item, Feature Update – SetupConfig.ini.
We hope this Windows 10 SetupDiag SCCM Inventory post was helpful ! Let us know in the comment section if you’re using it.


JJ
12.17.2020 AT 07:57 AMJonathan Lefebvre
12.18.2020 AT 08:17 AMJJ
12.19.2020 AT 11:12 AMJonathan Lefebvre
12.21.2020 AT 08:33 AMJJ
12.16.2020 AT 04:18 AMJonathan Lefebvre
12.16.2020 AT 10:58 AM