
Today, we are continuing our posts about SCCM 1706 new features. One of them is the ability to enable SCCM Azure Active Directory User Discovery. This discovery method enables organizations to import Azure Active Directory user information. With the growing popularity of Azure AD, this discovery method will soon be circumvented.
Azure AD Requirements
Before configuring the new discovery method, you’ll need to have :
- A valid Azure Tenant
- Access to your Azure admin portal
SCCM 1706 Configuration
The first step is to configure the Azure Services in SCCM. This step will automatically create the web app in your Azure tenant, there’s no need to create it manually, SCCM takes care of it.
- Open the SCCM Console, go to Administration / Cloud Services / Azure Services
- Right-Click Azure Services and select Configure Azure Services
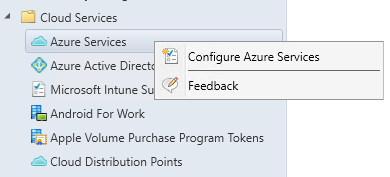
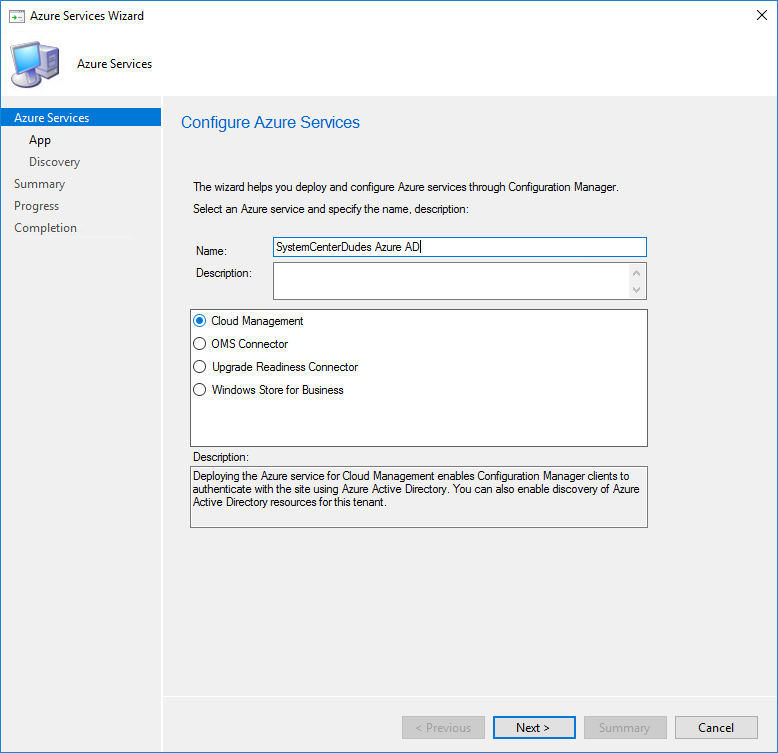
- In the Azure Service wizard, name your Azure Service and select Cloud Management in the bottom pane
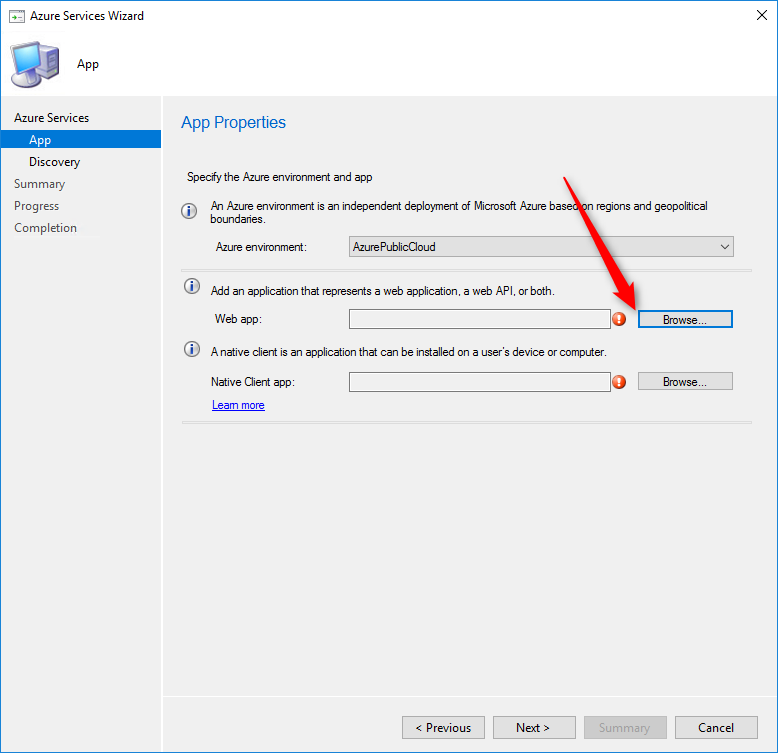
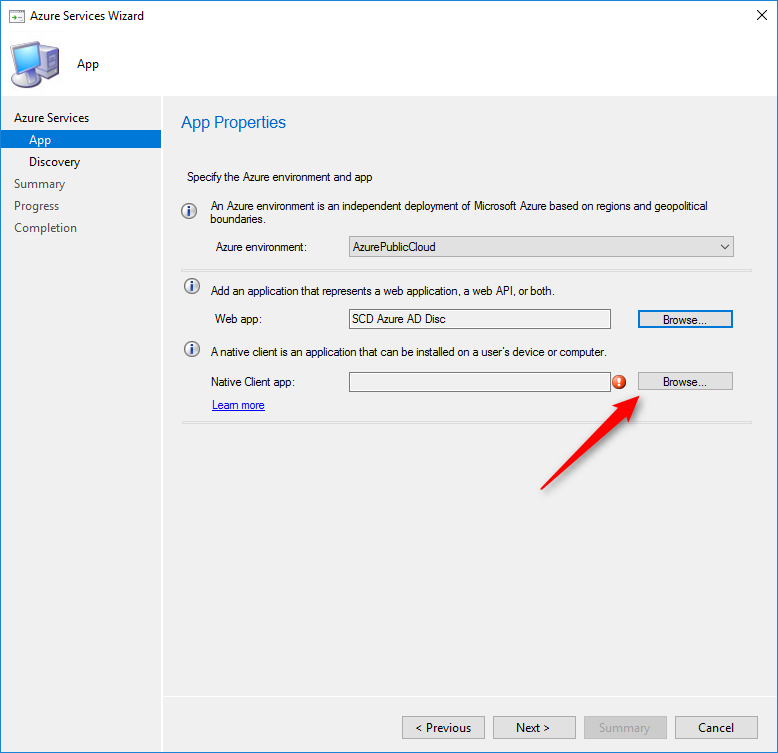
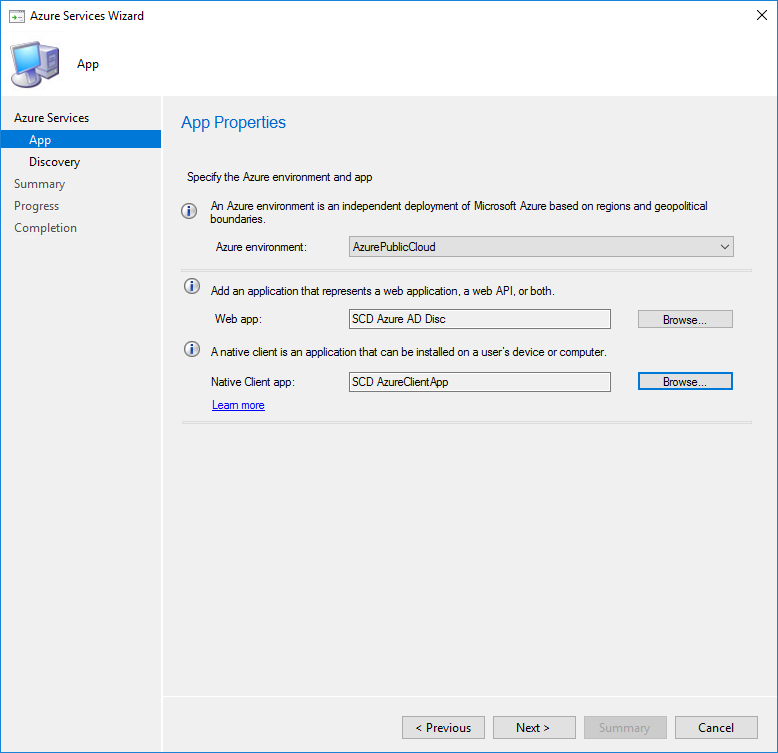
- In the App pane, click Browse to select your web app
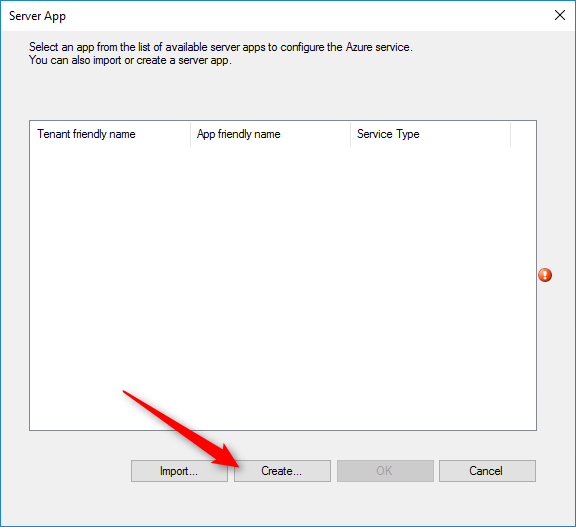
- In the Server App window, click Create to create the web app
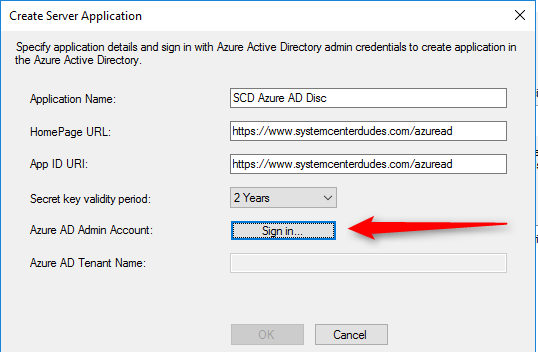
- Application Name: Provide a name for the app
- HomePage URL: Provide the homepage URL for the app. (This URL doesn’t need to resolve)
- App ID URI: Provide the identifier URL for the app (This URL doesn’t need to resolve)
- Secret key validity period: Select 1 Year or 2 Years for the key validity period
- Azure AD Admin Account: Sign in with your tenant administrator account
- Azure AD Tenant Name: Will be automatically populated after signing in
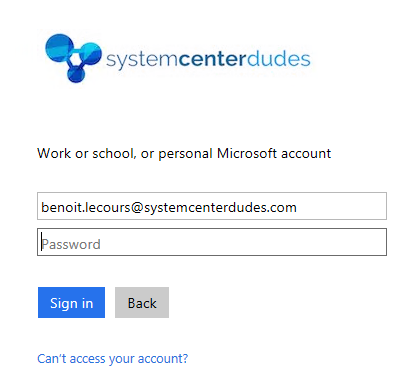
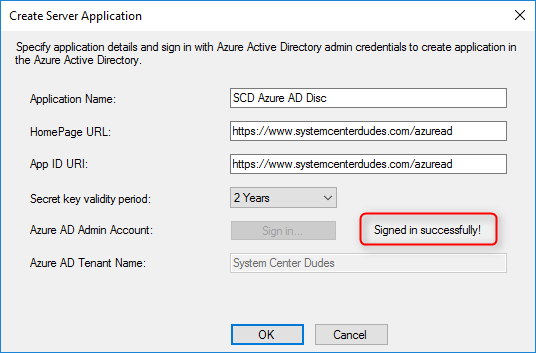
- Once the login is successful, click Ok. The app will be automatically created in your tenant. If the app already exists, it will prompt saying that it already exists and the existing one will be reused.
- Back in the App pane, click Browse to select a Native Client App
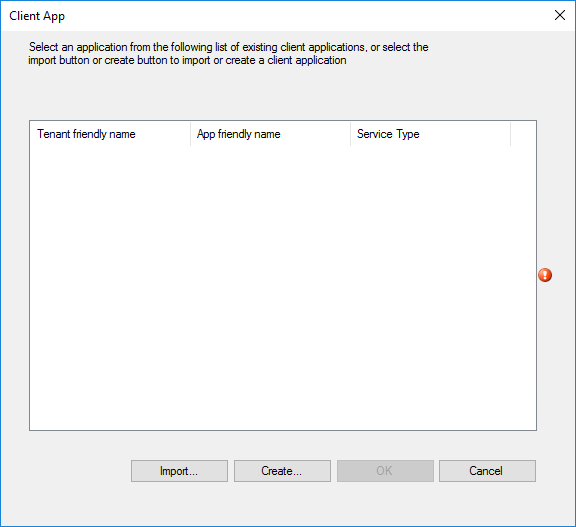
- In the Client App window, click Create
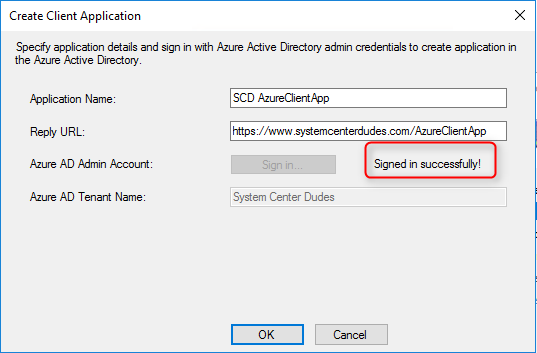
- Application Name: Provide a name for the app
- Reply URL: Provide the reply URL for the app. (This URL doesn’t need to resolve)
- Azure AD Admin Account: Sign in with your tenant administrator account
- Azure AD Tenant Name: Will be automatically populated after signing in
- Once the login is successful, click Ok. The app will be automatically created in your tenant. If the app already exists, it will prompt saying that it already exists and the existing one will be reused.
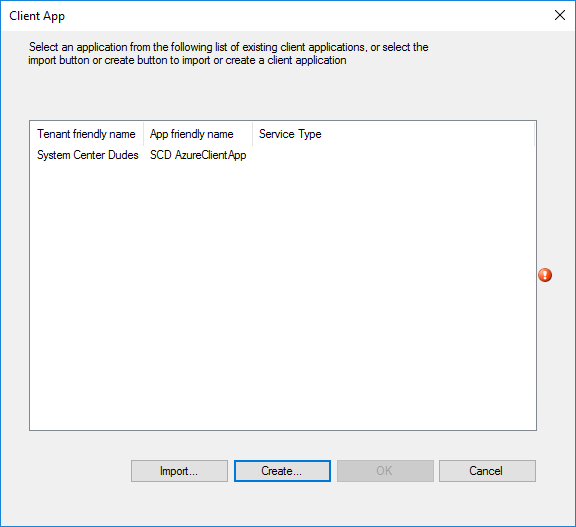
- Select your newly created App and click Ok
- Back in the App pane, click Next
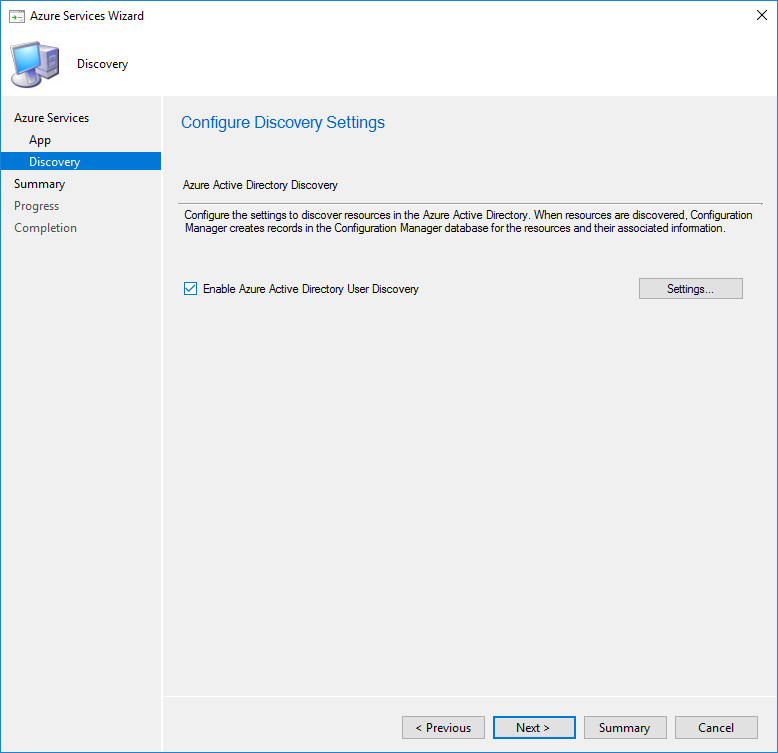
- Check the Enable Azure Active Directory User Discovery check box, click Settings
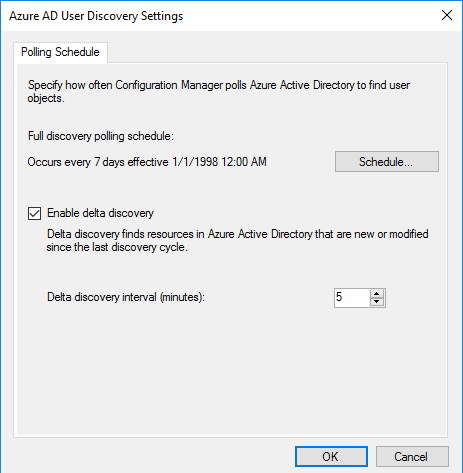
- Select your preferred Full Discovery Schedule and decide to enable or not the Delta discovery, click Ok
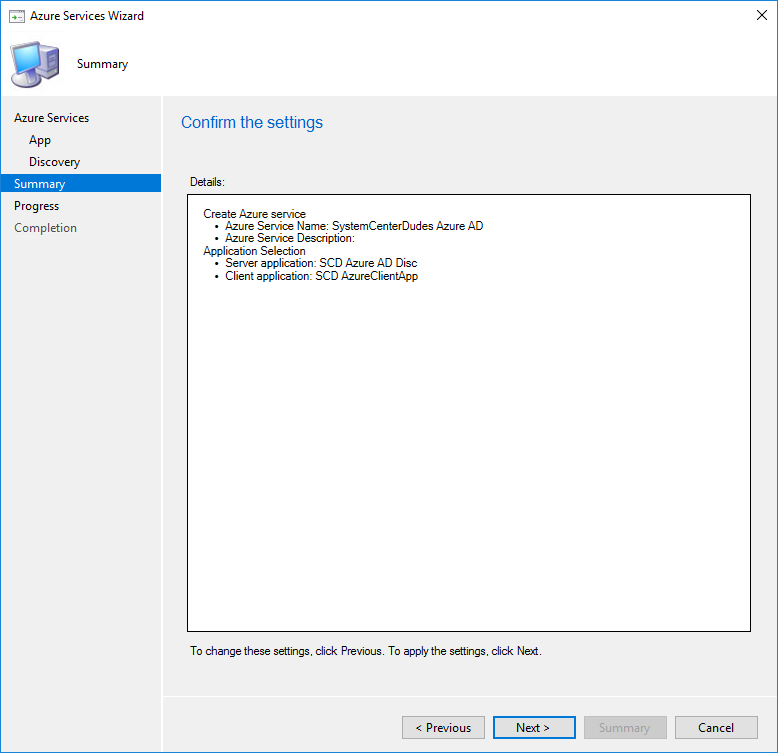
- Review your settings and complete the wizard
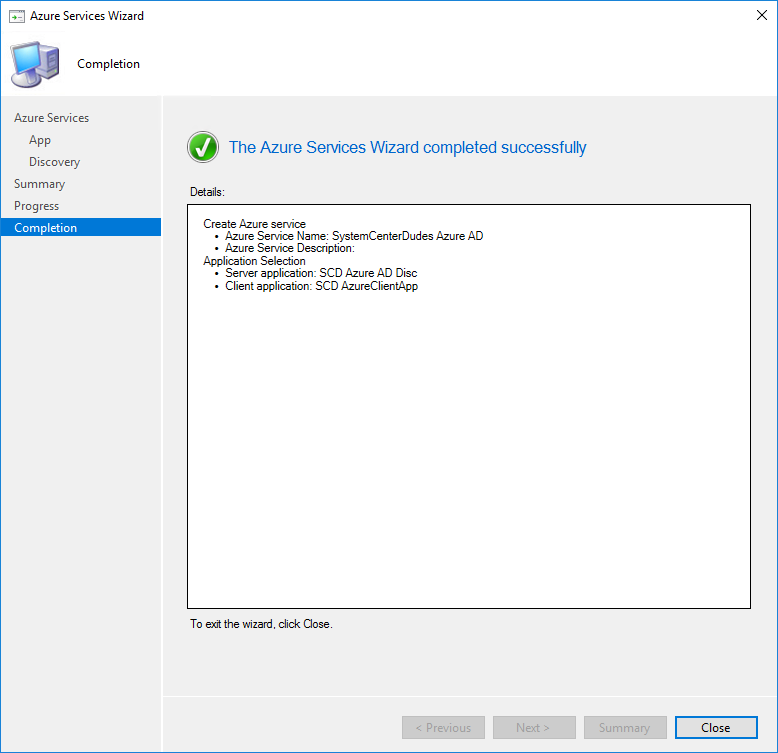
- Once created, you can run a Full Discovery now but further configuration must be made
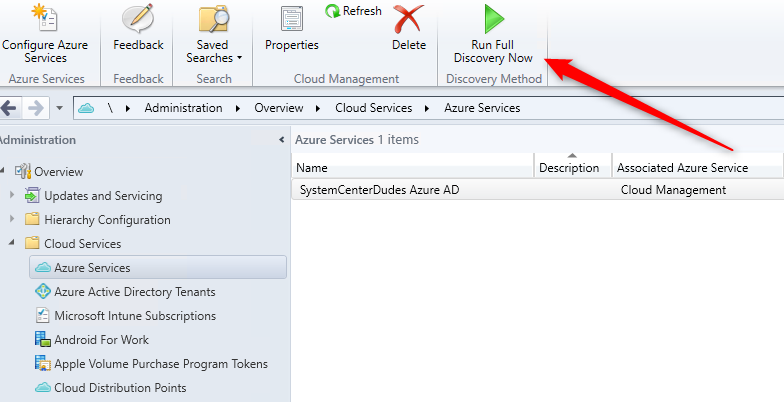
- If ran now, the discovery will fail. You can view status in the SMS_AZUREAD_DISCOVERY_AGENT.log file.

Azure Configuration
We now need to grant permissions on both the client app and server app in Azure.
- Log in your Azure Admin portal
- Select App Registration
- Our 2 app is displayed :
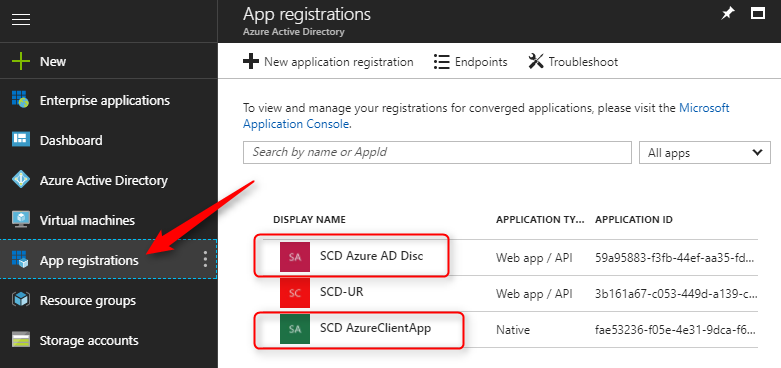
- Select one of the app, click All Settings, select Required Permissions

- On the top, select Grant permissions

- Click Yes
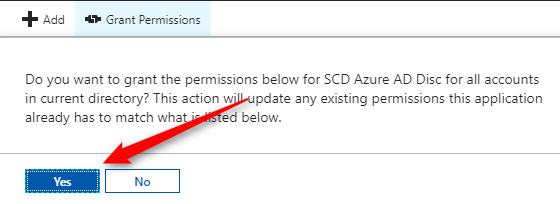
- Wait for the confirmation that the permission has been granted. Once completed, redo the step for your other app and close the Azure portal.

SCCM Azure Active Directory Validation
Once the app permission has been granted the SMS_AZUREAD_DISCOVERY_AGENT.log will start to show successful discovery
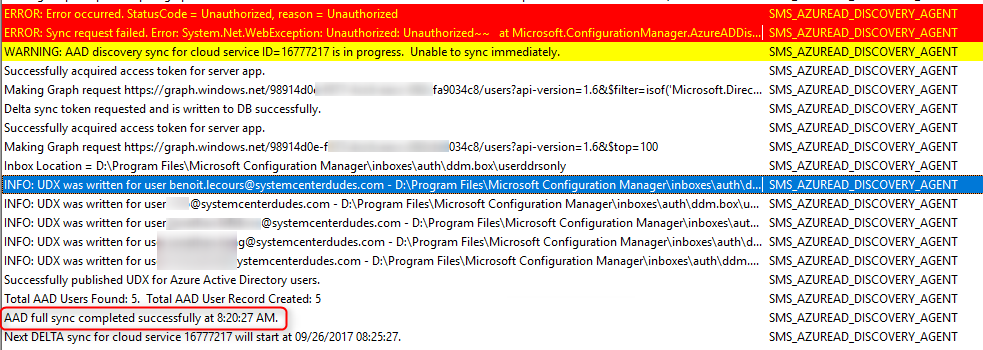
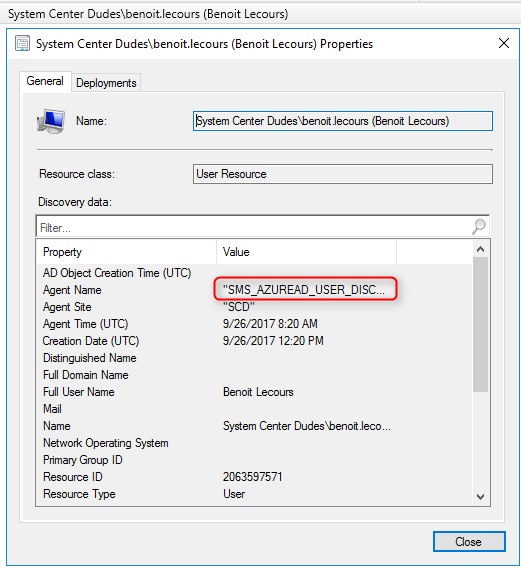
You can confirm that an account has been discovered by Azure Discovery by looking at its properties :


Dee
02.04.2020 AT 06:18 AMJan
10.23.2019 AT 03:54 AMPhil
03.12.2018 AT 11:18 AMTyler
04.09.2018 AT 01:15 PM