
Consulting Services Need help with your SCCM infrastructure ? Consult our fixed price consulting plans to see our rates or contact us for a custom quote. |
Update 2018-04-05 : See our new guide that covers this topic and gives all up-to-date scenario
With the latest version of SCCM 1511, many admins will be tempted to move to latest operating system and SQL versions. Considering Windows Server 2008 R2 and SQL 2008 R2 are already on extended support and the way SCCM 1511 is designed for future upgrades, it can be good time to do a SCCM 1511 migration with the latest OS and SQL.
As of now, all system roles of SCCM 1511 are supported on Windows Server 2008 R2, but if you are planning to use Windows 10 Servicing, you must use WSUS 4.0 from Windows Server 2012 and up.
If you’re planning this scenario, you have 2 choices :
- Install a new server with SQL and use backup/restore function before upgrading to 1511. In that case, we recommend doing it in the following steps :
- Backup/restore on the new OS (The new machine must have the same host name)
- Upgrade to 1511 on the new machine
- In-place SQL Upgrade (if necessary)
- Install a new server and perform a side-by-side migration between the 2 SCCM hierarchy
This post will cover the second option, describing SCCM 1511 Migration pre-requisites and tasks. The advantage of this method over the other one (backup/restore) is that it provide minimum down-time. You can do your migration at your desired pace and switch your clients when you’re ready. The disadvantage is that it requires a bit more operational tasks and planning.
If you’re looking to do an in-place upgrade, please see our SCCM 1511 upgrade guide instead.
SCCM 1511 Migration Pre-requisites
- Install your new server or virtual machine with desired SQL version as you would do for a new SCCM installation. You can refer to our Part 1 and Part 2 of our SCCM 1511 complete installation guide for this
- Perform a new SCCM 1511 Installation on this new server with a new site code
- SCCM must be at least 2007 SP2 and above in order to create a migration task
- Software Update Point must be configured on destination hierarchy (1511) prior to migrating any Software Update configurations
Setup Source Hierarchy
To transfer data between your SCCM 1511 and SCCM 2012 sites, you must first connect them together.
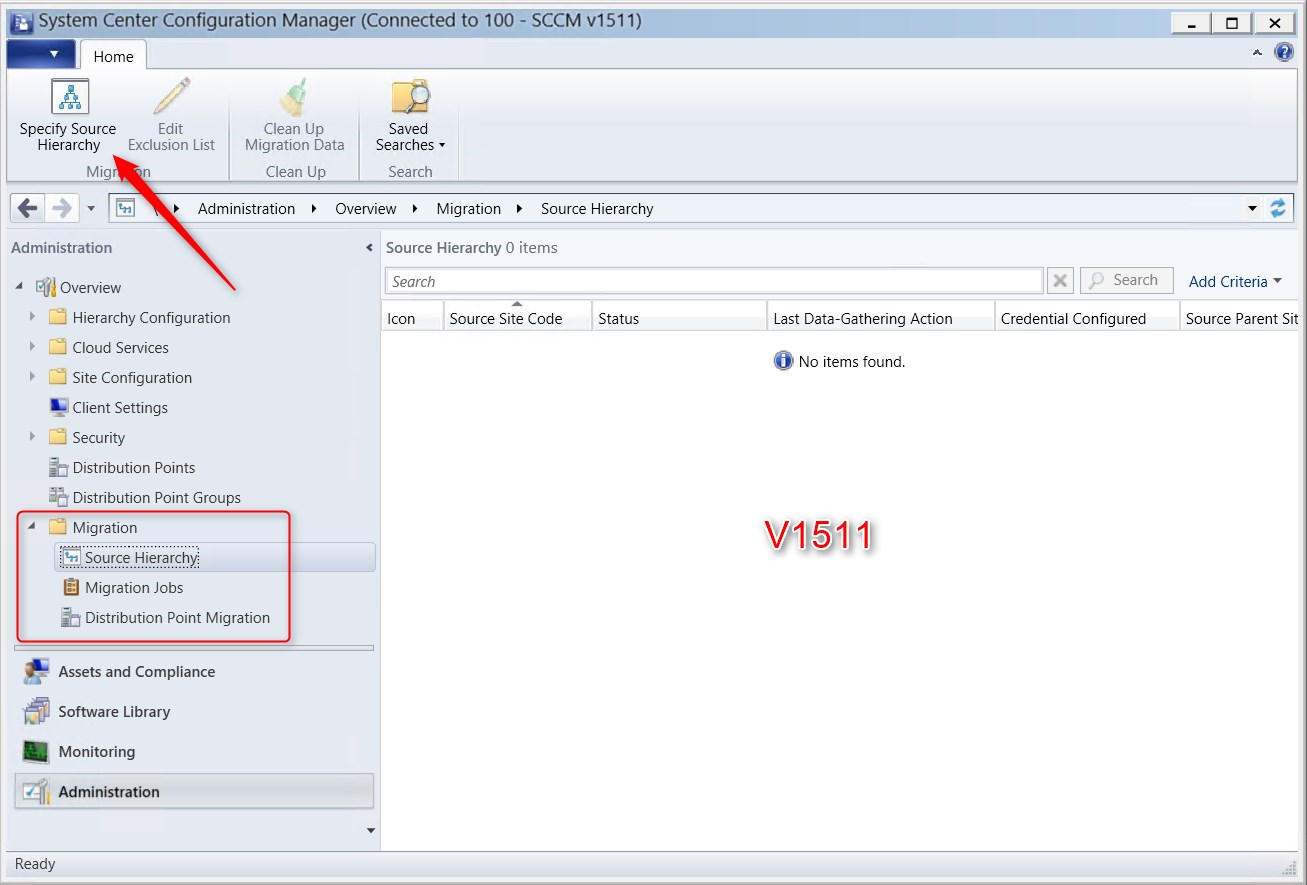
- On your SCCM 1511, go to Administration/ Migration/ Source Hierarchy
- Select Specify Source Hierarchy on the top ribbon
- Enter the top-level site server FDQN of the source environment (SCCM 2012 server)
- Select the account to use to connect to the top-level site server
- We use and account that is SCCM Full Admin on both side. As specified in the wizard, no such rights are required
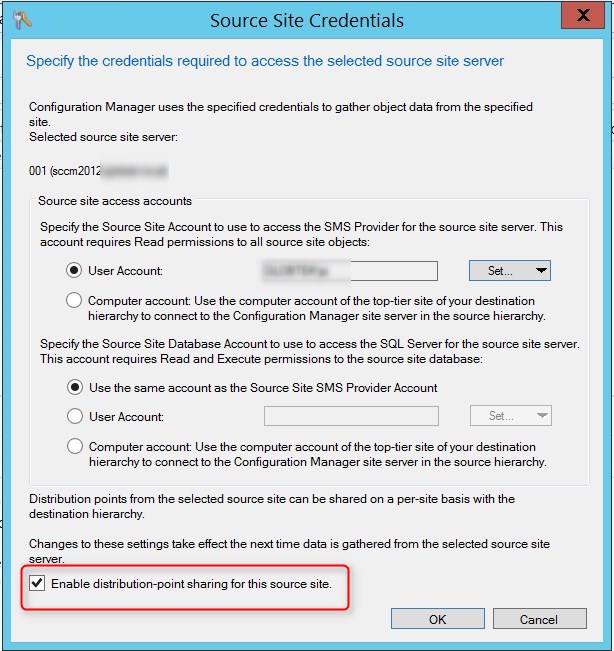
- Depending on your environment, Enabling Distribution point sharing might be useful
- This should be pretty important in large, distributed environment
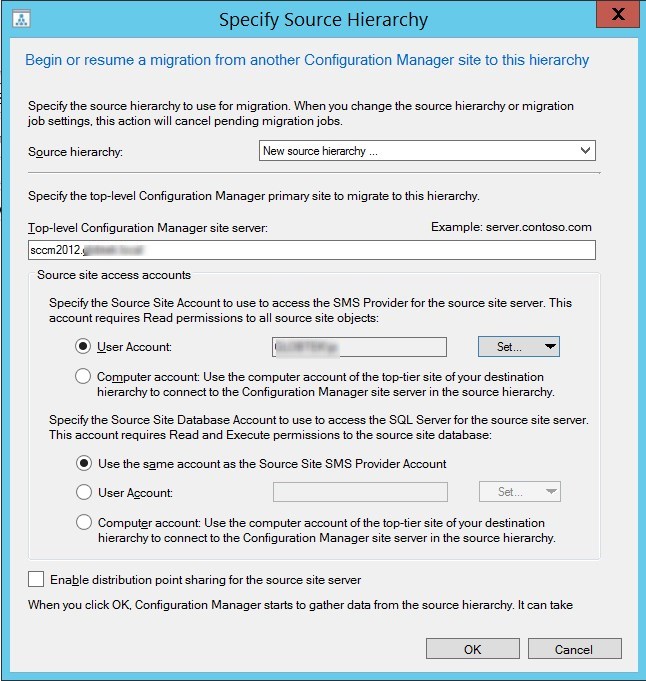
- Click OK, Data Gathering process starts
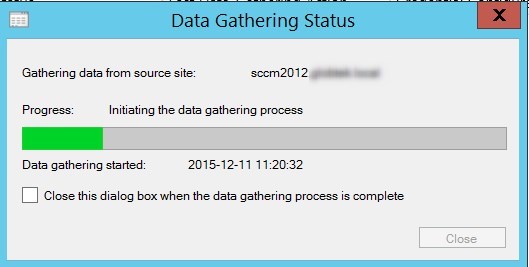
Your 2 sites are now connected!
For more details about source hierarchy, read the following Technet article.
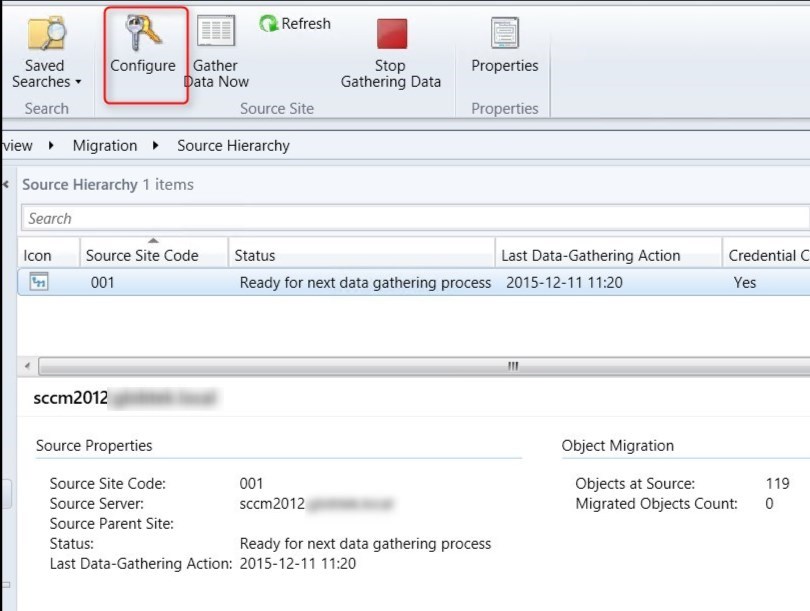
Data Gathering
The Data Gathering process will verify items that can be migrated from the source.
No objects are migrated yet ! Data gathering is configured to 4 hours by default.
It can be modified in the properties of the source hierarchy.
Migration jobs
To migrate objects from our SCCM 2012 site, we need to create a migration job.
When migrating content from a 2012 hierarchy, all objects should be compatible.
Before migrating, we suggest that you read these details about what objects can or can’t be migrated.
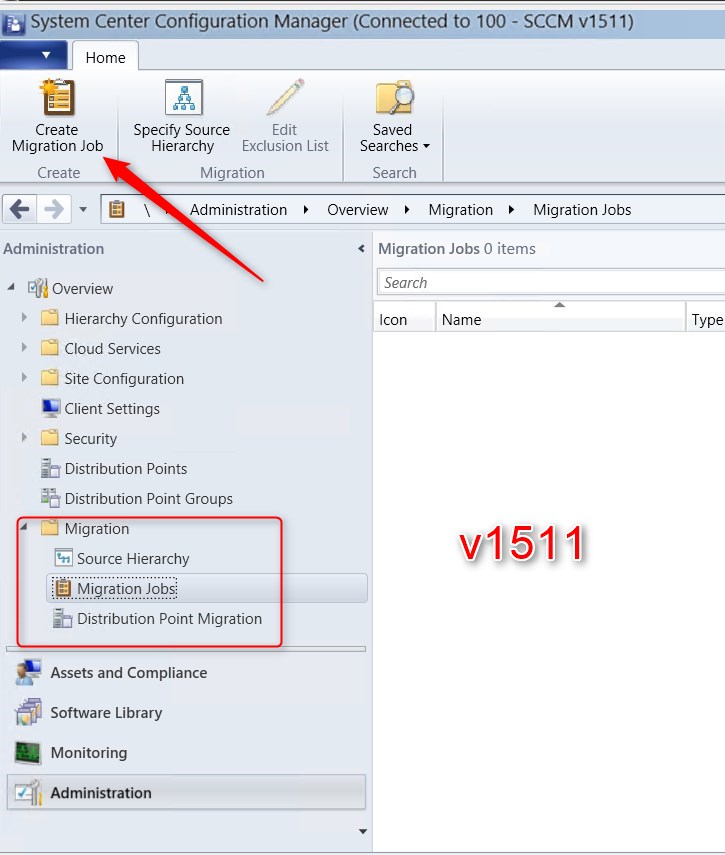
- In SCCM 1511, go to Administration/ Migration/ Migration Jobs
- Select Create Migration Job
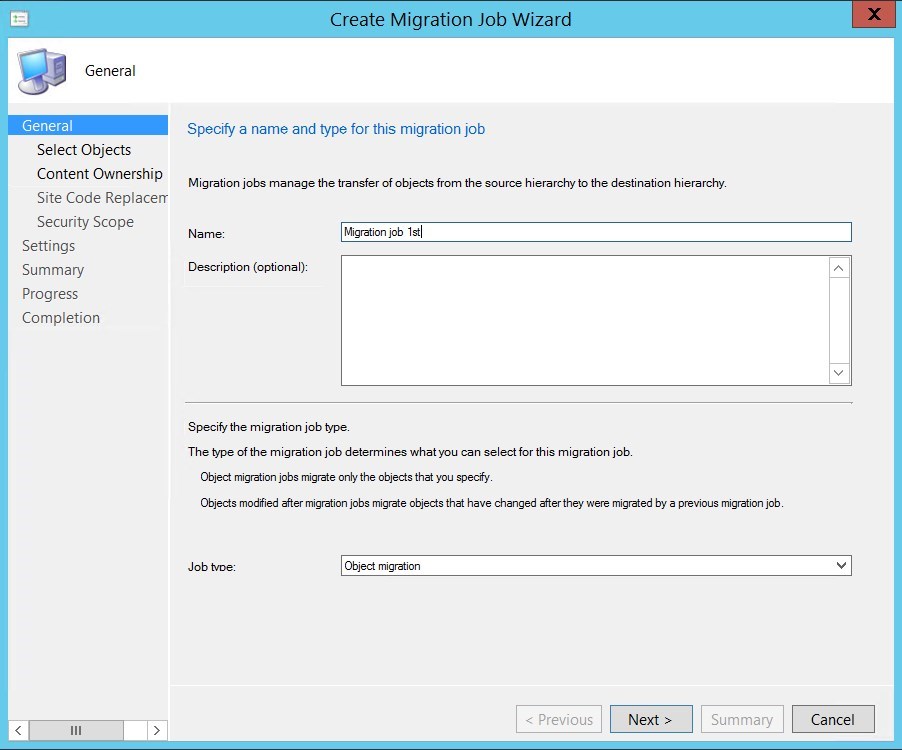
- On the General tab, provide a name and select Object Migration in the Job Type dropbox, click Next
- Object modified after migration can be useful to monitor object modified after the job as ran
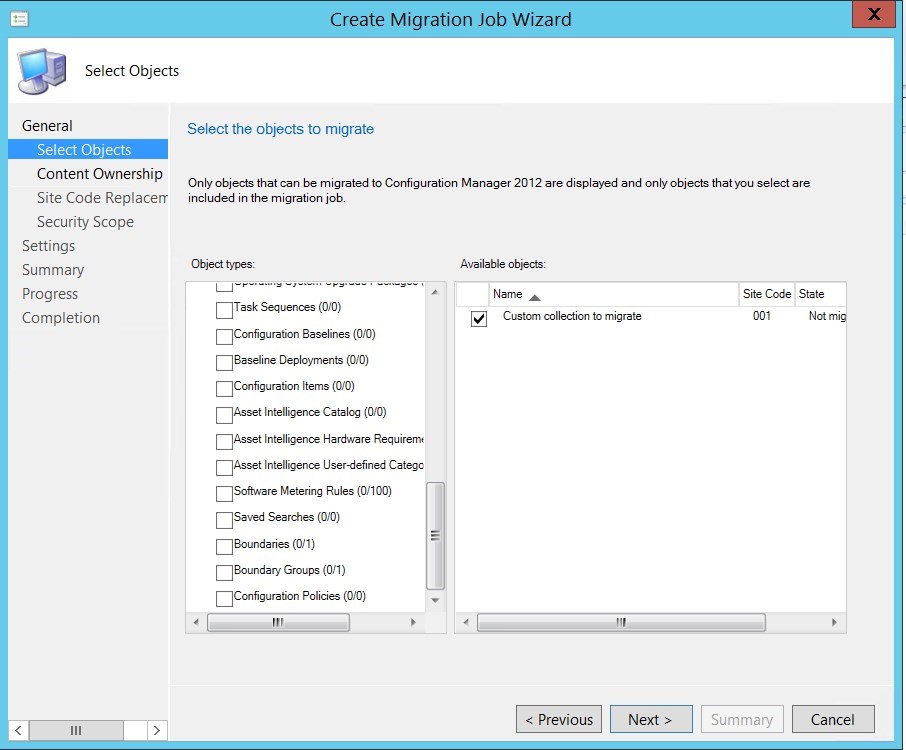
- On the Select Objects tab, select objects that you want to migrate, click Next
- On the Content Ownership tab, all migrated objects will be owned by the new site, click Next
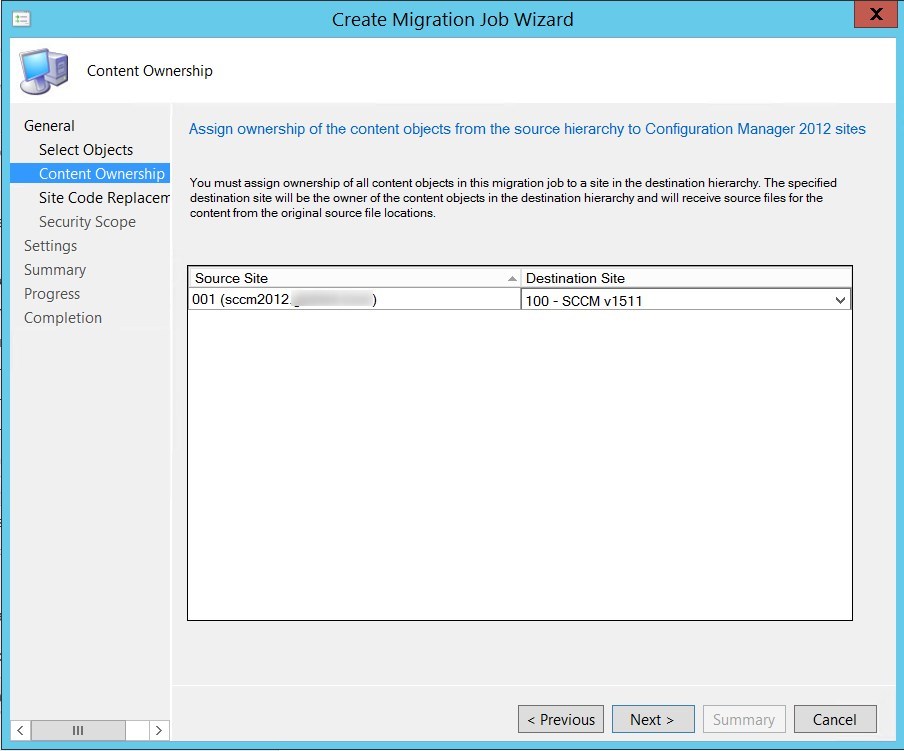
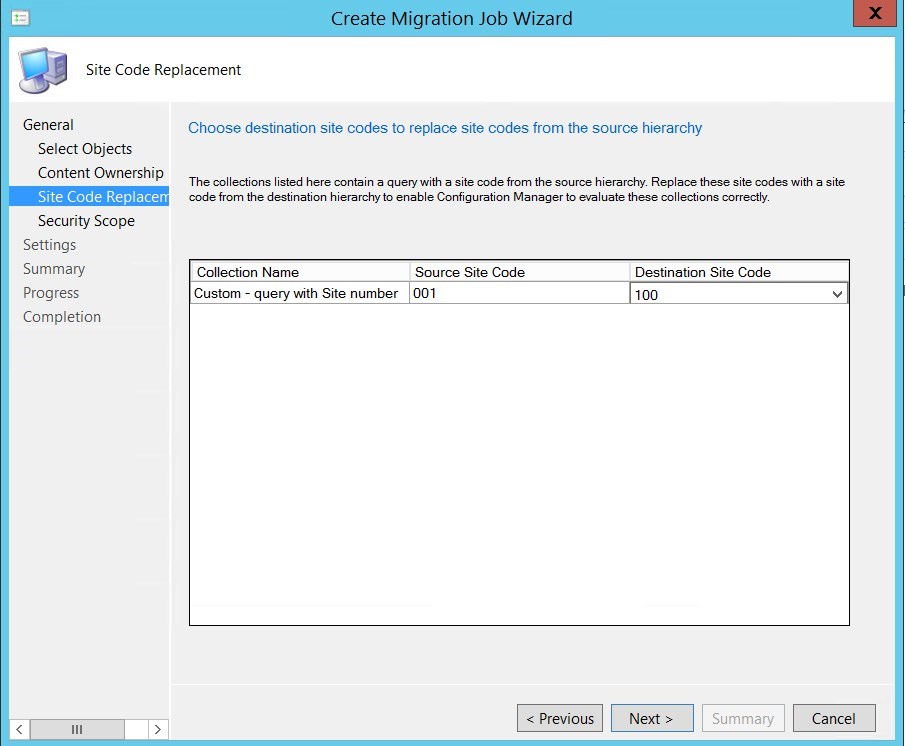
- On the Site Code Replacement tab, replace site code for collections if needed, click Next
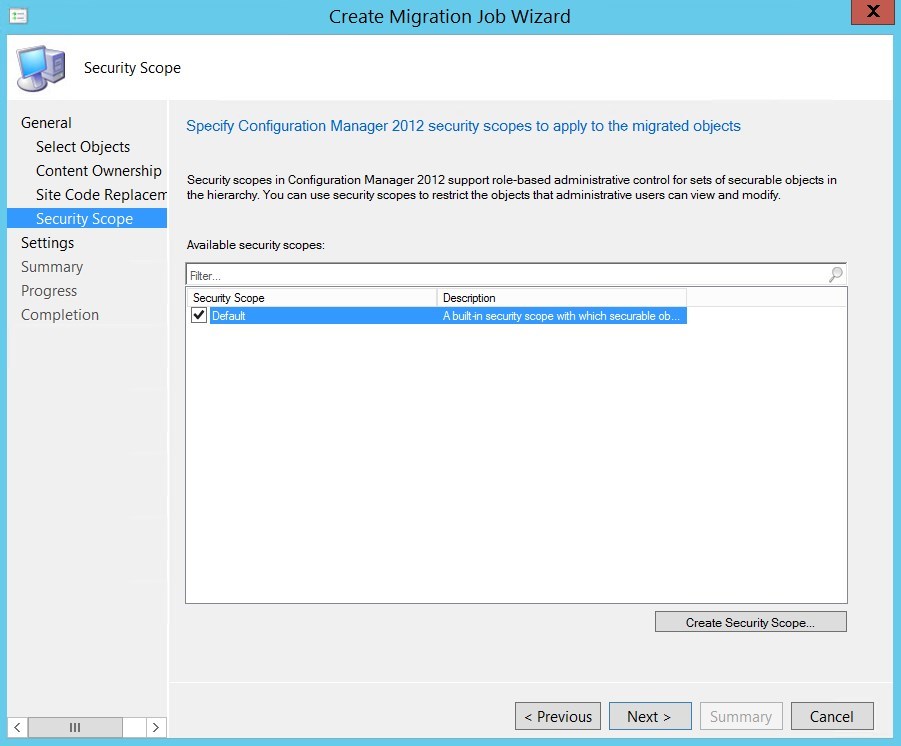
- On the Security Scope tab, specify the security scope to apply to the migrated objects, click Next
- If you used it a lot in SCCM 2012, multiple migration might be a good idea to assign the security scope back
- Assigning security scopes can also be done after the migration
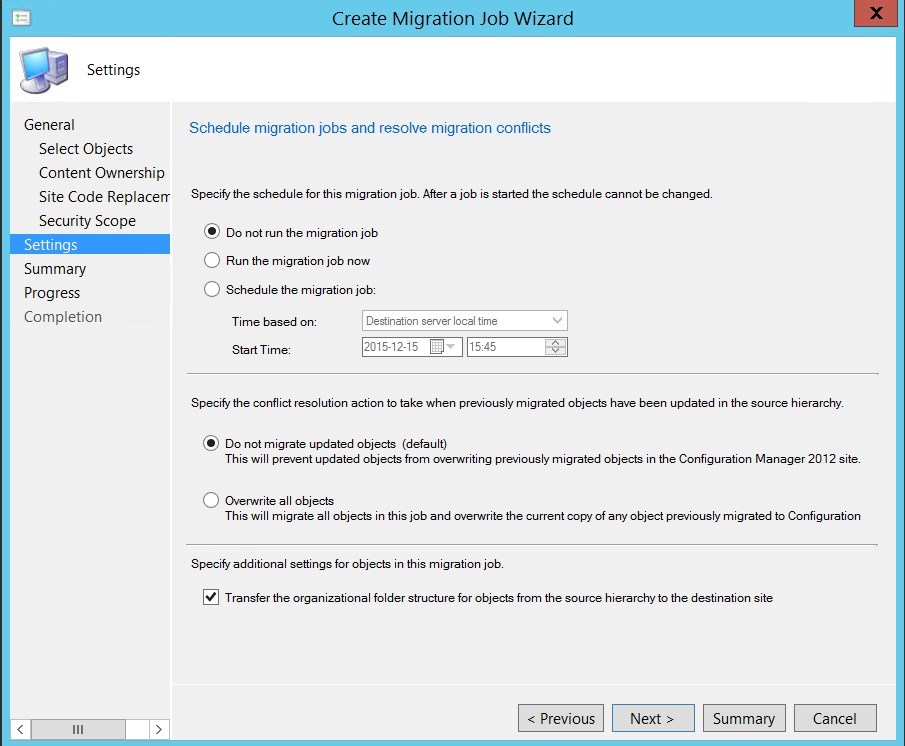
- On the Settings tab, specify the Schedule, Conflict resolution action and Organizational folder structure, click Next
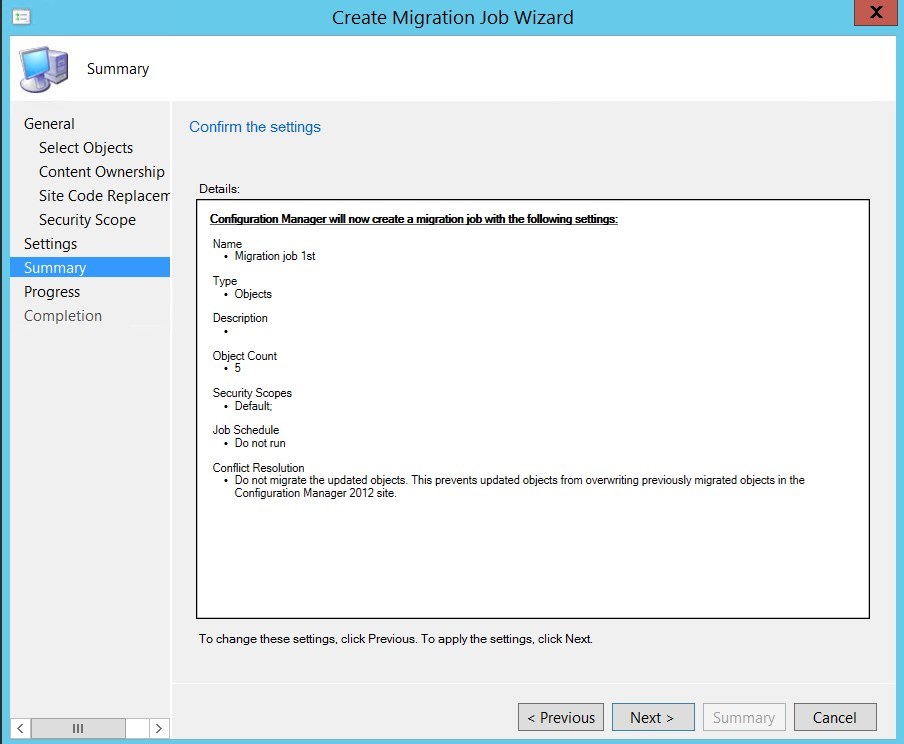
- On the Summary tab, review your option, click Next
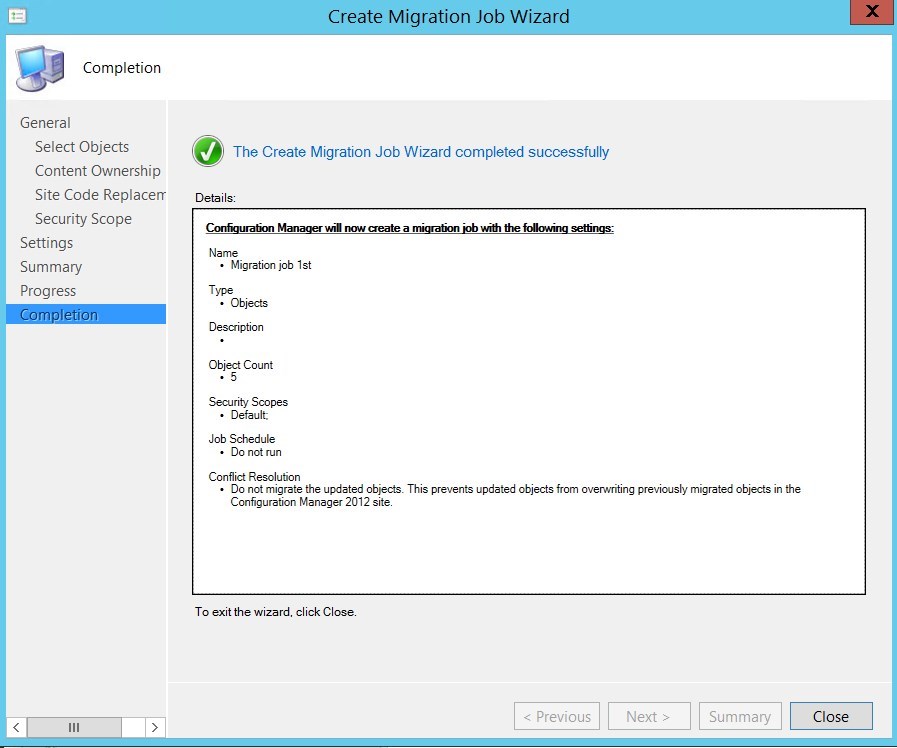
- On the Completion tab, click Close
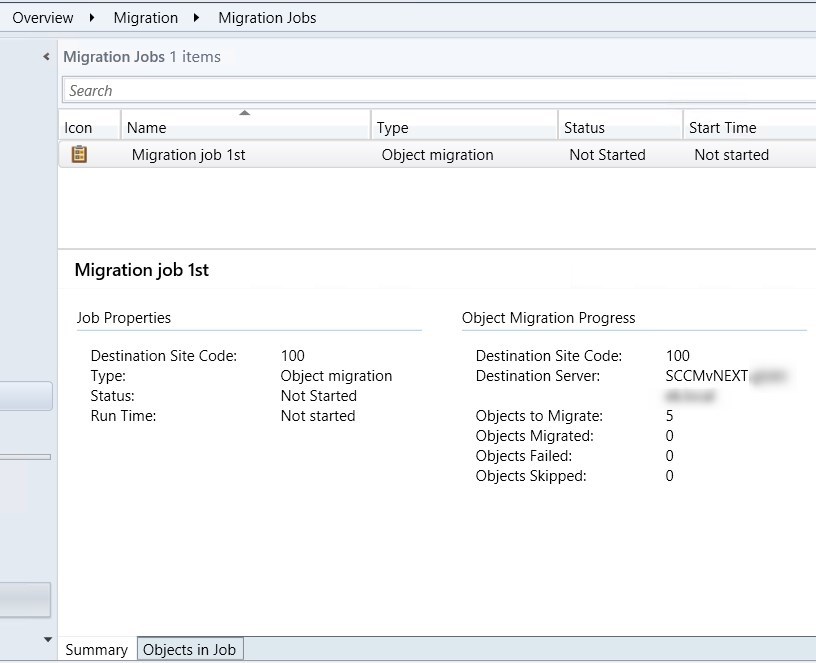
- You can see the migration job status in the console, go to Administration / Migration / Migration Jobs (Details can be found in the Summary tab in the bottom)
- The Objects in the job tab will shows each object included in the job
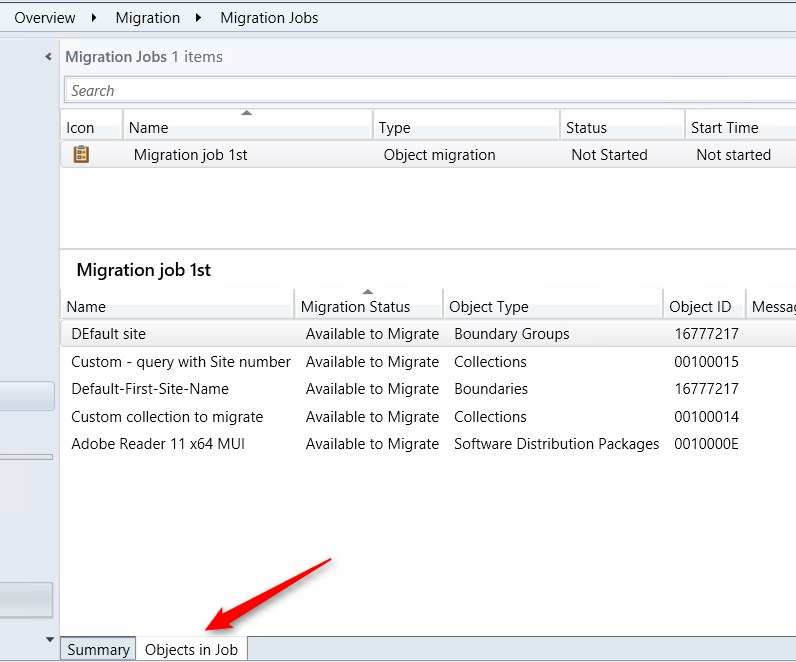
Once you run the job, you will see objects appearing within the new SCCM.
You can run the job at any time by right-clicking the job and selecting Start.
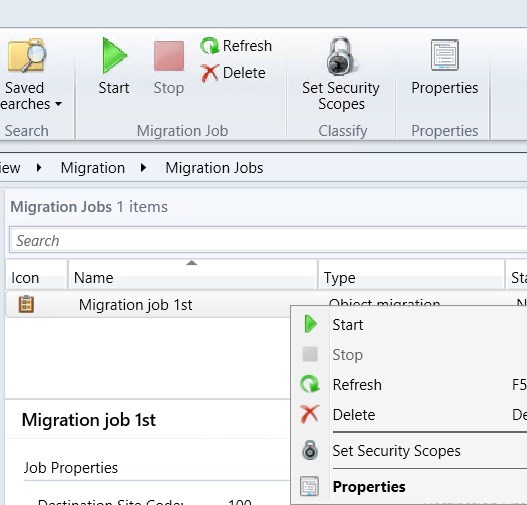
For more details about Migration jobs, read the following Technet Article
Content Distribution
Once objects are migrated, you can now migrate Distribution Points. Activating Enable distribution-point sharing for this source site in the Source Site properties will allows previous version Distribution Point to show up in SCCM 1511 and to be used by client as content source when packages are migrated.
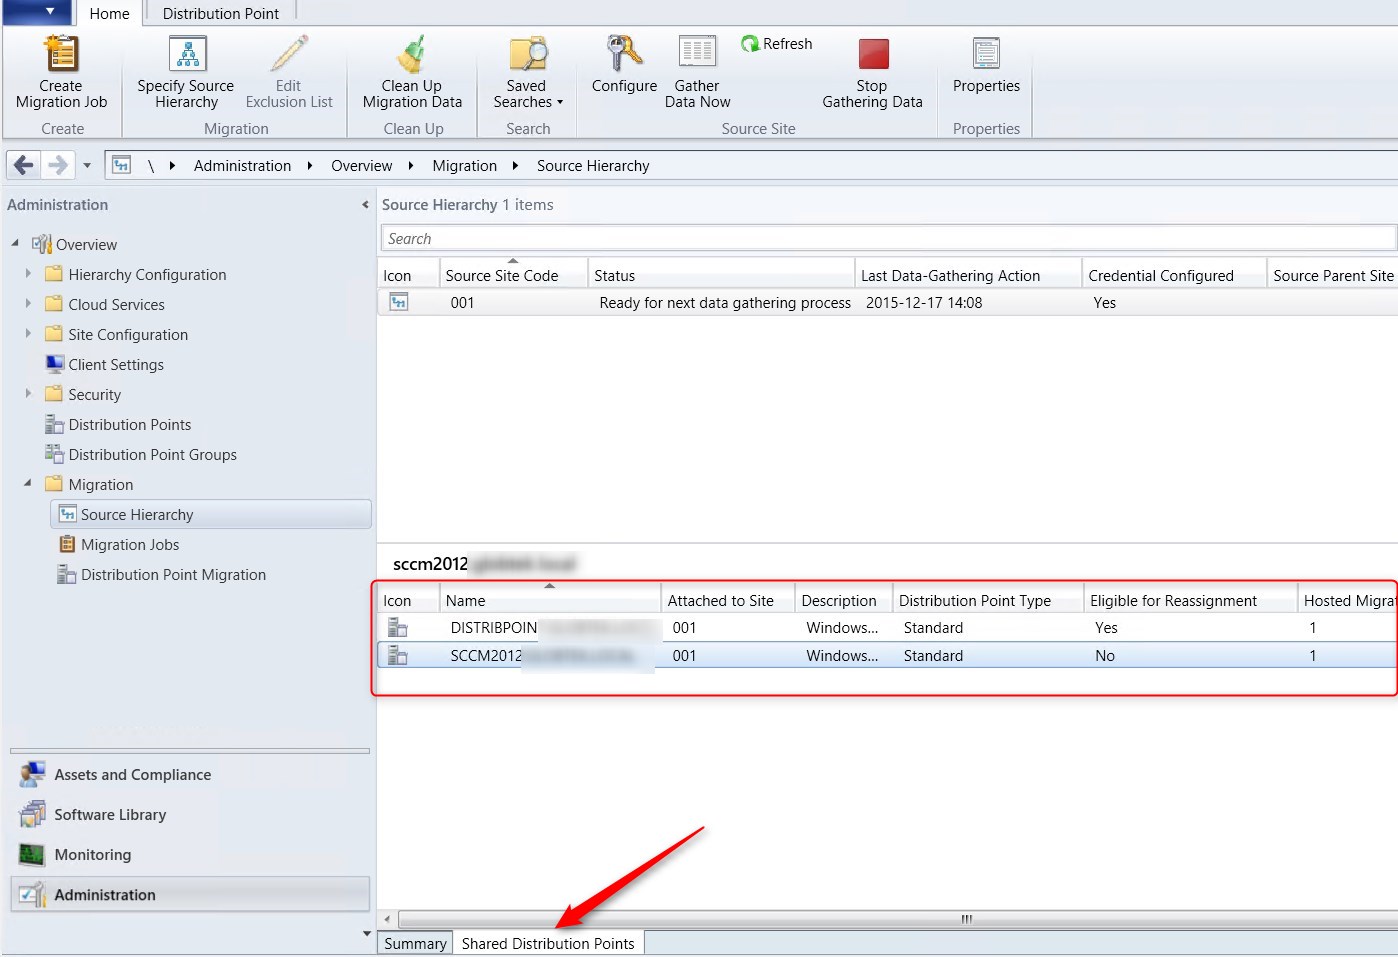
You can see the status of Shared Distribution Point in the console under Administration / Migration / Source Hierarchy and by selecting the Shared Distribution Point tab at the bottom.
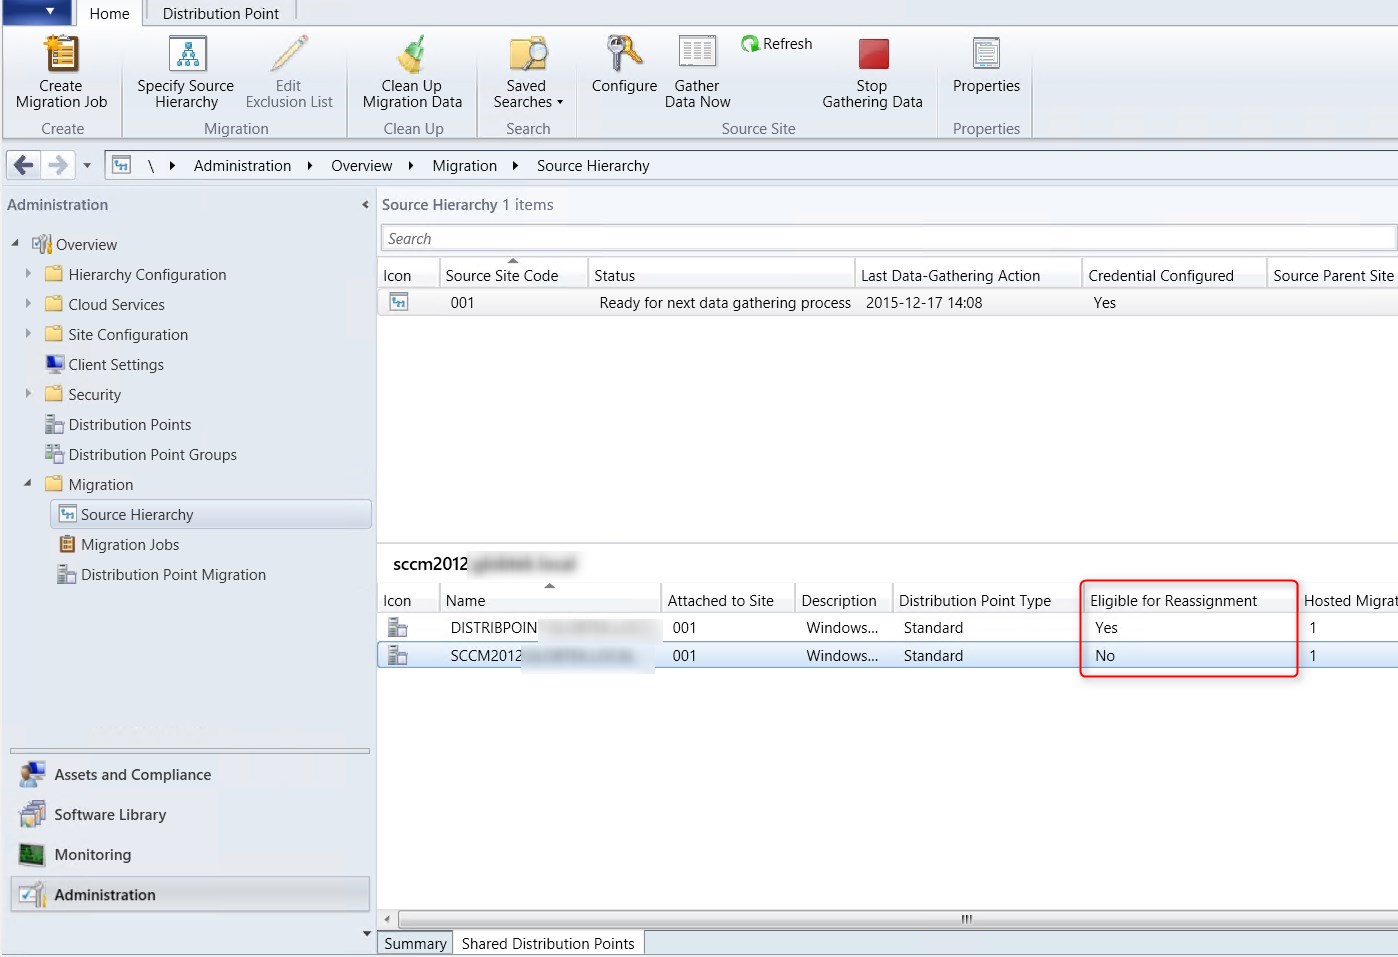
Eligible for Reassignment
When looking at your Shared Distribution Point tab, you’ll notice an Eligible for reassignment column. Yes value means that the Distribution Point is ready to be reassign to your SCCM 1511 hierarchy.
For a System Center 2012 Configuration Manager distribution point to be eligible for reassignment, it must meet the following criteria:
- A shared distribution point must be installed on a computer other than the site server
- A shared distribution point cannot be co-located with any additional site system roles
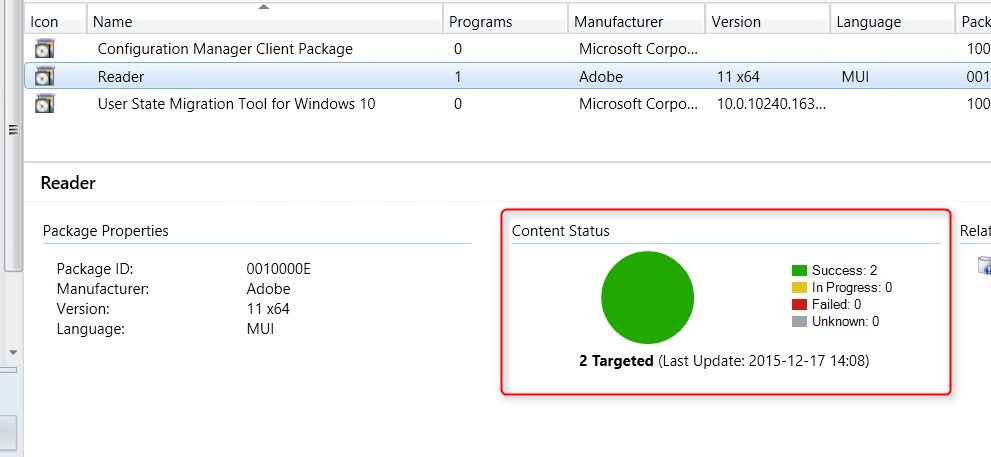
If you look at a package that has been migrated, you will see that they are already distributed.
How to Reassign a Distribution Point
The Reassign wizard is pretty much like a new Distribution Point installation.
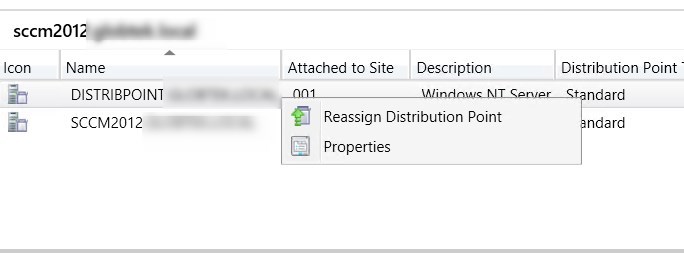
- Under Administration / Migration / Source Hierarchy select the Shared distribution Points tab at the bottom
- Select your Distribution Point, Right click it and select Reassign Distribution point
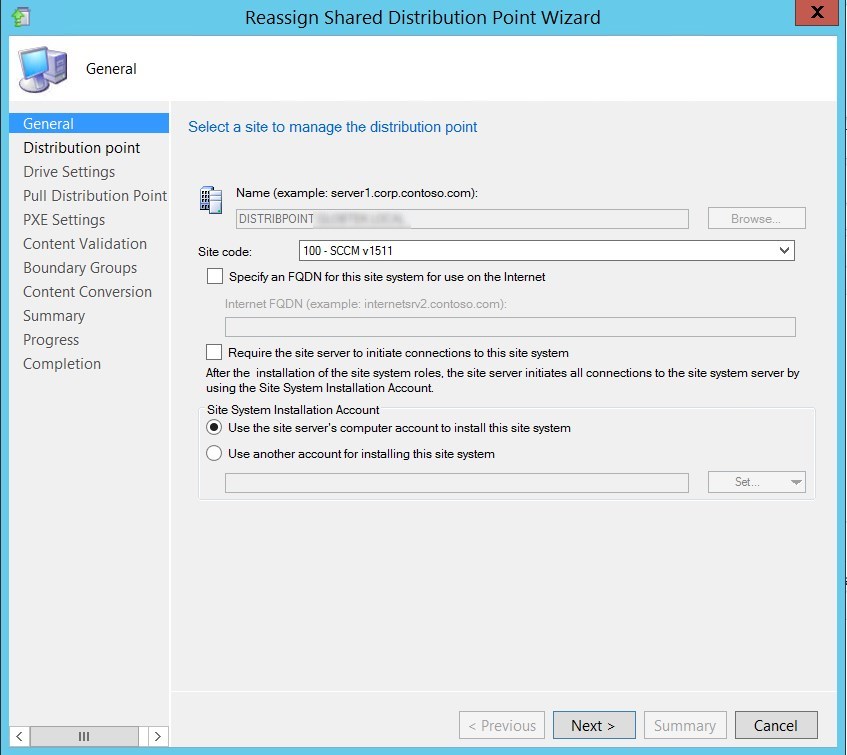
- On the General tab, select the new Site code, click Next
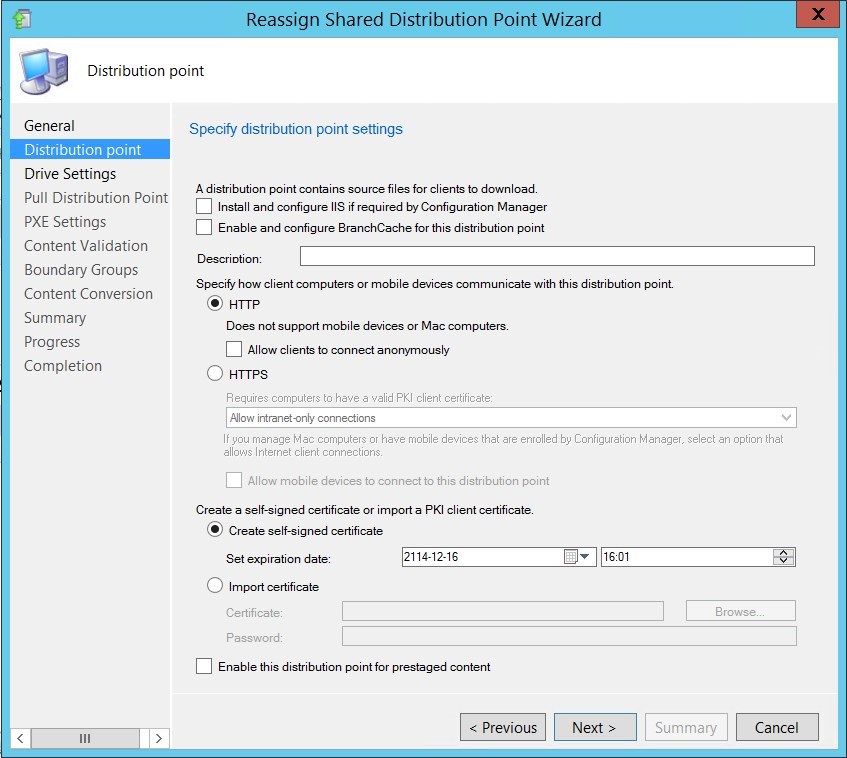
- On the Distribution Point tab, specify the desired options, click Next
For rights needed to reassign a Distribution point here, see the Technet Article
- On the Drive Settings tab, you cannot configured your drives, it will use what is already in place, click Next
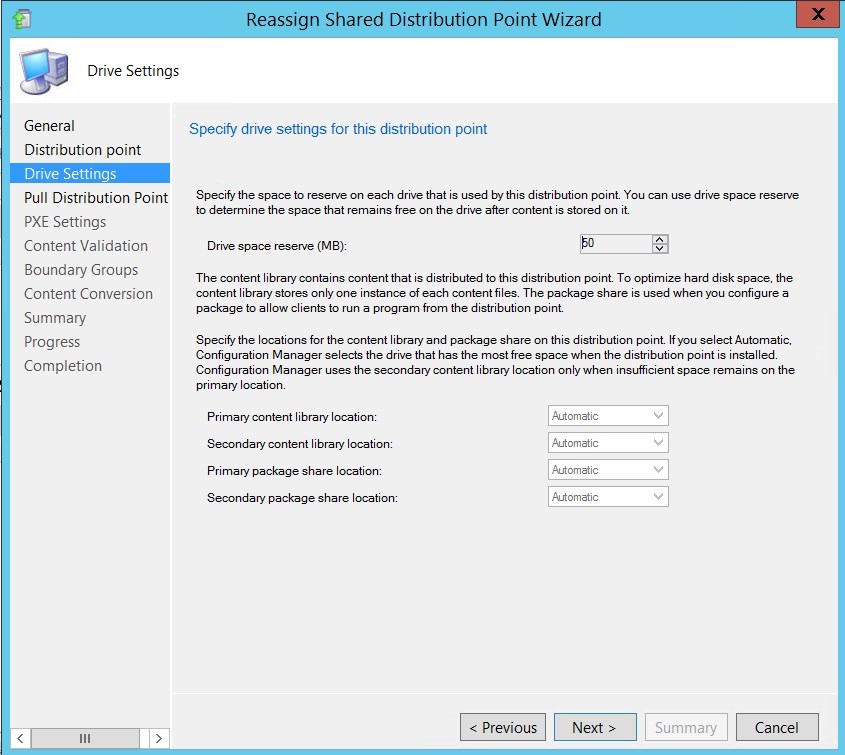
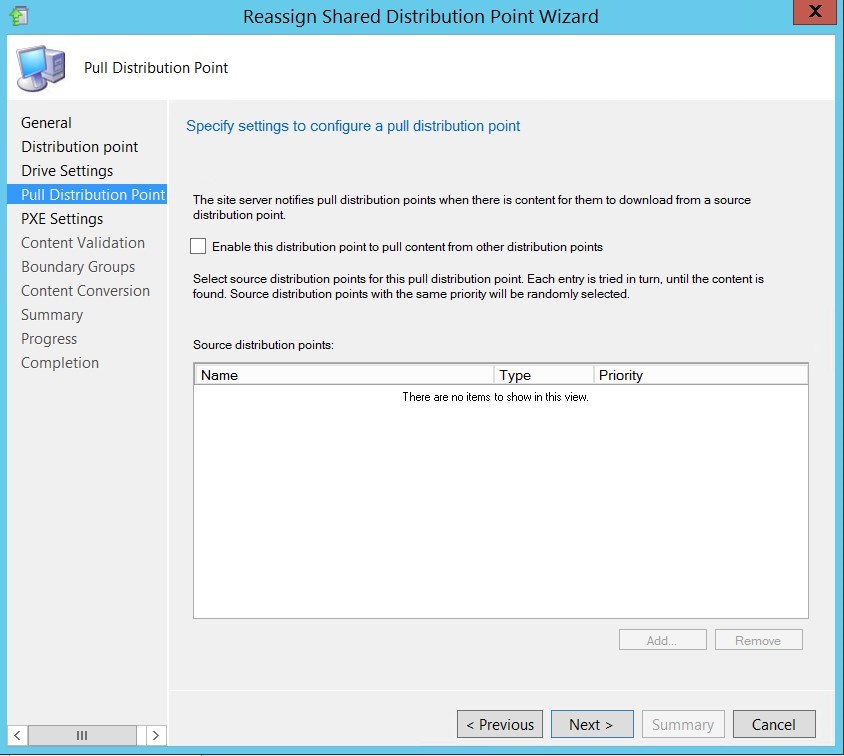
- On the Pull Distribution Point tab, you can be enable you DP to be a Pull DP if needed, click Next
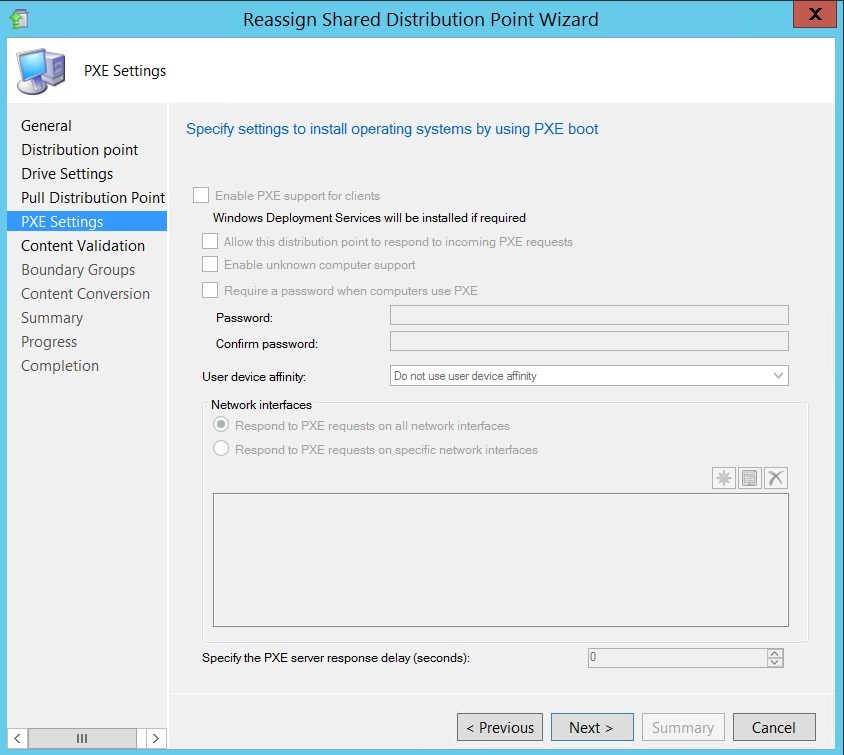
- On the PXE Settings tab, you can’t configured anything, this is normal, click Next
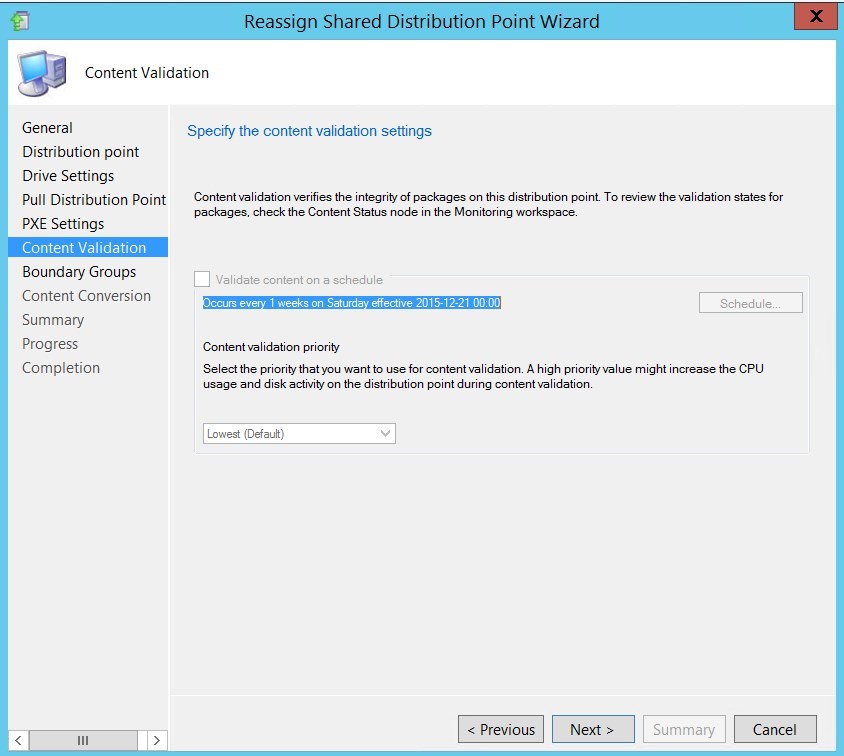
- On the Content validation tab, you can’t configured anything, this is normal, click Next
- On the Boundary Groups tab, assign your Boundary groups to your Distribution Point, click Next
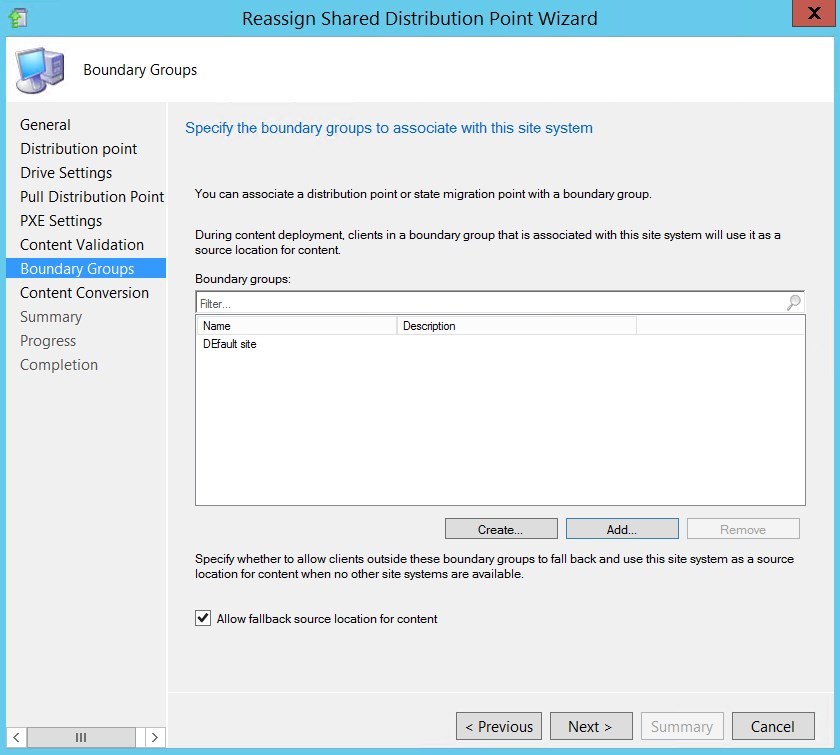
- On the Content Conversion tab, you’ll see a list of packages on the Distribution Point, click Next
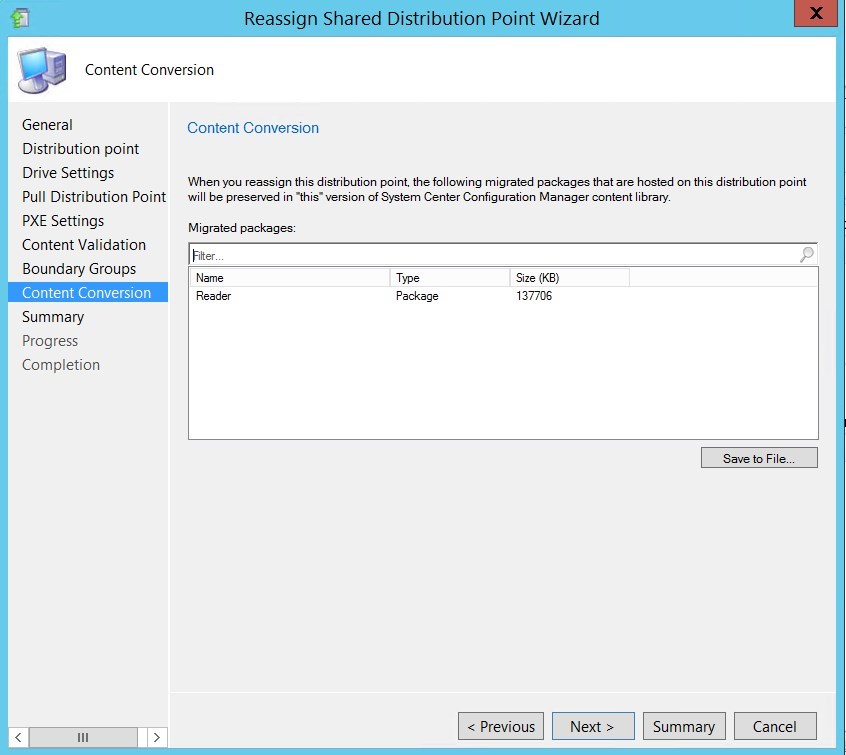
- On the Summary tab, review your options and click Next
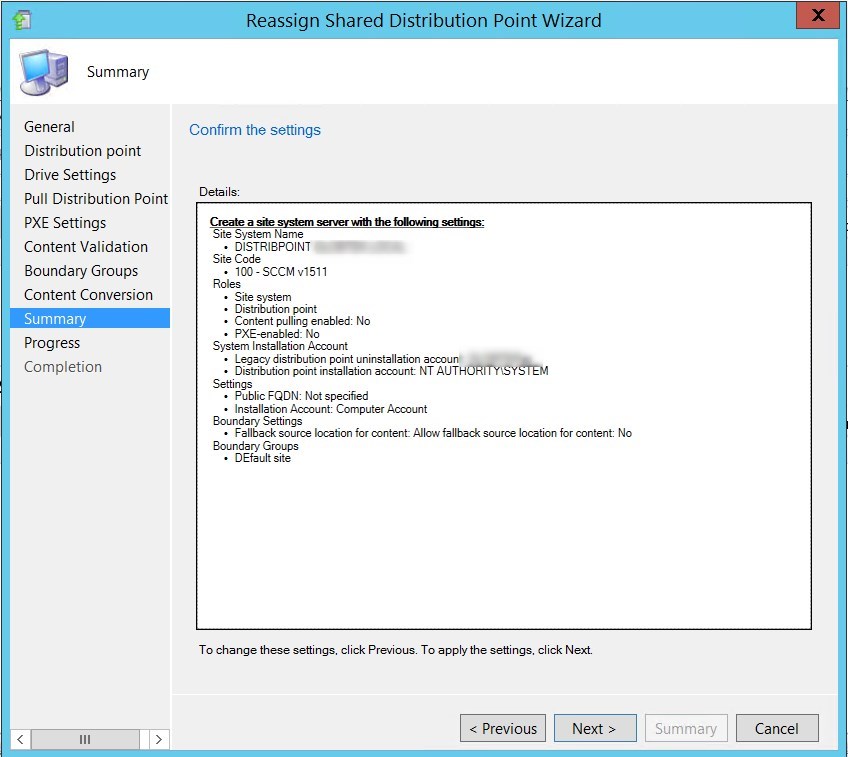
- On the Completion tab, click Close
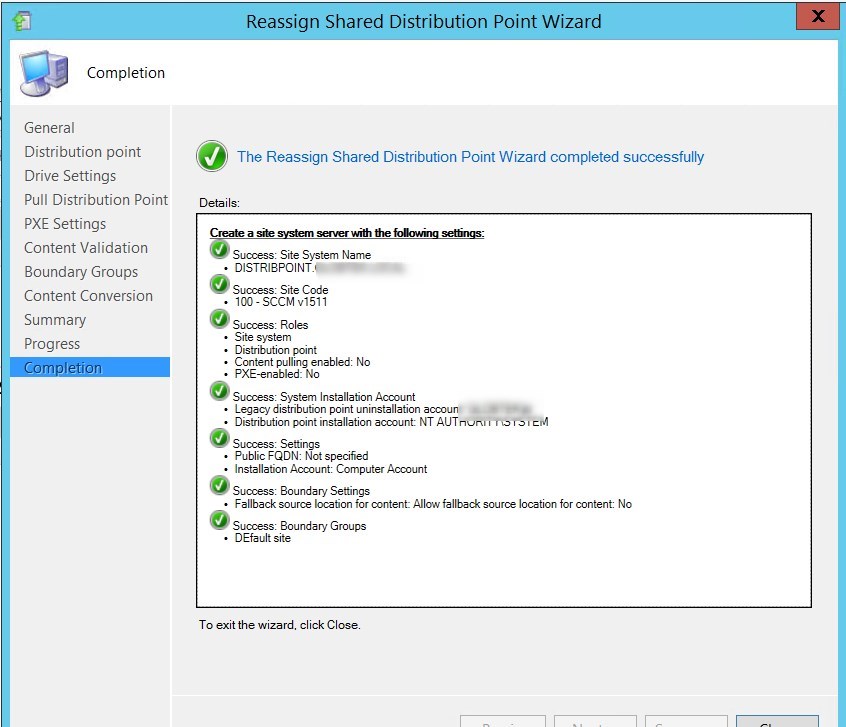
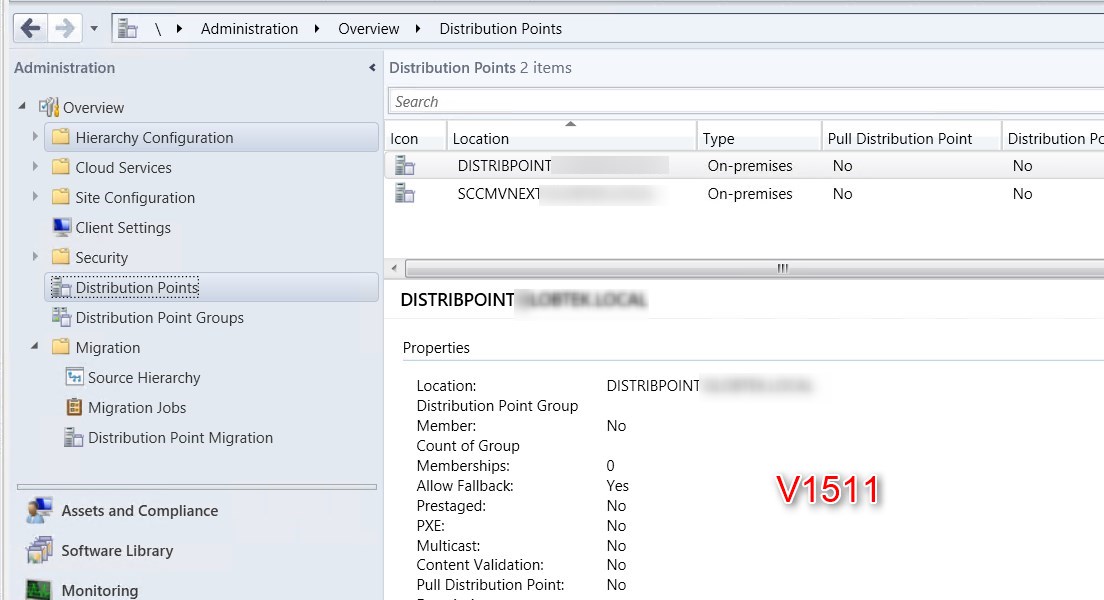
- Confirm that your Distribution Point is now part of your SCCM 1511 site
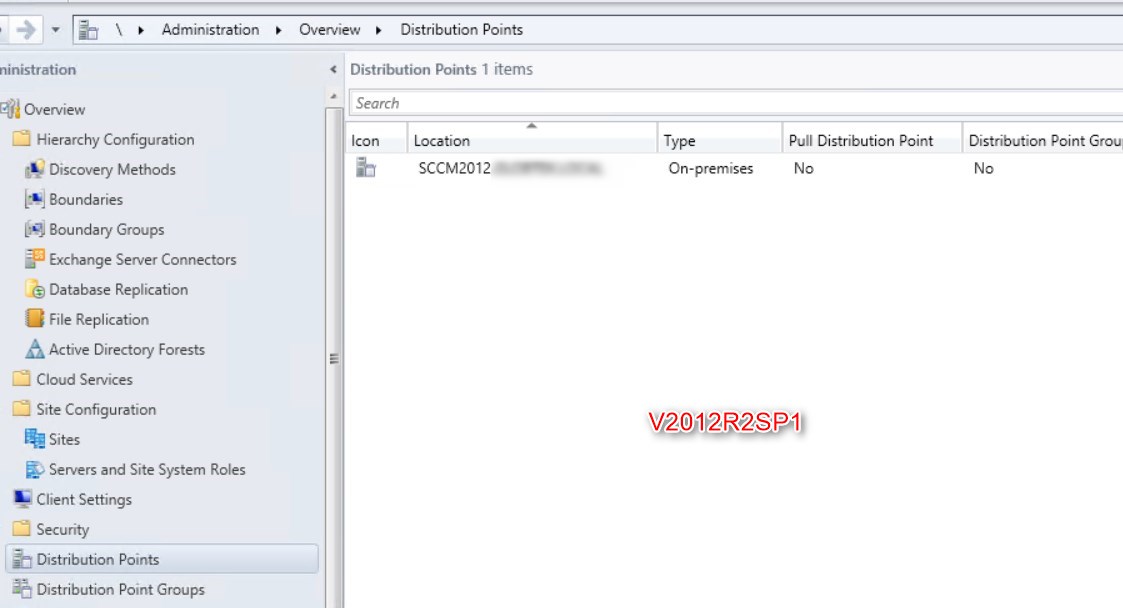
- Confirm that the Distribution Point as been removed from the 2012 R2 SP1 site
For more details about Content Migration, read the following Technet article.
Clients
Once all objects are migrated, you need to reassign your client in the new SCCM 1511 site.
Many options can be used :
- Reassign client site with a script to migrate to the new hierarchy
- This is mandatory because of the new site code
- This script from Steve Thompson [MVP] does the trick!
- Use auto-upgrade when client are assigned to the new hierarchy
- Use client push to reassign clients and upgrade at the same time
- This will change the assigned site code automatically
In the end, upgrading the clients uses the same process as any previous Service Pack release.
Please refer to our SCCM R2 SP1 upgrade post for client upgrade using auto-upgrade or client push.
For more details about Client Migration, read the following Technet article
SCCM 1511 Post Migration Tasks
When all objects are migrated, the migration can be completed with these general steps :
- Validate that all clients, data, Distribution Points are migrated and no longer require the source hierarchy
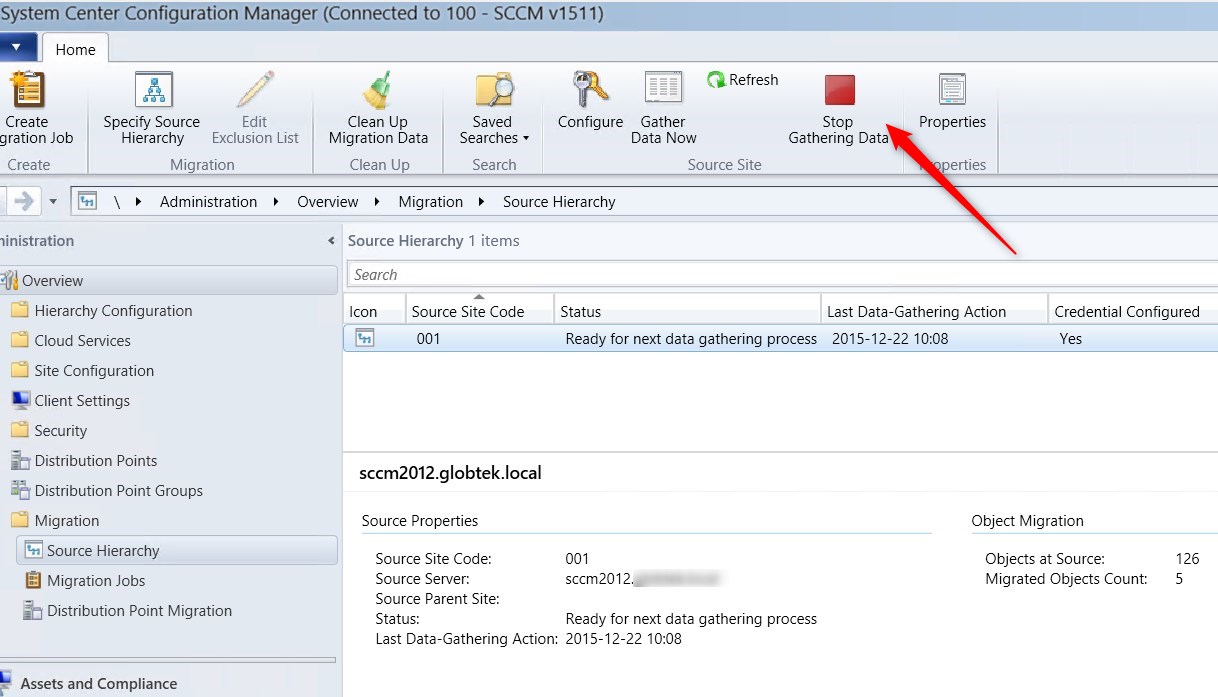
- Stop gathering data from the source site
- Clean up migration data
- Decommission the source hierarchy
Stop gathering data
Before you stop gathering data, the following must be completed :
- Distribute content to at least one DP in the new hierarchy
- Reassign Distribution Point
To stop gathering data :
- In the SCCM Console, go to Administration / Migration / Source Hierarchy
Clean Up Migration Data
This step is optional.
To clean up migration data :
- In the SCCM Console, go to Administration / Migration / Source Hierarchy
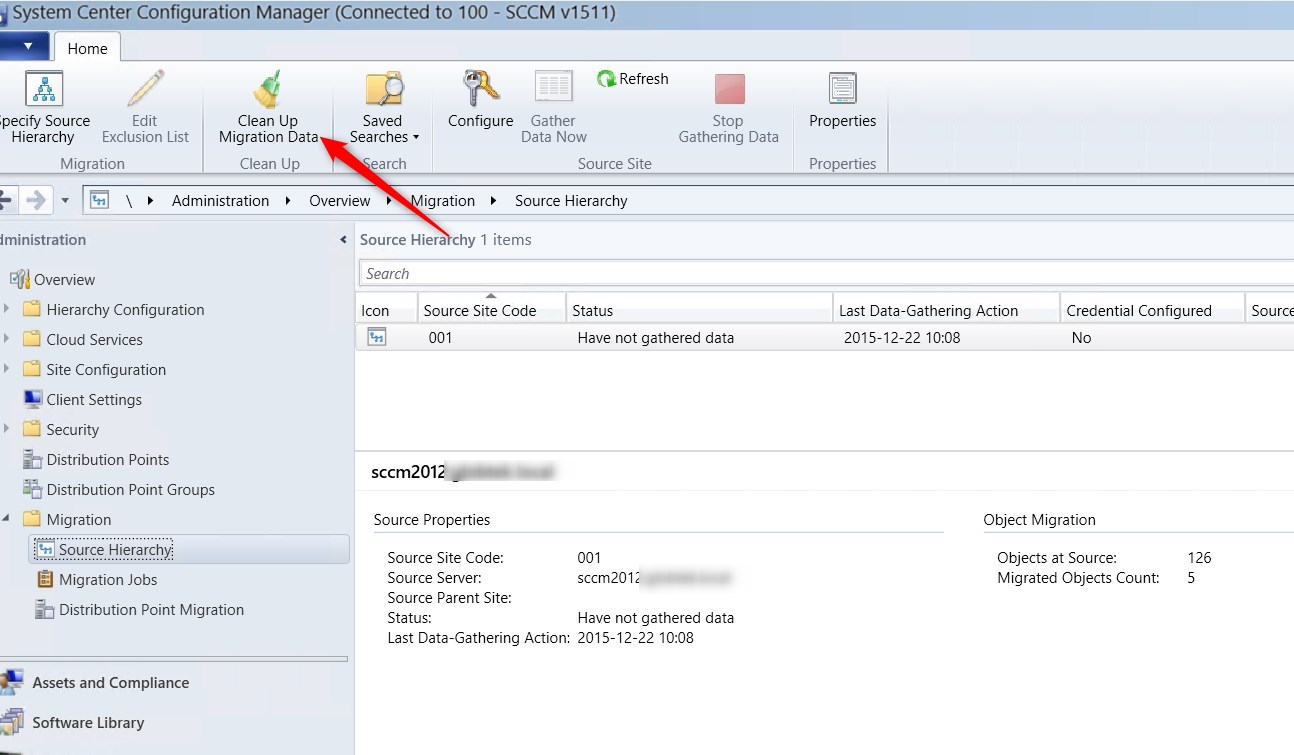
- Select the source hierarchy
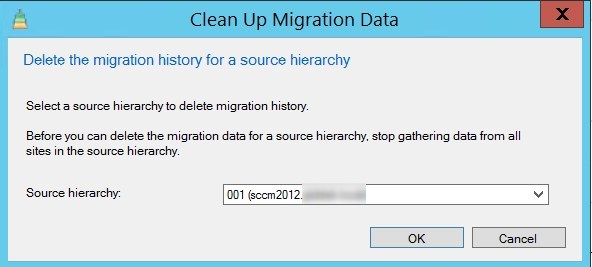
- Confirm by clicking Yes
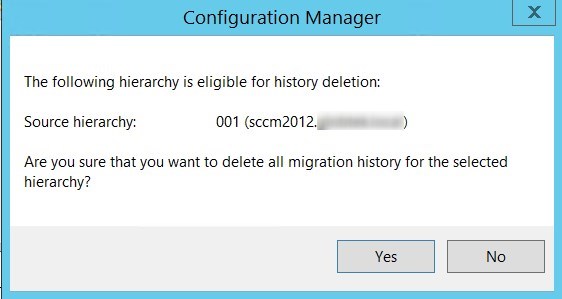
For more details about post migration tasks, read the following Technet article
Logs
All migrations tasks refer to the same log : Migmctrl.log
It can be founded in your SCCM installation directory Microsoft Configuration Manager\Logs\
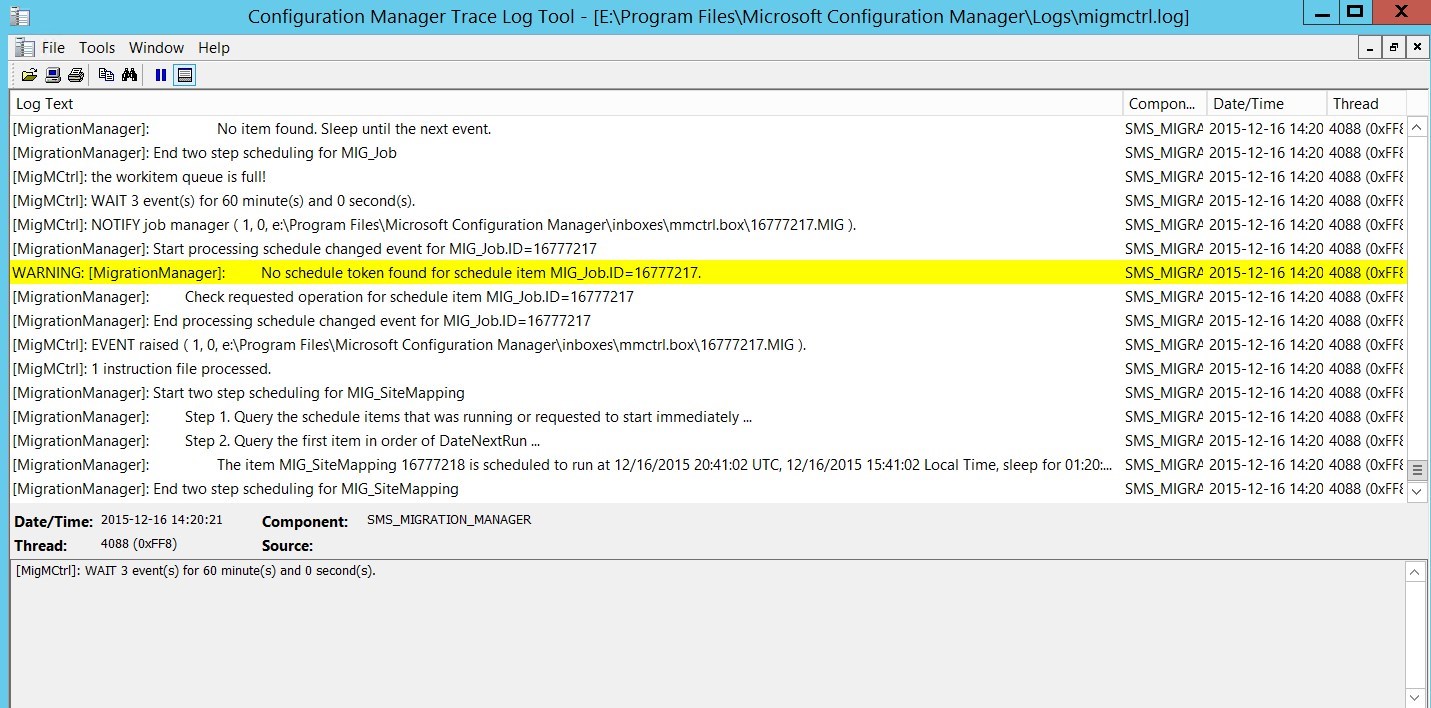
For more details about Monitoring migration, read the following Technet article
That’s it, you’ve completed your SCCM 2012 to SCCM 1511 Migration. Don’t forget to upgrade to 1602 after your migration (if needed). Feel free to ask your question or leave your comments using the comments section !




CRISAN ANDREI VASILE
04.01.2020 AT 03:18 AMGibson
02.28.2019 AT 03:53 AMJonathan Lefebvre
02.28.2019 AT 07:35 AMSarav
11.11.2019 AT 10:21 PMVin
12.07.2018 AT 01:31 PMVin
12.07.2018 AT 01:25 PMAMDC
12.06.2018 AT 07:55 AMJonathan Lefebvre
12.06.2018 AT 08:54 AMVin
11.08.2018 AT 11:14 AMJonathan Lefebvre
11.08.2018 AT 12:10 PMVin
11.08.2018 AT 11:12 AMcbarrera23
11.07.2018 AT 12:00 PMJonathan Lefebvre
11.08.2018 AT 12:16 PMittoolkit
10.16.2018 AT 09:16 AMJonathan Lefebvre
10.16.2018 AT 10:47 AMittoolkit01
10.17.2018 AT 10:17 AMRicky
07.03.2018 AT 06:56 AMSS
05.08.2018 AT 04:26 AMJonathan Lefebvre
05.08.2018 AT 08:08 AMMario Borja
03.06.2018 AT 03:52 PMmunzi
01.08.2018 AT 09:15 PMmunzi
01.05.2018 AT 03:00 PMJonathan Lefebvre
01.08.2018 AT 11:05 AMBaretto James
12.11.2017 AT 12:01 PMJACK REACHER
11.30.2017 AT 08:11 AMJonathan Lefebvre
01.08.2018 AT 09:47 AMAdam M
11.29.2017 AT 11:24 AMJohn Merritt
10.27.2017 AT 02:10 AMJonathan Lefebvre
10.27.2017 AT 10:00 AMSudarsen S
10.24.2017 AT 05:15 AMJonathan Lefebvre
10.25.2017 AT 08:32 AMCarson
10.12.2017 AT 03:58 PMCarson
10.12.2017 AT 04:00 PM