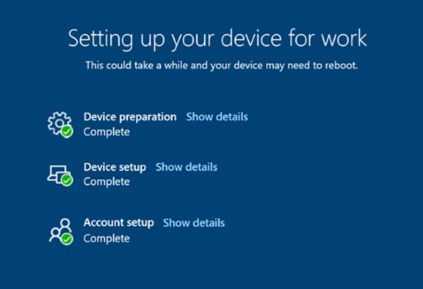

Since the announcement of Windows Autopilot there has been a lot of interest and questions about how it actually works, will it blend easily in our environment, etc. While at the beginning there was some major drawback compared to what a Task sequence’s configured computer can deliver, with the latest updates to the service, it is now a good time to start your journey with it. In this post, we will detail all the requirements and how to set up an environment for Microsoft AutoPilot and Windows 10 devices.
This post is part of a series on Windows Autopilot that will be published in the following weeks. In the next posts, we will cover the following subjects :
- Getting started with Windows Autopilot | Step-by-step guide
- How to deploy Win32 Applications in Microsoft Intune
- How to customize Windows 10 with Microsoft Intune and Autopilot
- How to join Autopilot devices to Hybrid AD
- How to use Windows Update for Business
- How to GPO with Microsoft Intune
Microsoft AutoPilot Windows 10 Requirements
- Windows 10 version 1703 or higher
- Only the following Windows 10 editions are supported :
- Pro
- Education
- Enterprise
- The latest Windows 10 2019 LTSC is also supported
- other LTSC/LTSB releases are not supported
Licensing
There are multiples options for licensing to be used with Autopilot.
- Microsoft 365
- Business
- F1
- Academic
- Enterprise E3 or E5
- Enterprise mobility + Security (EMS) E3 or E5
- Intune for Education
- Azure AD Premium P1 or P2
You can also begin with trial licenses for Enterprise Mobility and Security (EMS). This would cover everything we need for Autopilot.
To begin your testing, assign one of those license to a test account. Eventually, this will be required on all users you wish they can use Windows Autopilot to provision a computer.
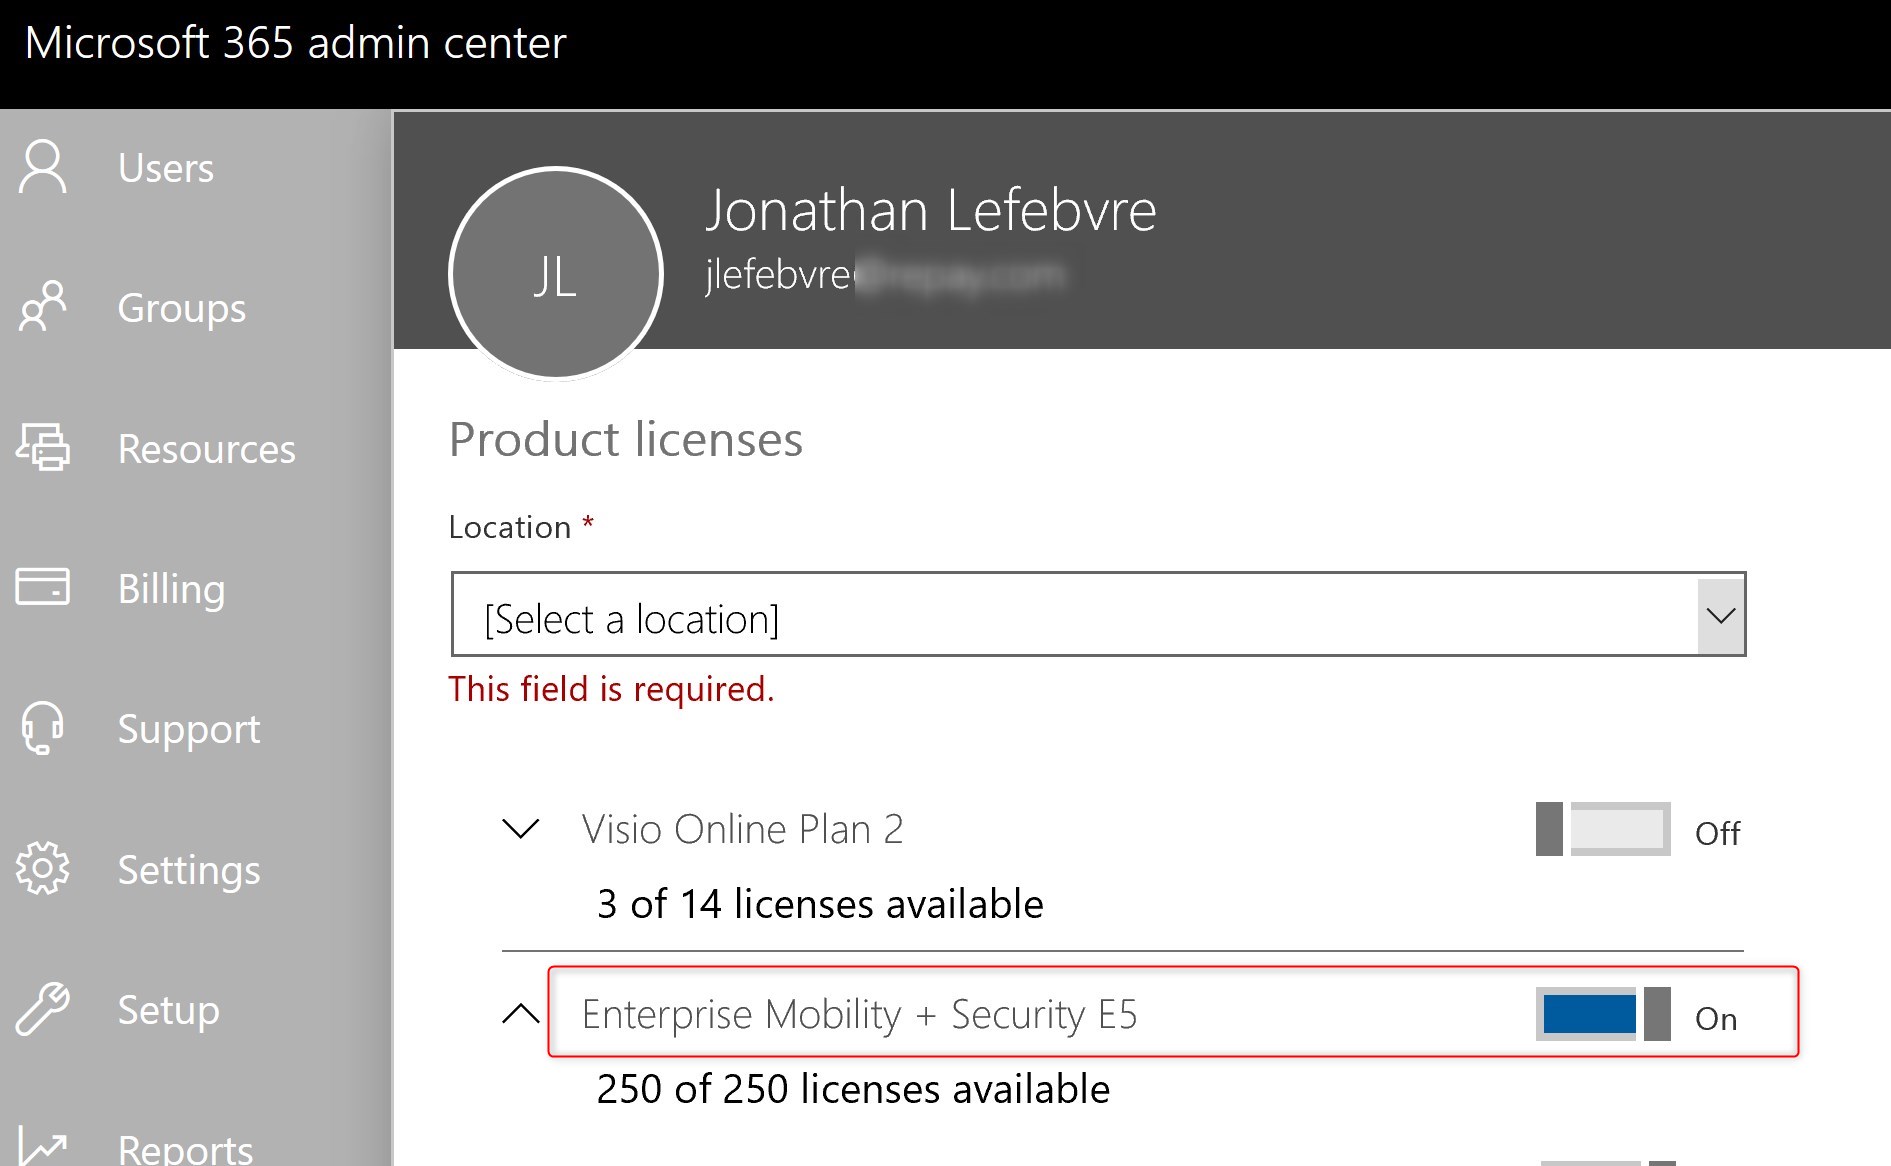
For more details about licensing, see Microsoft docs
Access and rights
If your enterprise is new to anything related to Azure and Intune, it is easier to begin with Global administrators rights in Azure.
Once the various requirements will be done, Intune Administrators along with rights for the Windows Store for business will be enough.
Network Configurations
No matter what kind of network configuration you have, it’s a good idea to review the list of requirements on the network side.
Review the list of recommendation on Microsoft docs.
Azure Configurations
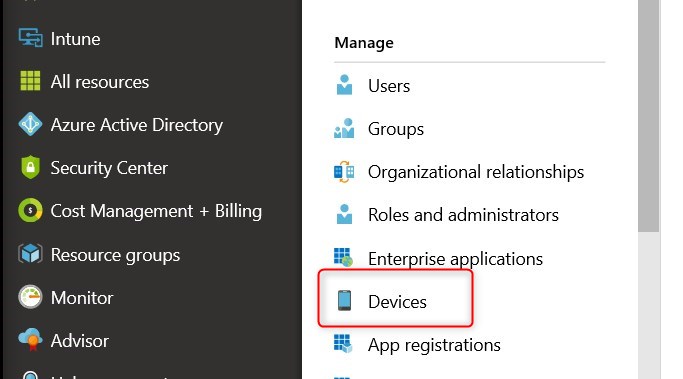
- Connect to Azure portal
- Browse to Azure Active Directory and select Devices
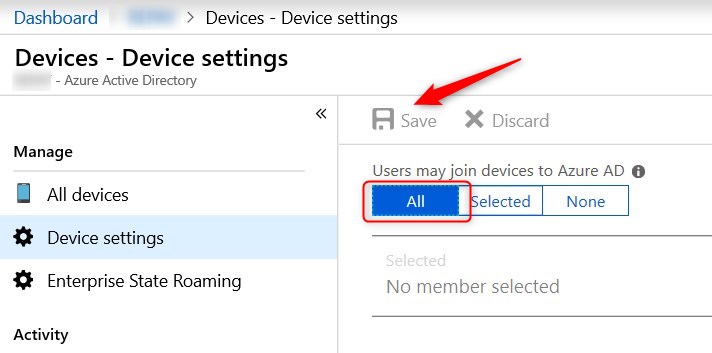
- Select Device settings
- Enable Users may join devices to Azure AD for all and click Save
Configure Azure AD Company Branding
While this step isn’t mandatory, it helps the look and feel when authenticating against the Azure AD/Office 365.
- Back to Azure Active Directory, select Company Branding
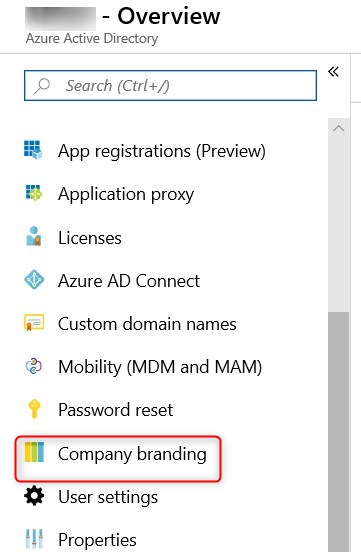
- Click Configure

- Provide the various images required with the format.

Configure Intune
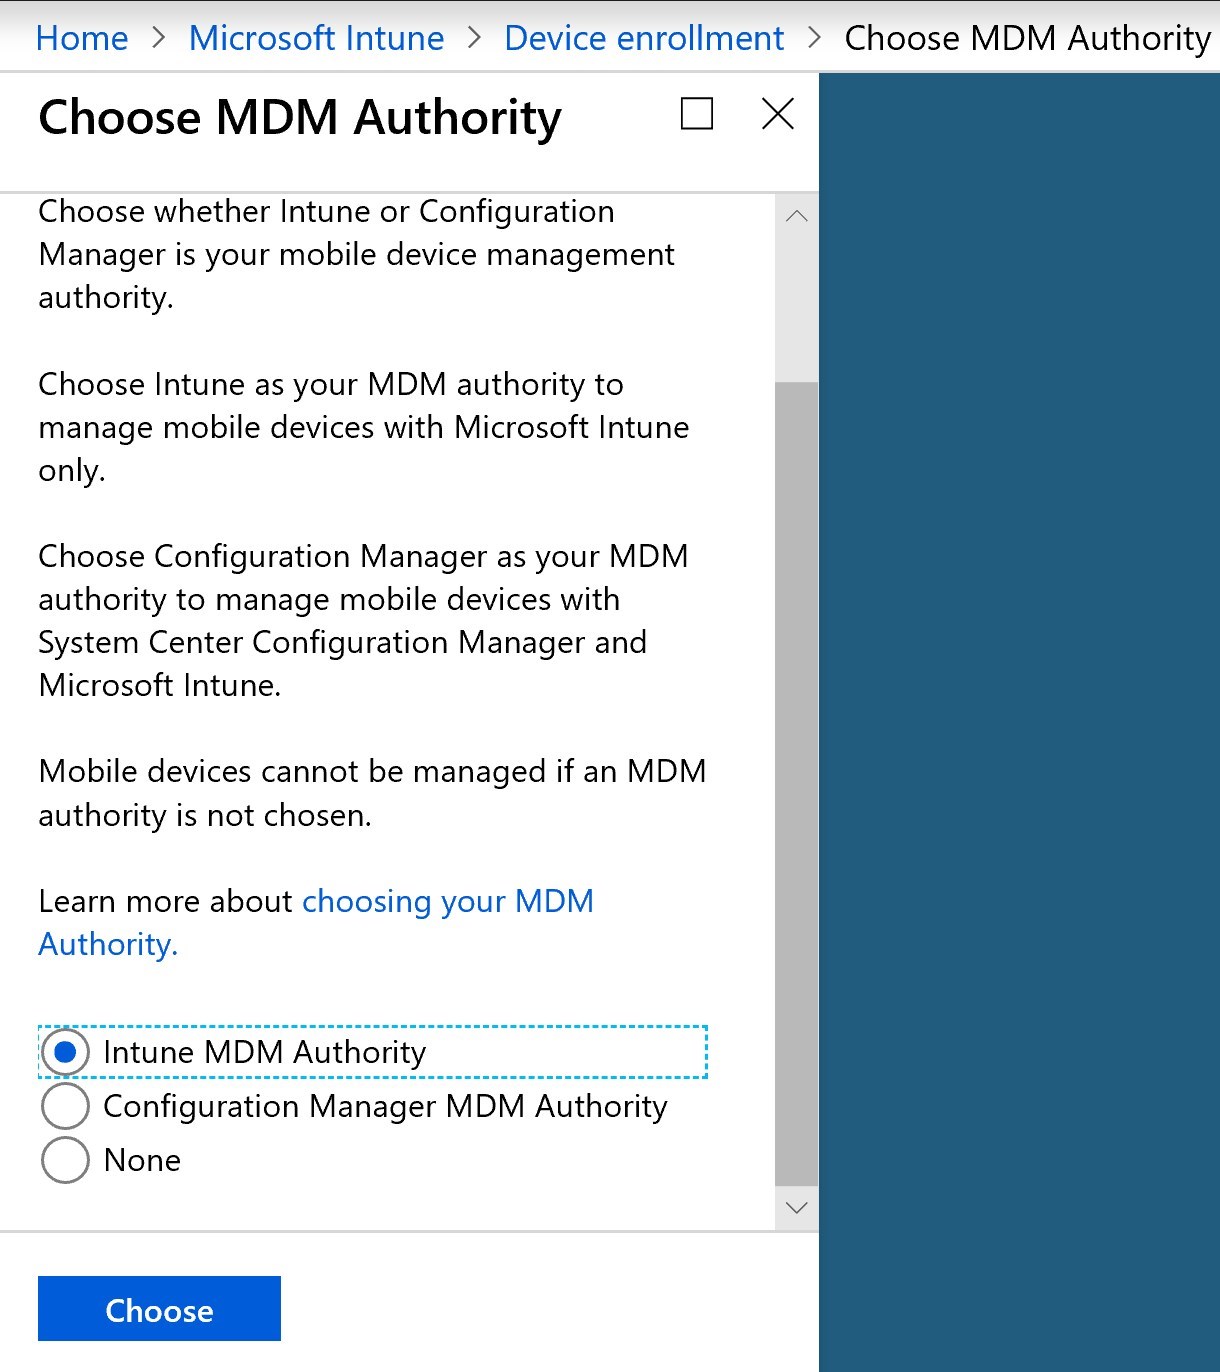
Everything related to Windows Autopilot itself is part of Microsoft Intune. First step is to setup Intune as the MDM authority
- In the Azure portal, go to Microsoft Intune/Device Enrollment/Choose MDM Authority. Select Intune MDM authority
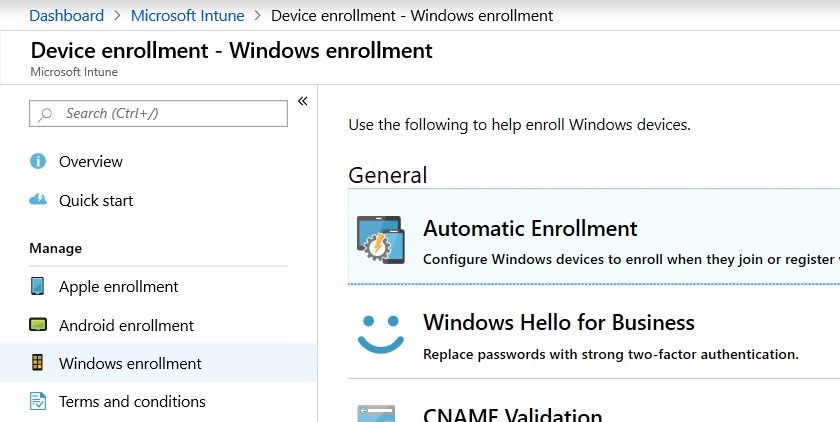
- Under Microsoft Intune/Device Enrollment – Windows Enrollment, select Automatic Enrollment
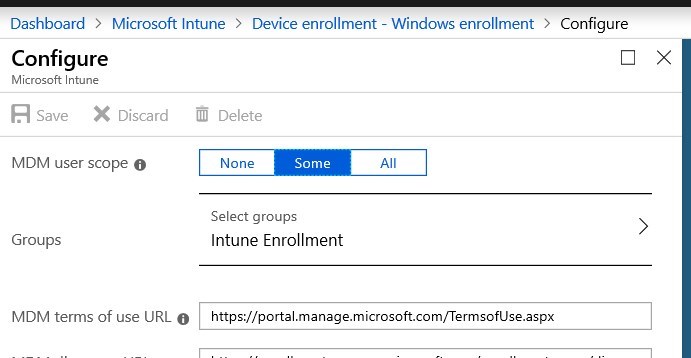
- Specify a group or if All MDM user can enroll devices.
- For more details about Windows enrollment, see Microsoft Docs
Now that requirements have been covered, it’s time to dive into Autopilot itself.
Create an Autopilot deployment profile
The autopilot deployment profile is the configuration of the out-of-the-box experience(OOBE) to set up a Windows 10 device.
It will allow to manage the following component :
- Cortana configuration
- Automatically setup for work or school
- Customized Azure AD sign-in page
- Skip privacy settings and EULA
- Disable local admin account
To create an Autopilot deployment profile:
- Go to the Azure portal
- Go to Microsoft Intune and select Device Enrollment
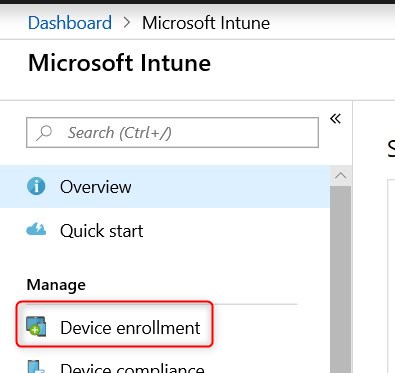
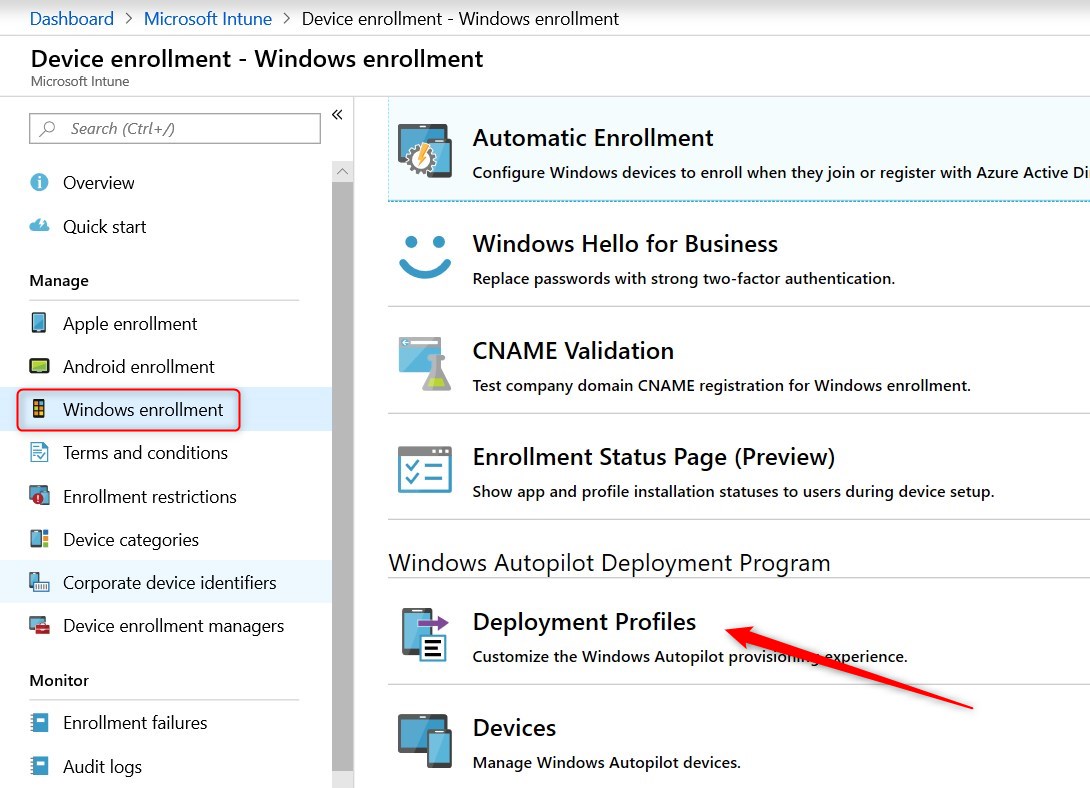
- Select Windows Enrollment from the left pane and then Deployment profiles from the right pane
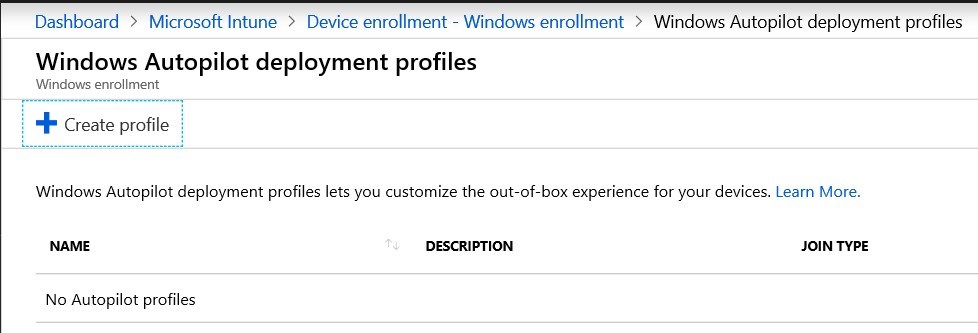
- Select Create Profile
- Provide the name for the profile
- Select the deployment mode: User-driven
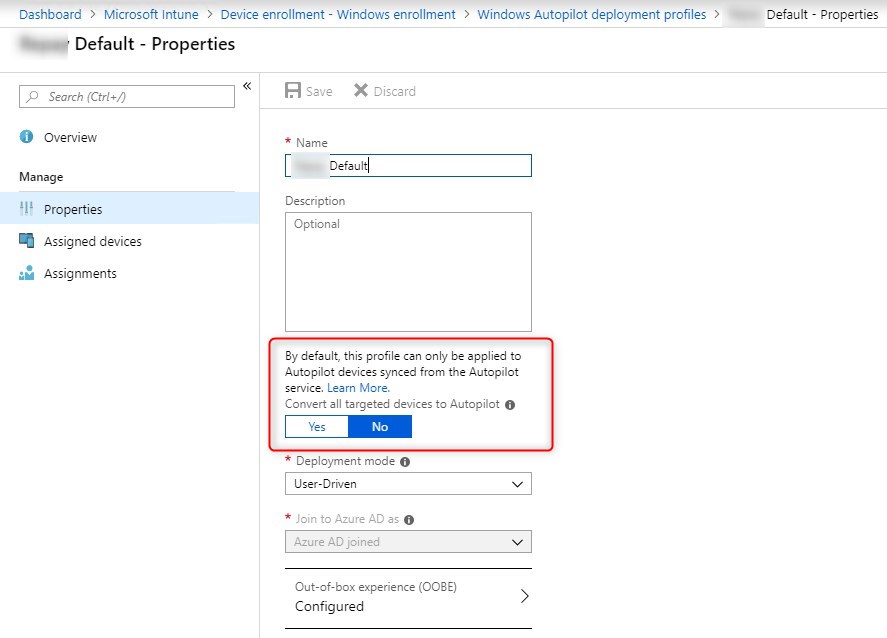
- The option to Convert all targeted devices to Autopilot will be for later on when testing have been conducted.
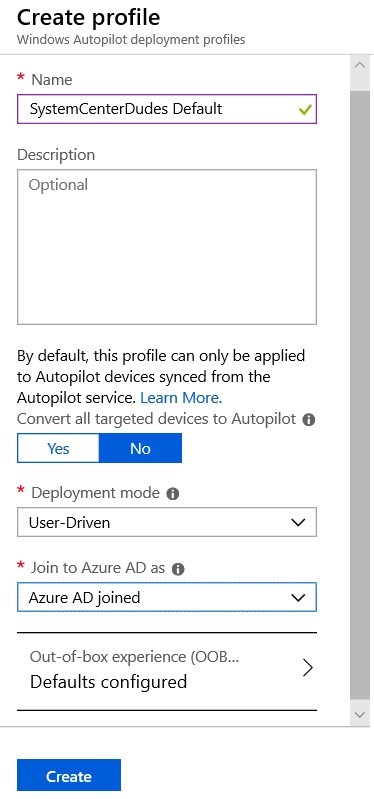
The user-driven mode will follow the user with simples tasks to complete the Windows 10 original setup. The high-level process will be the following :
- Unbox the device, plug it in and turn it on.
- Choose a language, locale, and keyboard.
- Connect it to a wireless or wired network with internet access.
- Specify your e-mail address and password for your organization account.
Microsoft recently released the Self-deploying mode in a preview. This mode is mainly for Kiosk computers, digital signage device or shared devices. The idea is to remove most, if not all, user interaction to provision a computer with Autopilot, therefore Azure AD join, required applications and configurations.
For more details about deployment modes, see Microsoft docs
- Clicking on Out-of-box experience/Default configuration brings another pane
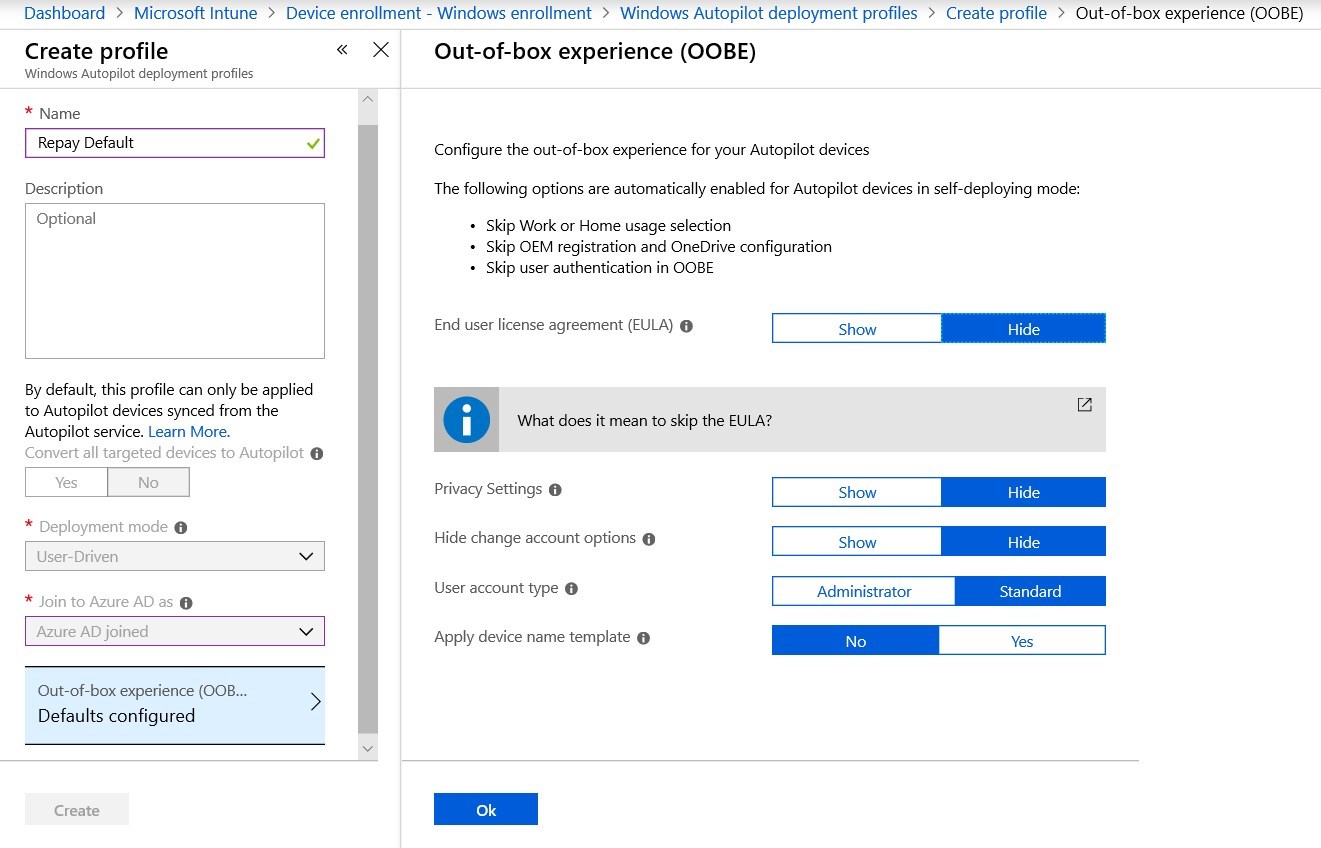
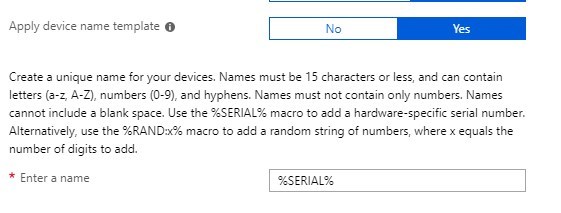
The option to Apply device name template gives the opportunity to set up a standard naming convention.
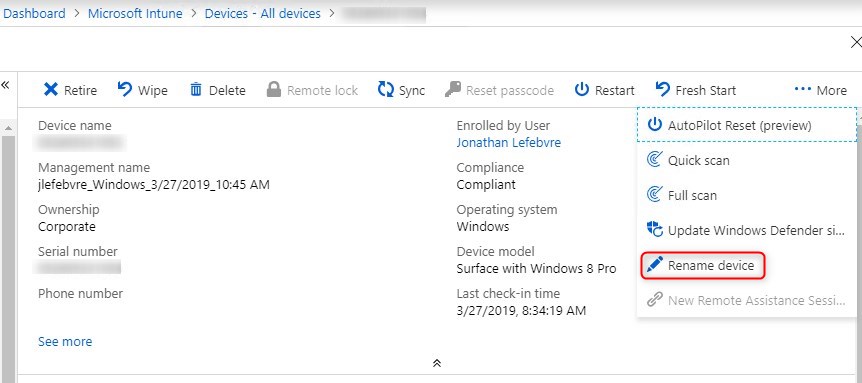
Using custom ID may not be possible depending on the requirement. In that case, a computer can be renamed straight from Intune.
- Click Create to complete profile creation

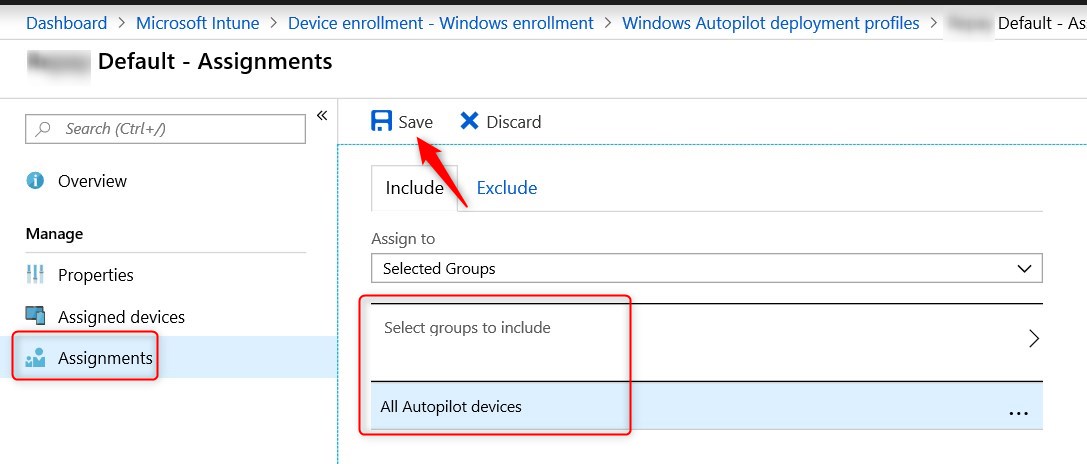
- Once created, make sure to create the Assignment to target the All Autopilot devices group.
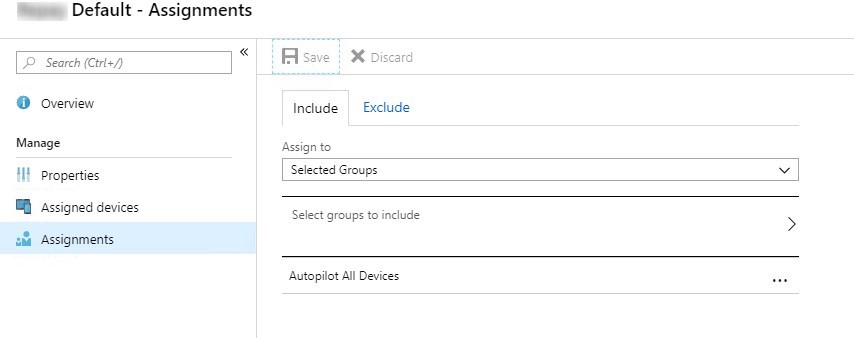
For mode details about Autopilot profiles, see Microsoft docs
Enrollment Status page(Preview)
The enrollment status page allows us to bring autopilot configuration closer than what a task sequence looks like. It will prevent the user from login while many key configurations happen automatically. Note that this feature is in preview, but we had great success so far with it.

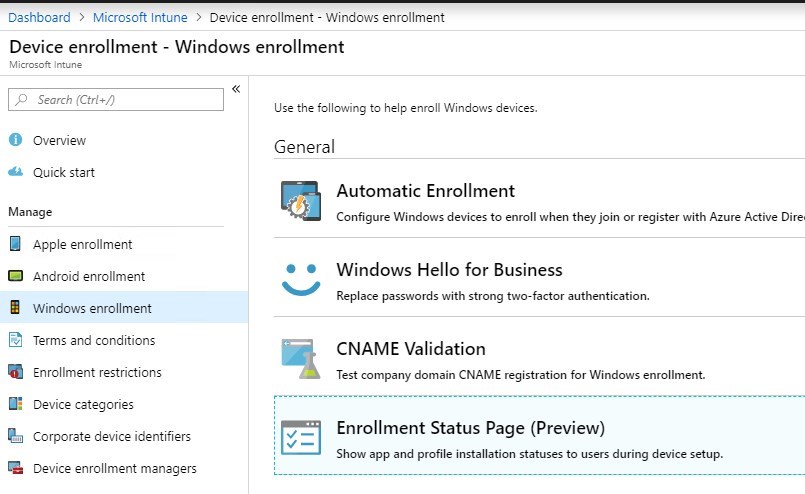
- Browse to Intune/Device Enrollment – Windows Enrollment and click on Enrollment status page(Preview)
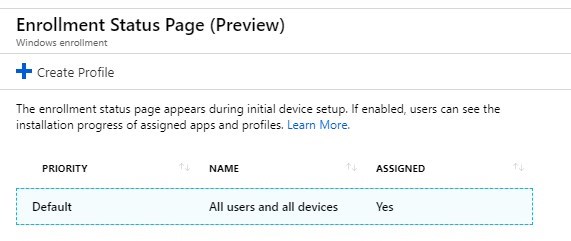
- A default profile already exist and assigned, but nothing is actually enabled. Click on it to edit.
- Under Settings set Show App and profile installation progress to Yes
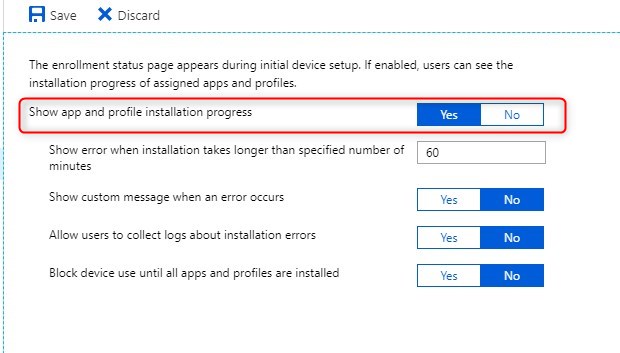
- Select Yes for Block device use until all apps and profiles are installed

The Block device use until these required apps option allows us to prevent using the computer until applications are downloaded and installed. This feature is for now limited to policies, Office 365 desktop apps, Appx/MSIX and standalone MSI installed by the Enterprise desktop app Management CSP.
This leaves the Win32 applications out of this option for now.
In clear words, this means that any Win32 applications installation, will occurs after the users log in the first time. Fortunately enough, this happen really fast after the initial setup, so it’s not really an issue.
Also note that Win32 applications dependencies is coming soon to Microsoft Intune.
For more details about Enrollment Status page, see Microsoft docs
Create Azure AD Group
This group will be targeted by the Autopilot profile.
- Go to Azure Protal
- Under Azure Active Directory, select Groups
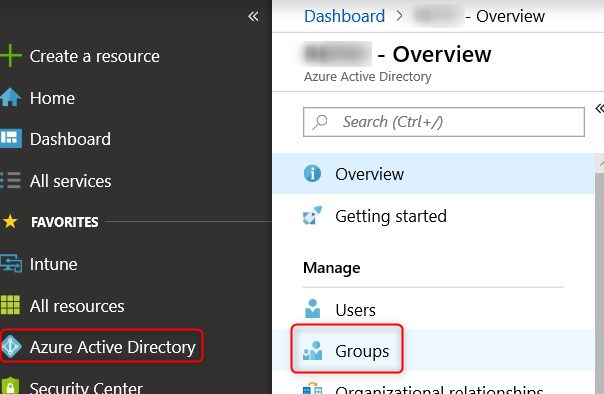
- Select New Group
- Group type : security
- Group name : All Autopilot devices
- Membership type : Dynamic device
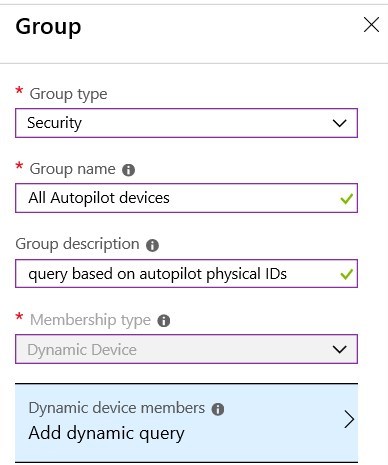
- On the right pane, select Advanced rule for the dynamic membership
- rule : (device.devicePhysicalIDs -any _ -contains “[ZTDId]”)
- This will add devices that are part of Autopilot, no matter which method was used to add the computer to Autopilot
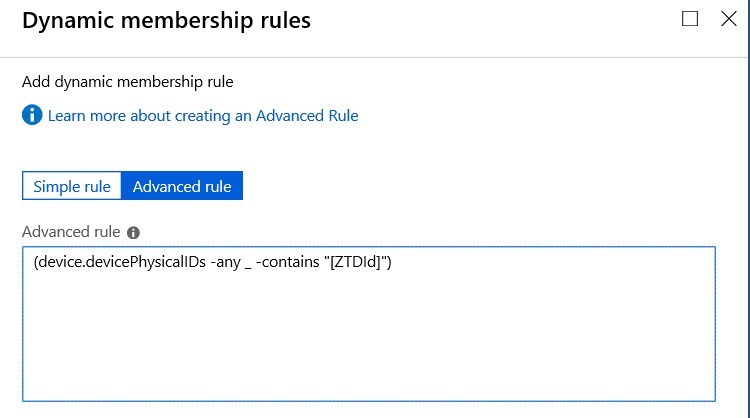
- Autopilot devices with a specific order ID :
- (device.devicePhysicalIds -any _ -eq “[OrderID]:179887111881”)
- Autopilot devices with a specific Purchase Order ID:
- (device.devicePhysicalIds -any _ -eq “[PurchaseOrderId]:76222342342”)
- Click Create
Add a test device
The easiest way to add a test device is to manually register it with the Get-WindowsAutoPilotInfo script. This will generate a unique device ID that we’ll be able to import in Autopilot.
- On the test device, open a Powershell console with elevated privileges
- Run the following command
- Command line :Install-Script -Name Get-WindowsAutoPilotInfo
- Answer Yes to questions to complete the install-script

More information about the Get-WindowsAutoPilotInfo script can be found on PowershellGallery
- Run the script
- Command line: Get-WindowsAutoPilotInfo.ps1 -Outputfile Jo-Surface.csv

- The .CSV is created and contain the Hardware Hash to be used by Autopilot to identify the computer
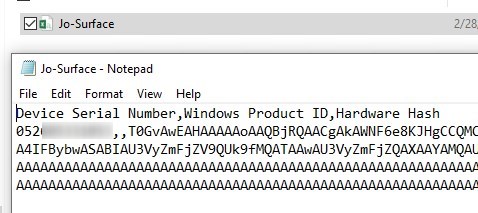
- Go to Azure portal
- Browse to Intune/Device Enrollment/Windows enrollment/Devices
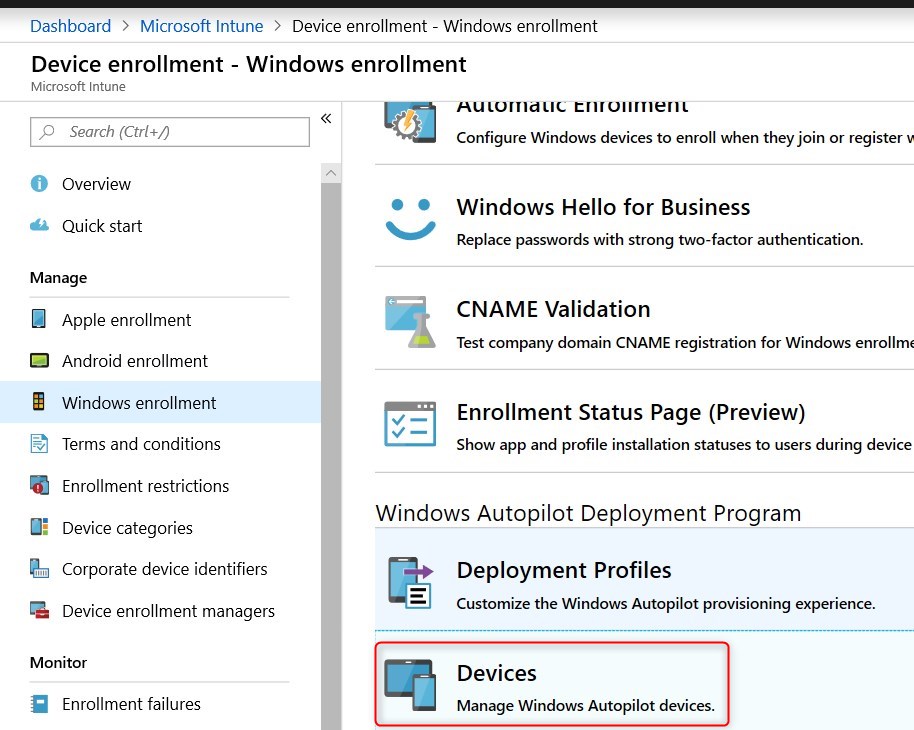
- Click Import and select the .CSV file generated earlier.

The import process can take up to 15minutes
- Once the import is completed, hit Sync

- Once sync is completed, the device will show up. Hitting refresh may be required to see it.

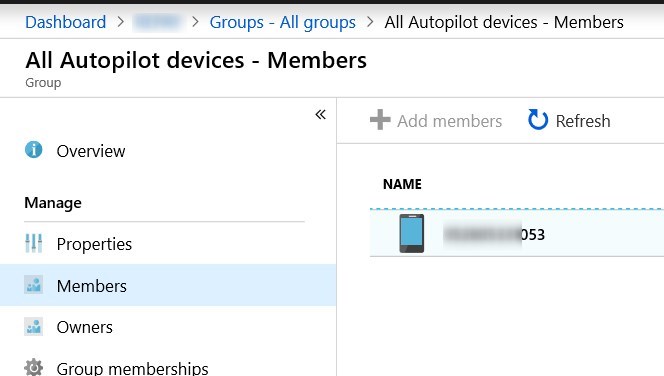
- Looking at the group members, we can see our machine
Add existing devices options
Many options exist in order to support currently used computers in the company to be able to be refreshed using Windows Autopilot.
Use SCCM inventory report to get device IDs for autopilot
Since SCCM 1802, a new report is available under Hardware – General.
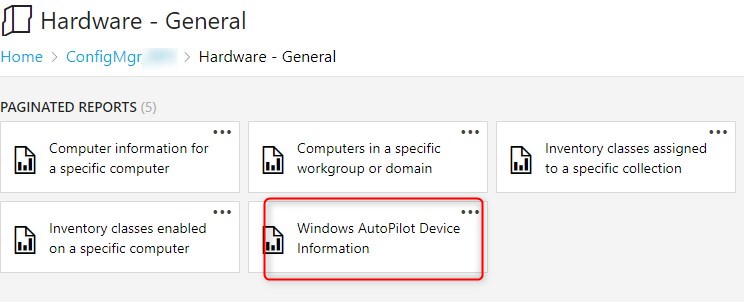
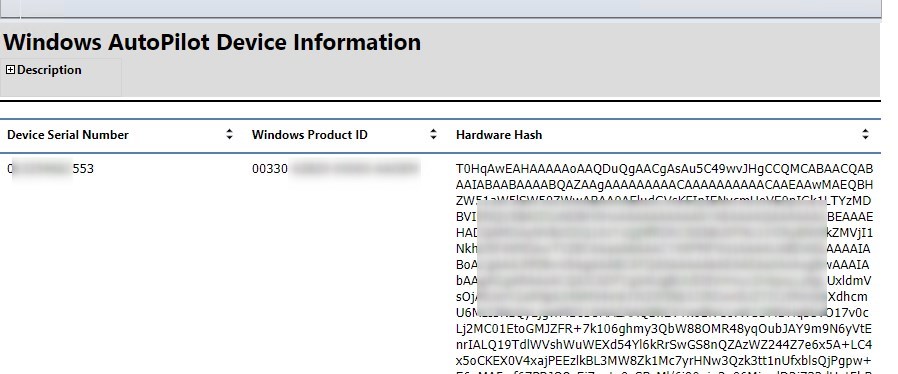
This reports give all the required information for Autopilot. This can be later used to import those computer using the same method as the test computer.
For Windows 10 devices already managed by Intune
This requires to have computer managed by Intune or Co-Managed with SCCM.
The option to convert all targeted devices to Autopilot can automatically convert managed devices by Intune or Co-Managed with SCCM to Autopilot ready devices.
For more information on existing devices, see Microsoft docs
Add new devices to Microsoft Autopilot
New devices can be automatically added to your Autopilot by your device vendor. as of now, Dell, HP, Lenovo and Toshiba. We’ve heard of possible small fee per computer. So don’t be supprised if it happen.
For specific steps to be taken, contacting your vendor is the best option you have. From past experience, at was mostly paper work and providing the Tenant ID so the provider know where to add newly bought devices.
Here some key configuration you can look for from your provider :
- Provide a generic image free of unsanctioned software
- Choose your Windows 10 build
- Get latest drivers delivered day 1
For more details about how to add computers to Autopilot, see Microsoft docs
Assign the profile to Azure AD group
- Go to Intune
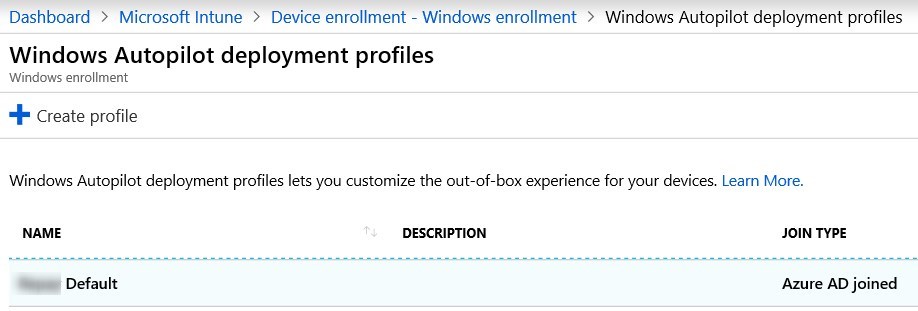
- Browse to Device enrollment – Windows enrollment/Deployment profiles
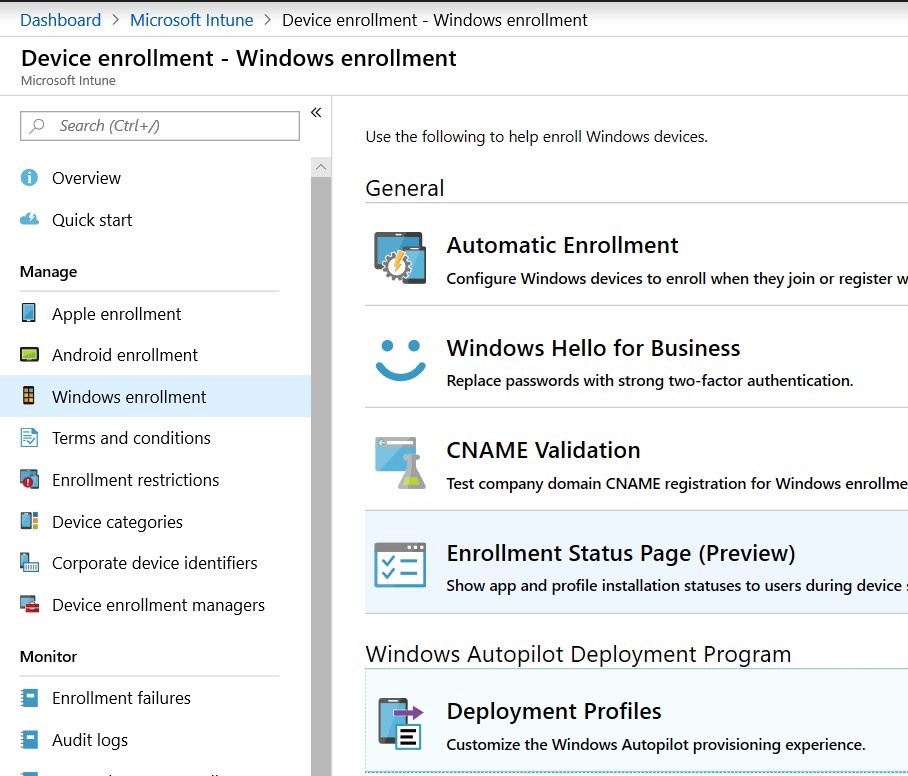
- Double click on the profile created previously
- Under Assignment select the group created earlier to be targeted by the Autopilot deployment profile
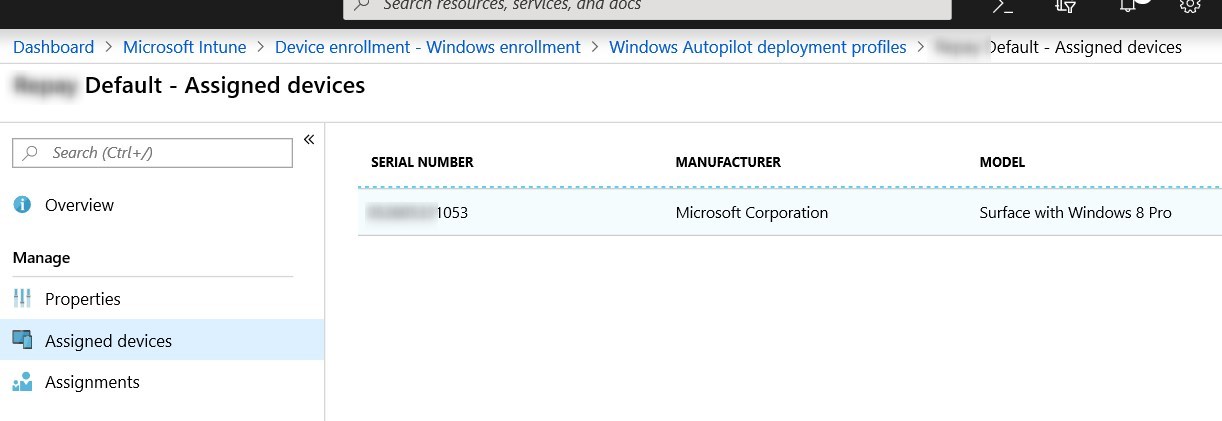
- The computer imported and added to group is now displayed under Assigned devices
Test Microsoft Autopilot Windows 10 deployment profile
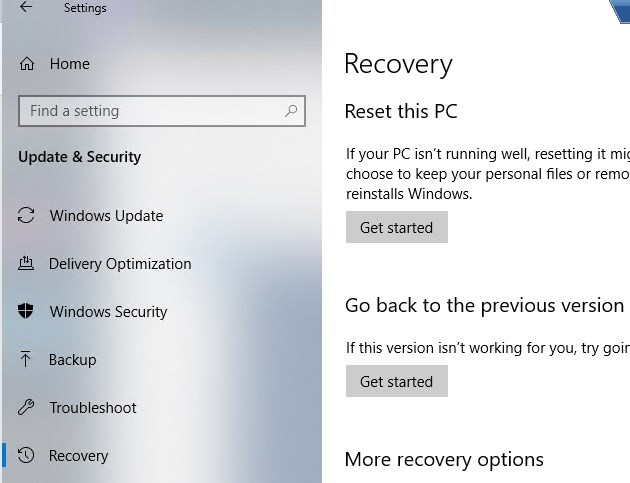
- On the test computer, hit Reset this PC under Settings/Update & Security/Recovery
- Wait for the reset to complete.
- Provide necessary user customization like Country, language, and keyboard.
- Then the user’s email and password will be asked.
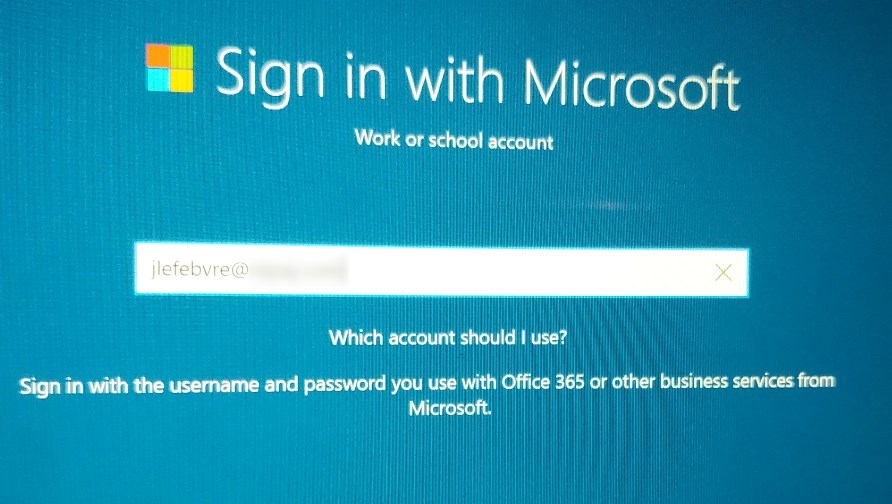
- Once provided, the setup will complete the following :
- Azure AD join
- Enroll the device in Intune
- Apply policies
- Apply some applications

- When the Out-of-the-box experience is completed, the user will be logged on. Remaining applications, like Win32 Apps will begin to install right away.
Hope this as help you begin your journey with Microsoft Autopilot and Windows 10.
[ratings]




shabin1988
06.16.2020 AT 12:28 AMshabin1988
06.22.2020 AT 01:56 AMsetup office
03.24.2020 AT 03:53 PMoffice setup
03.24.2020 AT 03:51 PMJan
02.27.2020 AT 10:29 AMErnest Houle
12.25.2019 AT 10:09 PMHarvey
11.06.2019 AT 09:08 AMHarvey
11.06.2019 AT 09:11 AMTina A
09.26.2019 AT 04:05 PMDoro
06.05.2019 AT 02:16 AMgar
04.15.2019 AT 12:52 PM