
In our previous post, we covered how to set up computers using Windows Autopilot. While the main scenario is to join computers to Azure AD, leaving the on-prem domain aside is for sure not realist in many cases. Microsoft has added the ability to join the On-prem domain as part of the Autopilot setup. This feature is still currently in Preview, but worth testing and checking it out. In this post, we will detail the requirements and how to configure Azure and on-prem AD to allow Hybrid AD to join computers. Intune Autopilot Hybrid AD joined computers allows seamless integration.
This post is part of a series on Windows Autopilot that will be published in the following weeks. In the next posts, we will cover the following subjects :
- Getting started with Windows Autopilot | Step-by-step guide
- How to deploy Win32 Applications in Microsoft Intune
- How to customize Windows 10 with Microsoft Intune and Autopilot
- How to join Autopilot devices to Hybrid AD
- How to use Windows Update for Business
- How to deploy Office 365 with Intune
- How to GPO with Microsoft Intune
Intune Autopilot Hybrid AD joined Requirements
- Hybrid AD join requirements are completed
- See Microsoft docs for details
- Windows 10 1809 or higher
- Internet Access
- On-prem(domain connected) network access.
- VPN connection is not supported
- Intune automatic enrollment enabled
- See our previous post about Autopilot for this requirement
- A server running Windows Server 2016
High-level steps
- Delegate AD rights to the server that will have the Intune connector installed on
- Install and configure the Intune connector
- Modification to the Autopilot Deployment Profile
- Create Domain join configuration profile
Delegate Active Directory rights
Before we move on to set up the AD delegation, the server that will be used to host the Intune Connector needs to be chosen. This server requires to run Windows Server 2016.
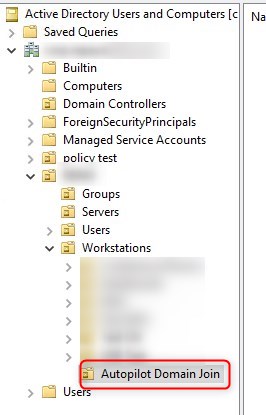
Because will be delegating rights on an OU, we created a new one. This is not mandatory to have a dedicated OU.
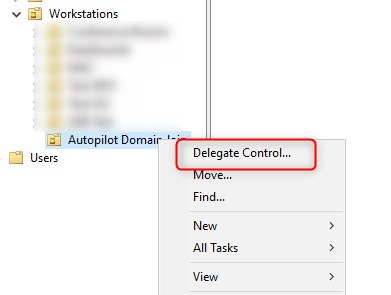
- Right-click on the OU and select Delegate control
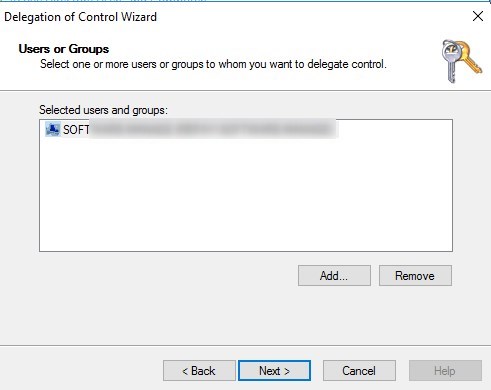
- On the Users or group, find and add the computer account for the server.
- Select Create a custom task to delegate
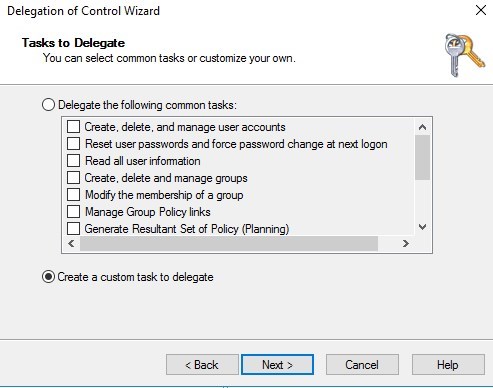
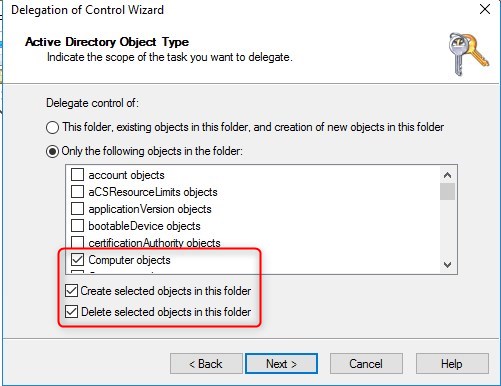
- Select Only the following objects in the folder and check Computer Object and also check Create selected object in this folder and Delete selected object in this folder
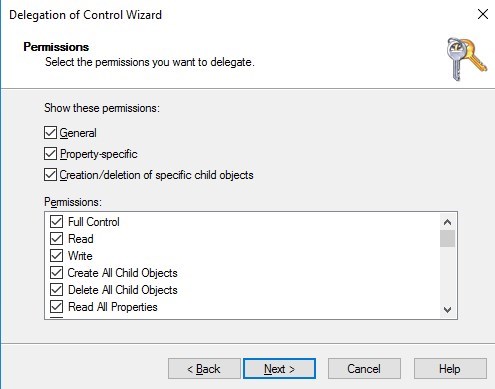
- Check General, Property-Specific, Creation/deletion and Full Control
- Delegation is completed!
Install and configure the Intune Connector
The server that will have the Intune connector must be running Windows Server 2016, have internet access and can talk to the Active Directory
- Connect on the server to host the Intune Connector
- Browse to Azure Portal/Intune/Device Enrollment/Windows Enrollment/Intune Connect for Active directory(Preview)
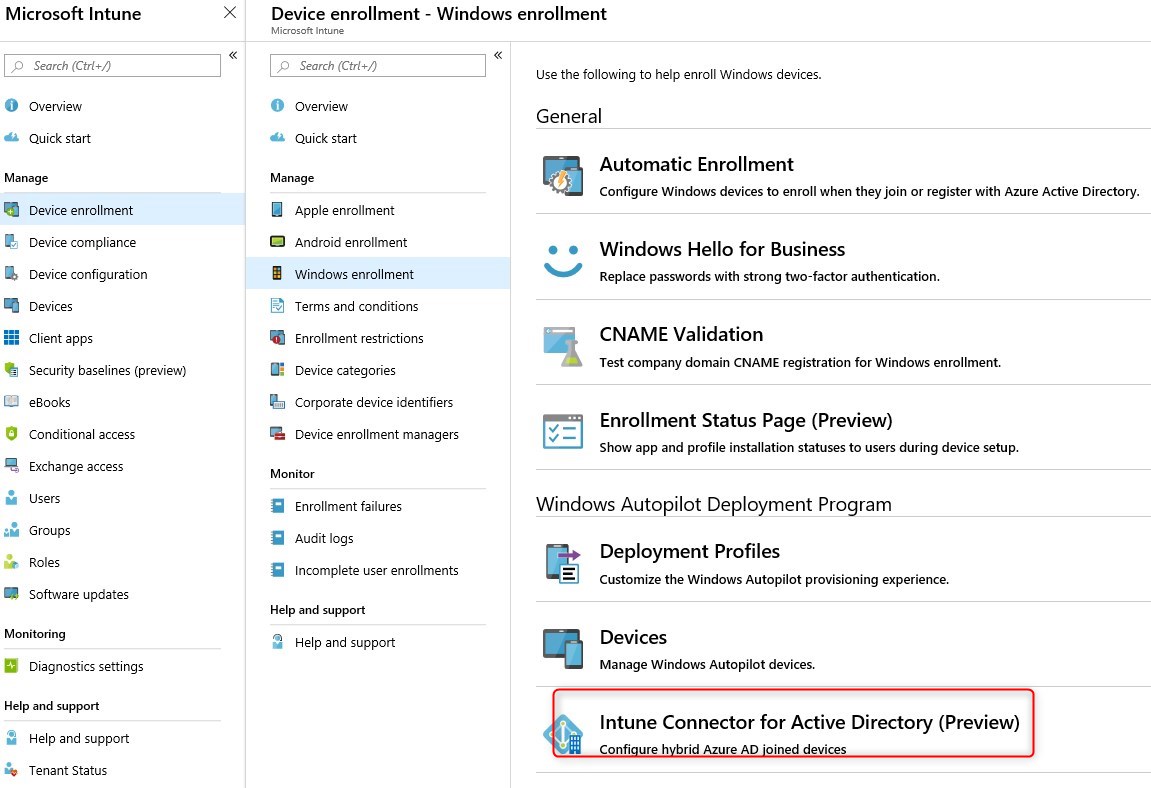
- Click on Add and select Download the on-premise Intune Connector for AD

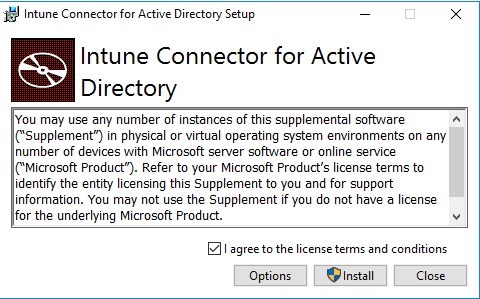
- Run the ODJConnectorBootstapper.exe, check the I agree… and click Install
- The install path can be changed under options if needed
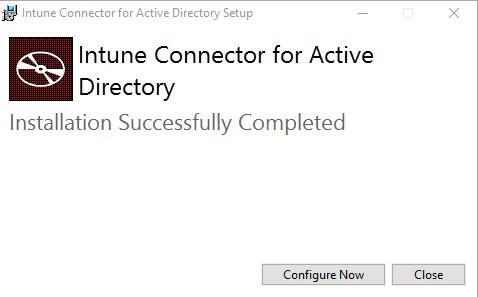
- Click on Configure Now
- Click on Sign in and provide credentials of a Global administrator or Intune Service Administrator
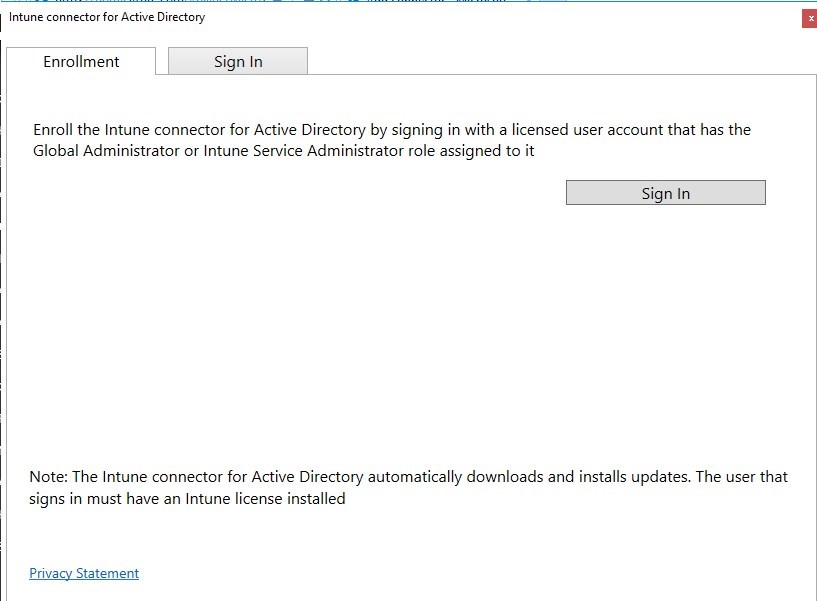
The note at the bottom is really important :
The Intune connector for Active Directory automatically downloads and installs updates. The user that signs in must have an Intune license installed
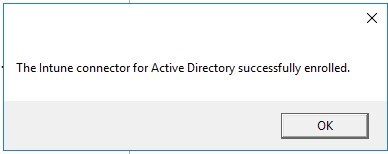
- Intune Connector for AD successfully enrolled!
- Looking back in Azure Portal/Intune/Device Enrollment/Windows Enrollment/Intune Connect for Active directory(Preview), the server name now shows up.

Configure Autopilot profile for Intune Hybrid AD joined
If you currently have an Autopilot profile to Azure AD join, it will not be possible to modify it. So we’ll create a new one.
- Go to Intune/Device enrollment – Windows Enrollment/Windows Autopilot deployment profile and Create a new profile
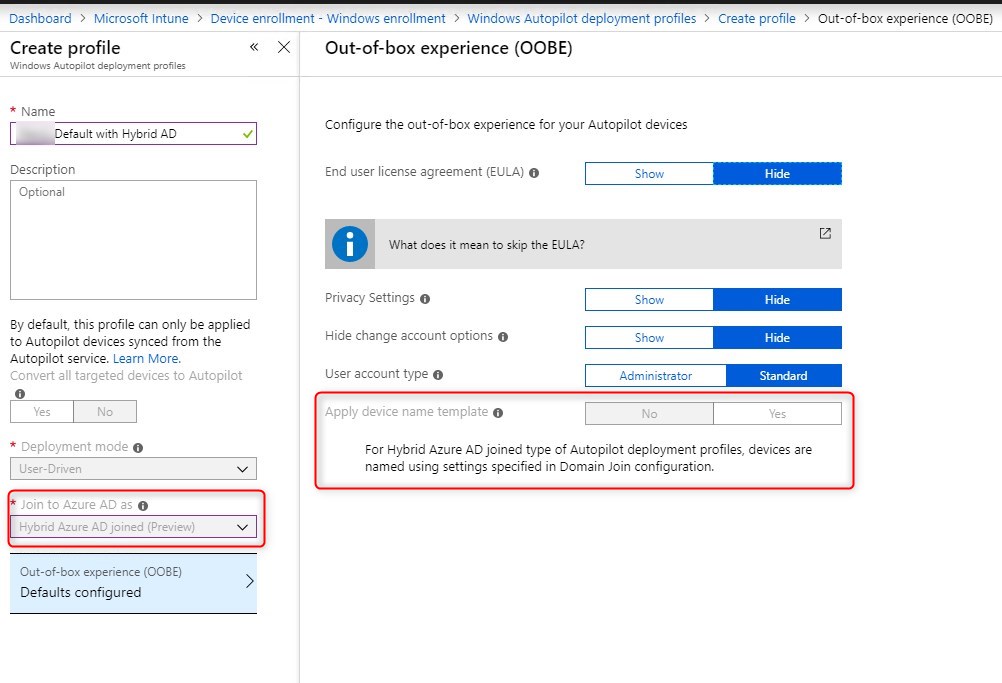
Note that the computer name will not be configured in the Autopilot deployment profile. This will be done in a Device configuration profile for Domain join.
This actually limits the use of variables like %SERIAL%, meaning that it is not currently supported to use the serial number as a computer name with Hybrid Domain join.
- Make sure you assign this deployment profile to your All autopilot group
Create Domain Join configuration profile
Once the Autopilot configuration is completed, we need to create a Device configuration profile with the domain specific informations.
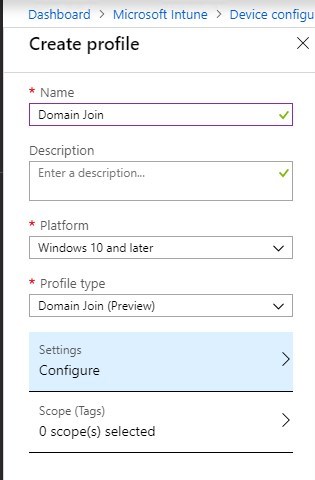
- Browse to Intune/Device Configuration – Profiles and create a new profile. Select Windows 10 or later and Domain Join (Preview)
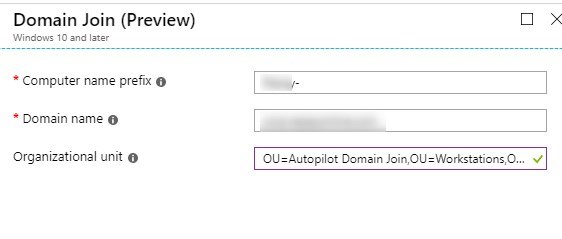
- On the right side, provide the computer name prefix, domain name, and OU to add to a computer to, in DN Format.
- Make sure you assign this Device configuration profile to your All autopilot group. Also, make sure that only one profile is available to your device.
Testing the Intune Hybrid AD joined
As mentioned earlier, the computer must be connected to the on-prem network and can access the domain before we initiate a reset.
After completing the OOBE section, we can see under Intune/Devices that this specific device as the Device Configuration – Domain join with a state of Succeeded!
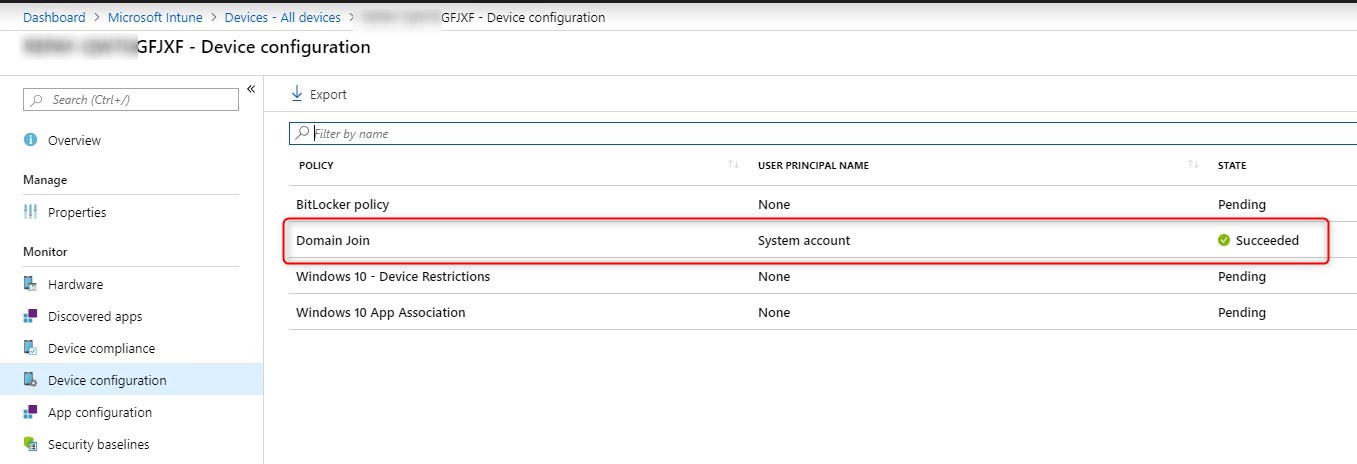
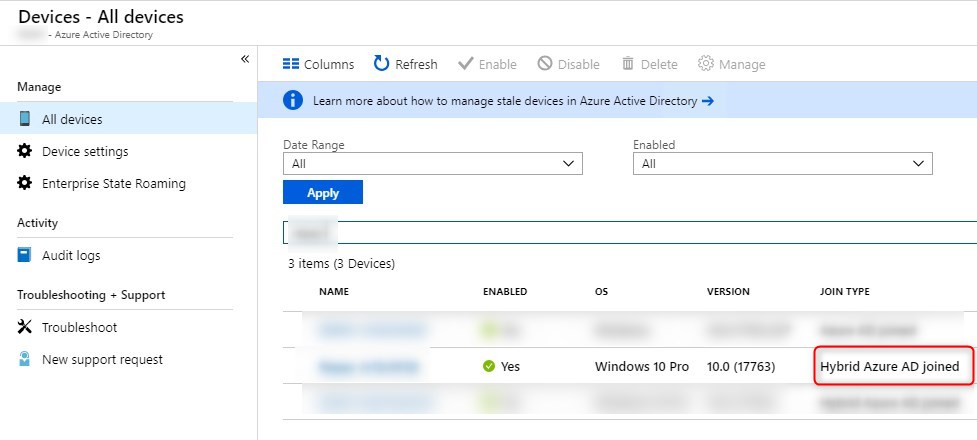
Under Azure AD/Devices our new computer is now Hybrid Azure AD joined instead of simply Azure AD joined!

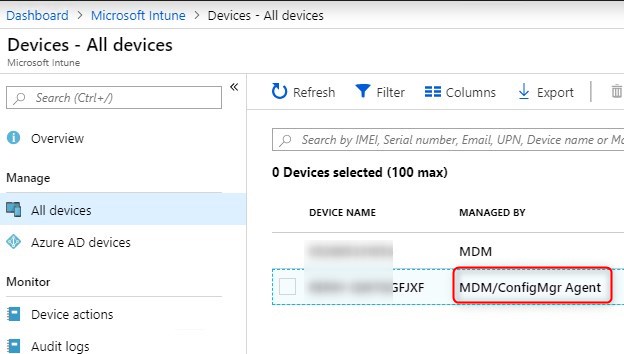
Because SCCM is also on our domain, it automatically push out the SCCM agent. This means that the Co-Management must be up and running in order to fully complete the process from Intune, for example, to push default applications.
Bottom line notes
Here’s a few observations while testing the Hybrid AD join.
Double computer with the same name
While we haven’t found a clear statement on this, it seems normal that 2 computers with the same name are store in Azure AD.

BitLocker recovery keys
In our previous post, we stated that the recovery keys are stored under the Intune device/ Monitor/Recovery Keys.
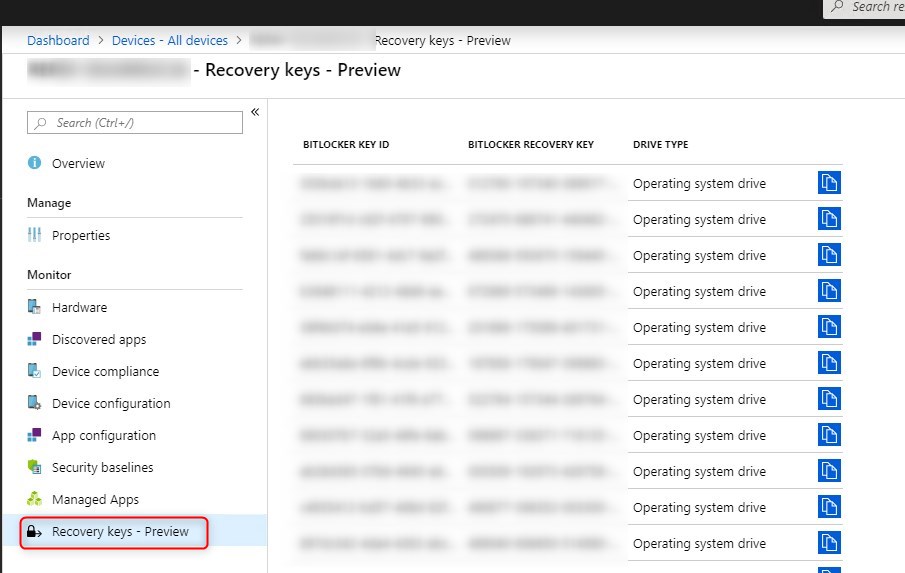
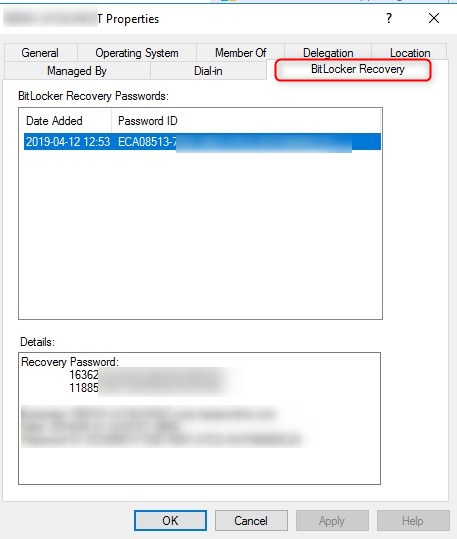
When doing the Hybrid AD join, this isn’t the case. The BitLocker recovery key will be stored on the on-prem AD object. Is this a feature? a bug? We don’t know…
For more details about Hybrid AD with Autopilot, see Microsoft docs
[ratings]




daniel
01.21.2020 AT 02:22 PMDavid Summers
12.12.2019 AT 10:56 AMScott
07.30.2019 AT 09:17 AMAmit Bahuguna
07.14.2019 AT 01:43 PMAlex
04.24.2019 AT 08:38 AMJonathan Lefebvre
04.24.2019 AT 09:24 AMSteve
04.23.2020 AT 06:30 AM