
There may come a time in your SCCM administration days where some special needs may arise. I had such a case recently. Long story short, in our company, we have a windows domain where no trusts exist with our primary domain where SCCM resides. The problem with that is since there is no visibility in between the two domains, how do you get the servers or workstations managed? This post will describe Installing SCCM DP MP SUP in Untrusted Domain.
- Default settings?
- Such as a default Windows Update setup. Nah, I like to have some degree of control over who does what and when.
- Install a standalone WSUS server?
- Yes, this is a viable option where you can set and forget it. But it probably doesn’t fit with your SCCM setup.
- Install a completely separate SCCM infrastructure?
- Sure this works. But… Do you like doubling all your work? I surely don’t.
- Install a DP in that zone?
- This does indeed work. But… If you want to don’t want agents poking back to your internal primary site, you will need to add components to this. Such as? A Management Point. What if it is a zone with no internet access? How do you get your patches? Install a Software Update Point as a downstream server to your internal WSUS.
Requirements for a DP/MP/SUP in an untrusted domain
The first step, you will need to go over the supported configurations for Configuration Manager. Assuming that you are going for a regular setup such as a Windows 2012/2016 server, there is one thing you need to make sure you have.
All System Center 2012 Configuration Manager site systems must be members of a supported Active Directory domain. This requirement includes site systems that support Internet-based client management in a perimeter network (also known as DMZ, demilitarized zone, and screened subnet).
So, if you are planning any SCCM role type, you will need a functioning Active Directory in that zone. If not, make sure you have that before coming back here.
Next, let’s look at the required firewall ports we need. You will most likely need to have these opened by your firewall administrators. Microsoft has done quite a good job in documenting pretty much all firewall ports that are required for SCCM to work. However, since you are here, I’m guessing you are looking for the TL;DR version.
I am assuming here you are using the default ports.
Management Point <-> Site Server
These ports are required for your new management point to “talk” with your primary site.
| Description | UDP | TCP |
| RPC Endpoint Mapper | – | 135 |
| RPC | – | Dynamic ports |
| SMB | – | 445 |
Management Point -> SQL Server
Your management point will also need to be able to communicate with your SQL database. This could either be the same IP as your primary site if both are residing on the same windows server, or the IP of the dedicated SQL server.
| Description | UDP | TCP |
| SQL over TCP | – | 1433 |
Notice that I didn’t include Client -> Management Point. This is because the clients are within the same domain as the new MP you are installing so unless your windows firewall is enabled on the new MP, it won’t be needed.
Site Server -> Distribution Point
This one is essentially used to distribute packages to your DP, amongst other things.
| Description | UDP | TCP |
| SMB | – | 445 |
| RPC Endpoint Mapper | 135 | 135 |
| RPC | – | Dynamic ports |
Site Server <-> Software Update Point
| Description | UDP | TCP |
| SMB | – | 445 |
| HTTP | – | 80 or 8530 |
| HTTPS | – | 443 or 8531 |
This one is for your site server to communicate with your SUP. Note that you will need either HTTP or HTTPS. You won’t need both. Not sure? One very easy way to find out is by opening the WUAHandler log on any one of your SCCM clients. Look for the keyword:”Existing WUA Managed server”

As you can see, I’m currently set in HTTP. So I’ll keep going that way.
Software Update Point <-> Upstream WSUS Server
| Description | UDP | TCP |
| HTTP | – | 80 or 8530 |
| HTTPS | – | 443 or 8531 |
You will also need to have some sort of name resolution to your primary site and SQL server. This could either be via DNS with TCP/UDP 53 opened, via host file, etc.
So that’s pretty much it for firewall requirements.
Next? Actual permissions. Obviously, in a typical setup, your primary site server is usually a local windows administrator of the server itself where it’s installed. However, in this case, the primary site server can’t be a local administrator of the new management point since there is no trust. Not a problem. Create a service account on the destination domain (which will essentially be a Network Access Account for that domain) and put it as a local administrator of your new MP.
What about SQL? Well, in my primary domain, we already have a NAA that does all that work. Let’s keep it. I’ll show you how to set it up when we do the installation.
One last piece of information as this one caused us quite a bit of a headache. If your domain has anything above the normal set of hardening rules, you could have a problem. Make sure that your NTLM settings are set up to allow authentication. The traffic will be initiated by your Primary Site -> New MP -> DC to authenticate. If you are denying NTLM traffic, you will most likely need to setup an exception to allow authentication for that new MP.
Installing SCCM DP MP SUP Untrusted Domain – Preparing the Windows Server
Since this will be a DP and SUP, we will need to install WSUS and IIS on the server. Fire up your Powershell console. Head over to Requirements and Recommendations before installing SCCM 2012R2 in the Roles and features section.
Go ahead… I will wait! ?
Ok, so that’s done. Now let’s install WSUS.
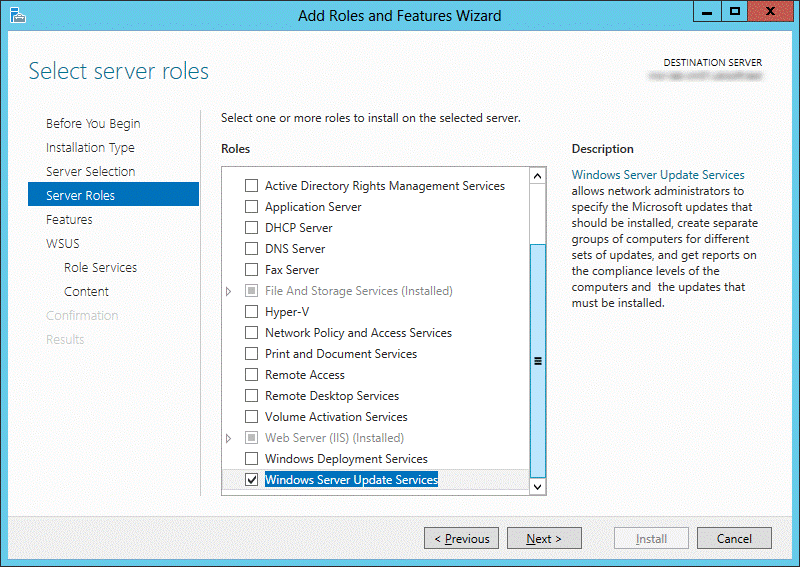
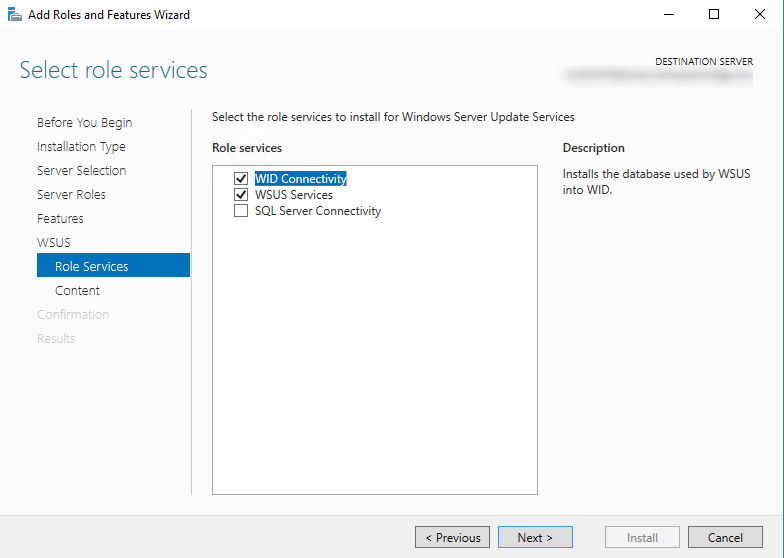
- Select WSUS Services and WID, click Next
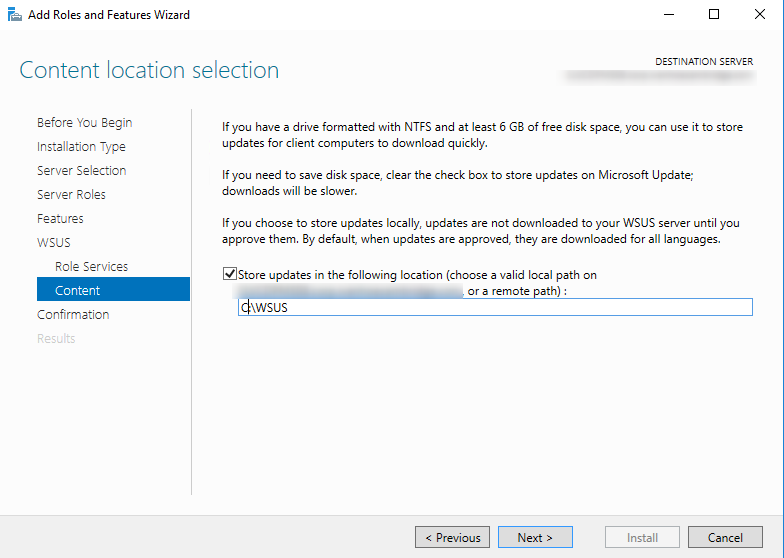
- Check Store updates, and set your WSUS location
- Press Install
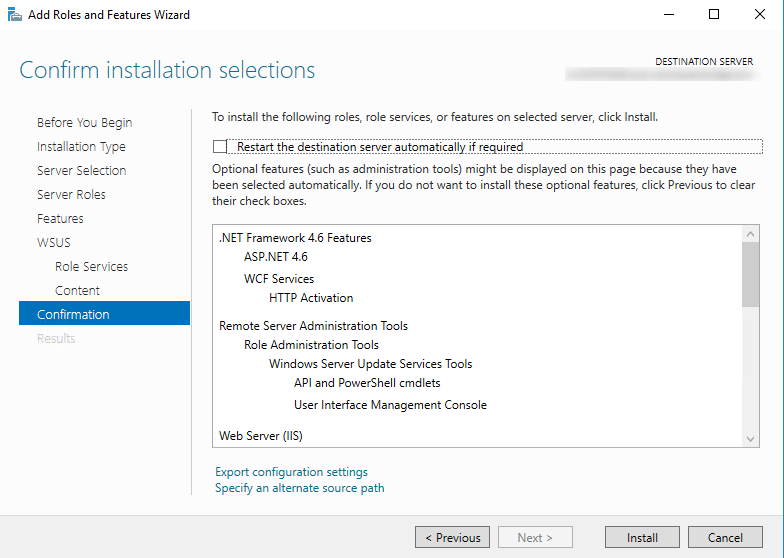
Now, as you probably know our external SUP will need to communicate with the upstream server. Let’s go ahead and set that up.
Launch your WSUS console which will most likely prompt you to complete the installation.
- Press Run if prompted.
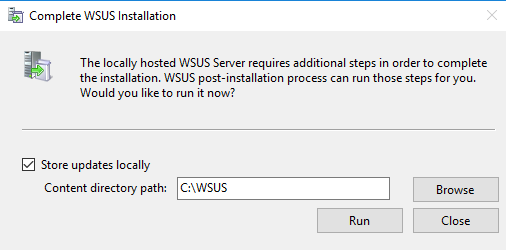
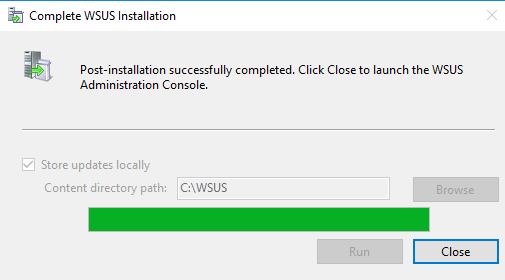
- Press Close when complete.
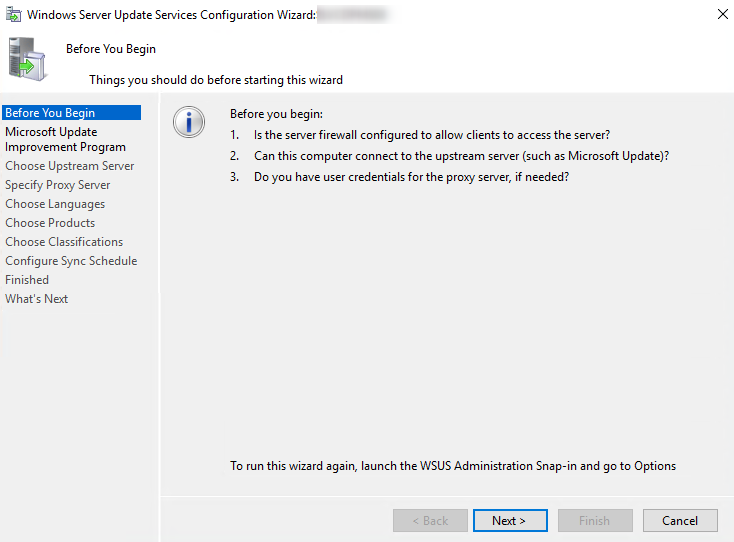
- When the WSUS Configuration Wizard starts, click Cancel
- Head over to Options and choose Update Source and Proxy Server

- Enter the Server Name of the Upstream server you will be using. Press Ok.
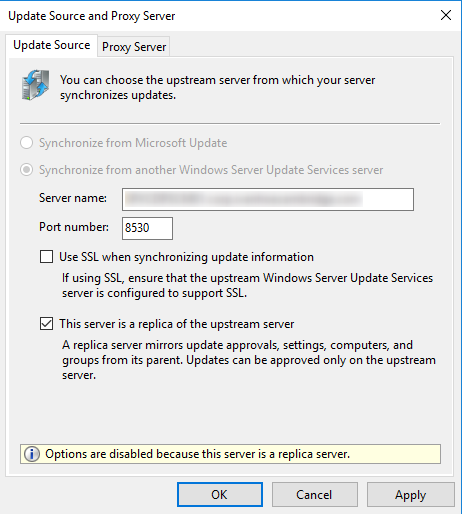
Installation of the SCCM roles
As stated in the documentation, by default, communication between the site server and site systems is bi-directional. The site server initiates communication to configure the site system, and then most site systems connect back to the site server to send status information. Reporting service points and distribution points do not send status information. If you select Require the site server to initiate connections to this site system on the site system properties, after the site system is installed, it will not initiate communication to the site server. Instead, the site server initiates the connections and uses the Site System Installation Account for authentication to the site system server.
How do we implement this? Here’s how.
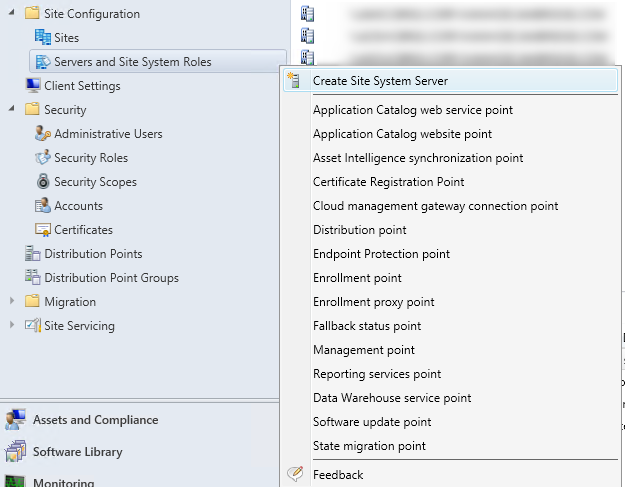
- Start by browsing to Administration – Site Configuration – right click Servers and Site System Roles and choose Create Site System Server
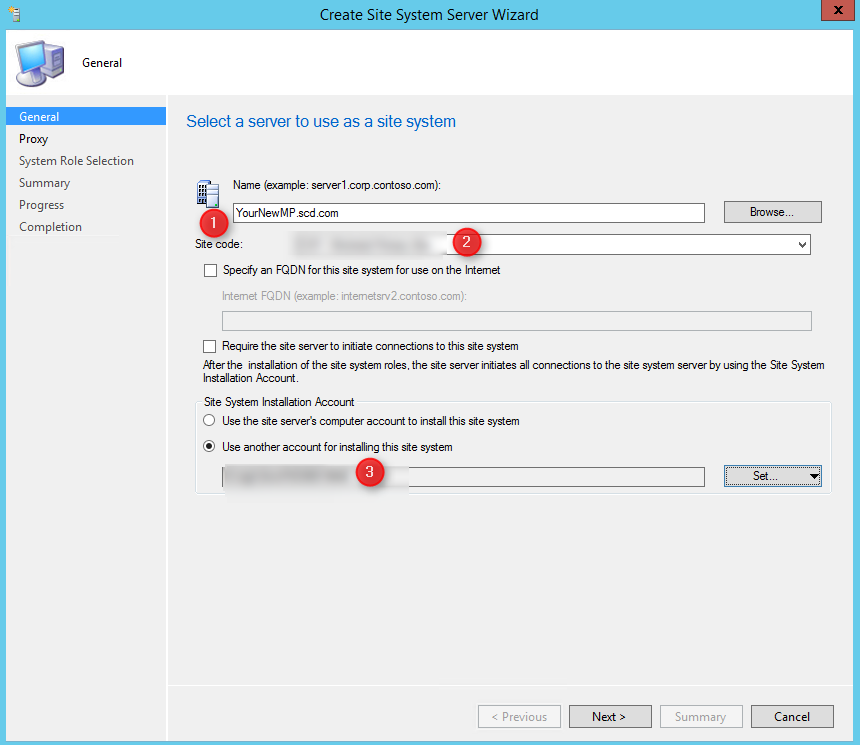
- Next, enter the FQDN of your new MP (1). Enter the Site Code (2) and finally instead of using the Site Server Account to install, since this server is in our untrusted domain, give him the service account which is local administrator of the server (3)
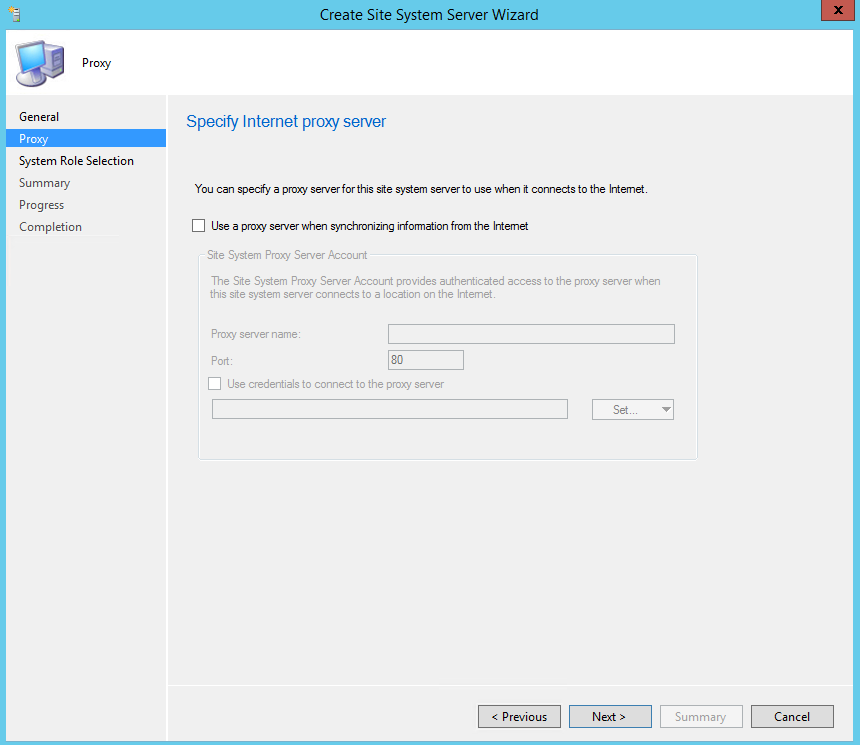
- In the proxy tab, leave the options default, press Next
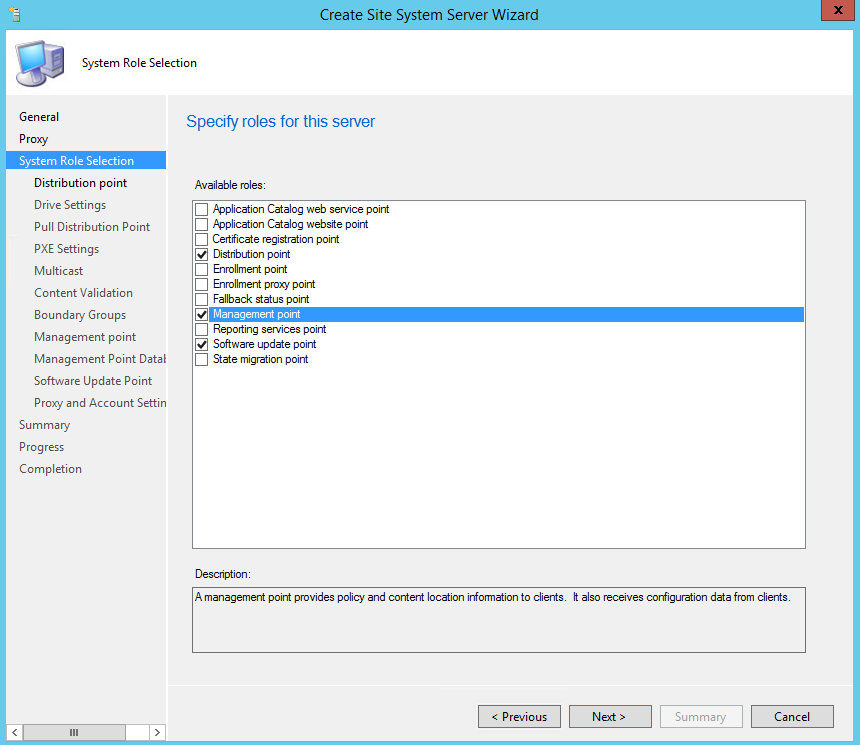
- On the System Role Selection, choose Distribution Point, Management Point, and Software Update Point
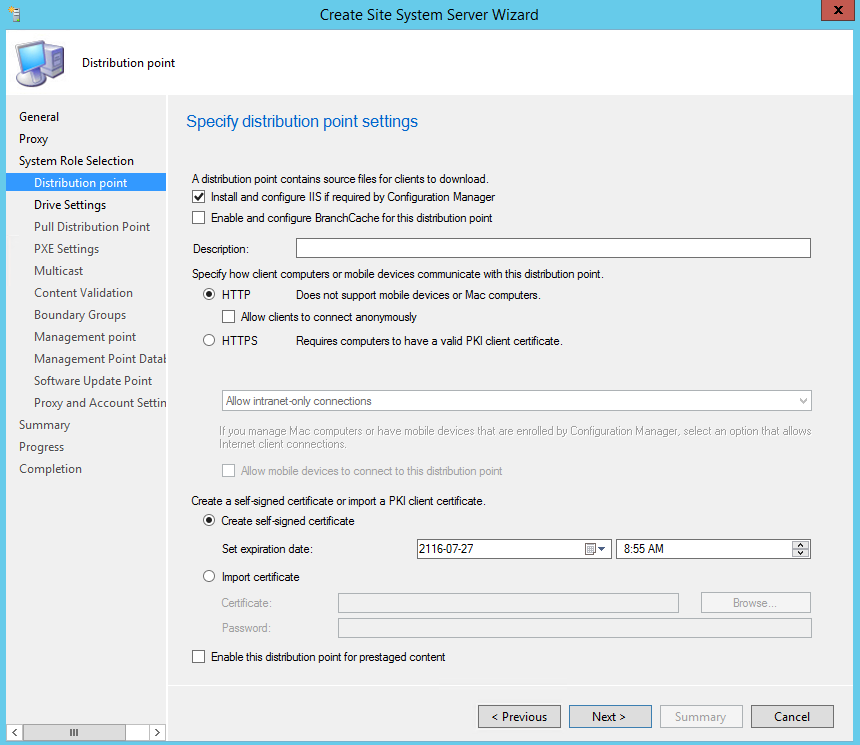
- On the Distribution point tab, check Install and configure IIS if required by Configuration Manager, press Next
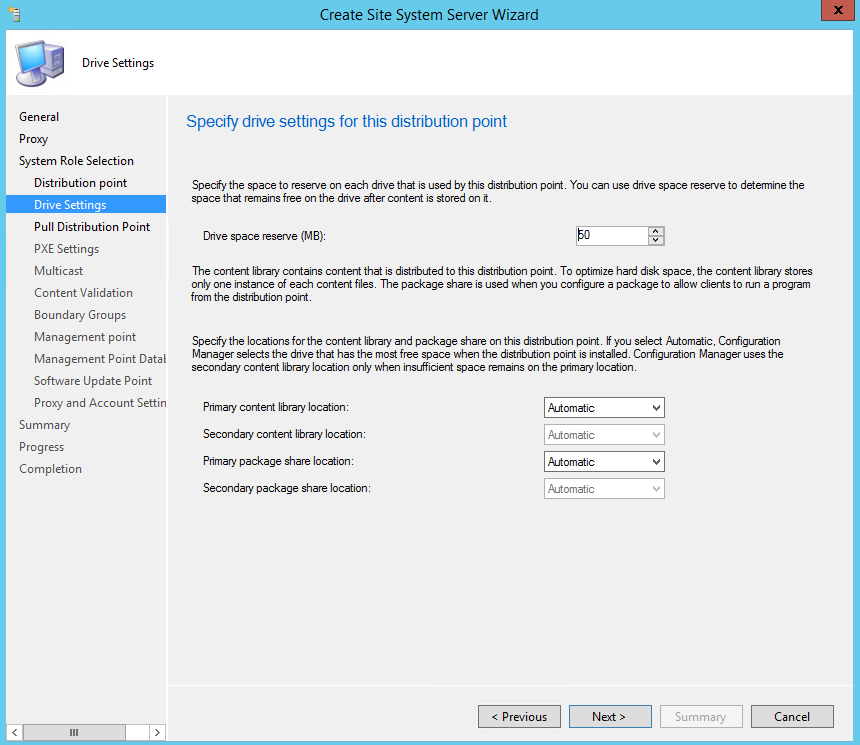
- On the Drive Settings, set your values as per your environment. Press Next
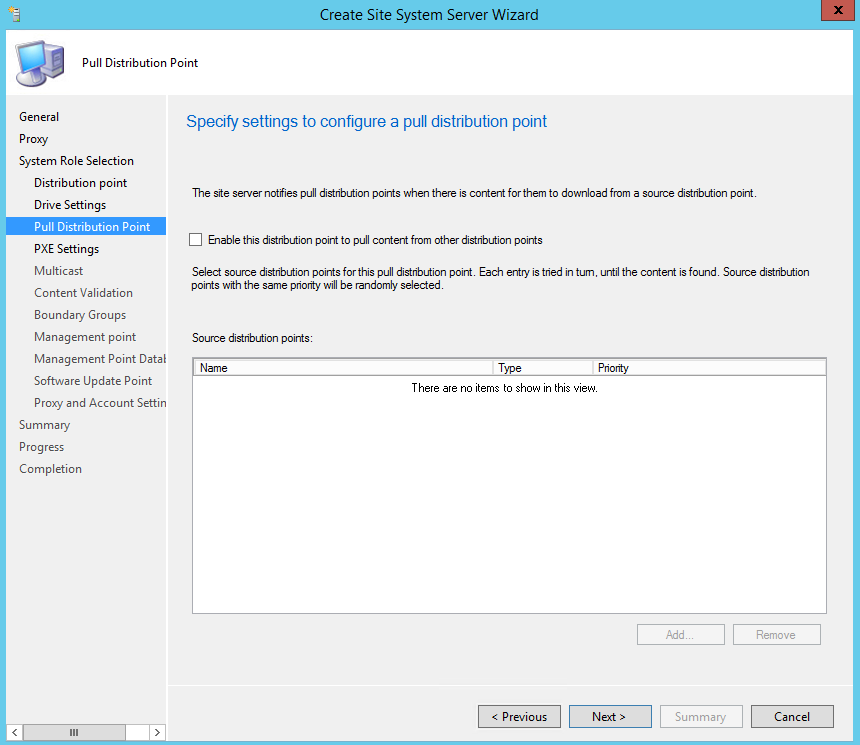
- On the Pull Distribution Point tab, press Next
- On the PXE settings, we will just press Next since we won’t be doing any PXE in that environment
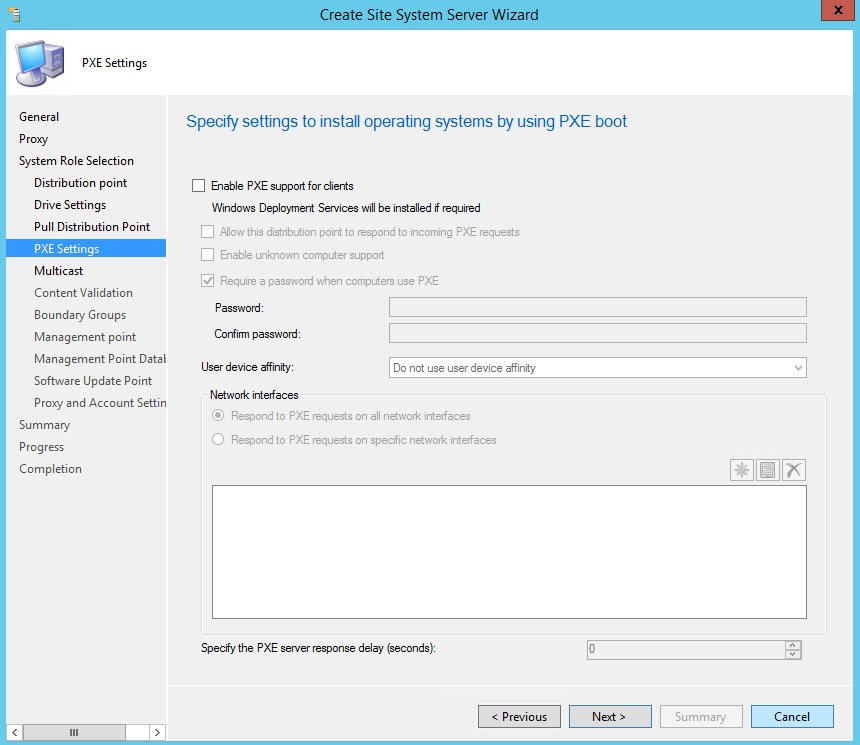
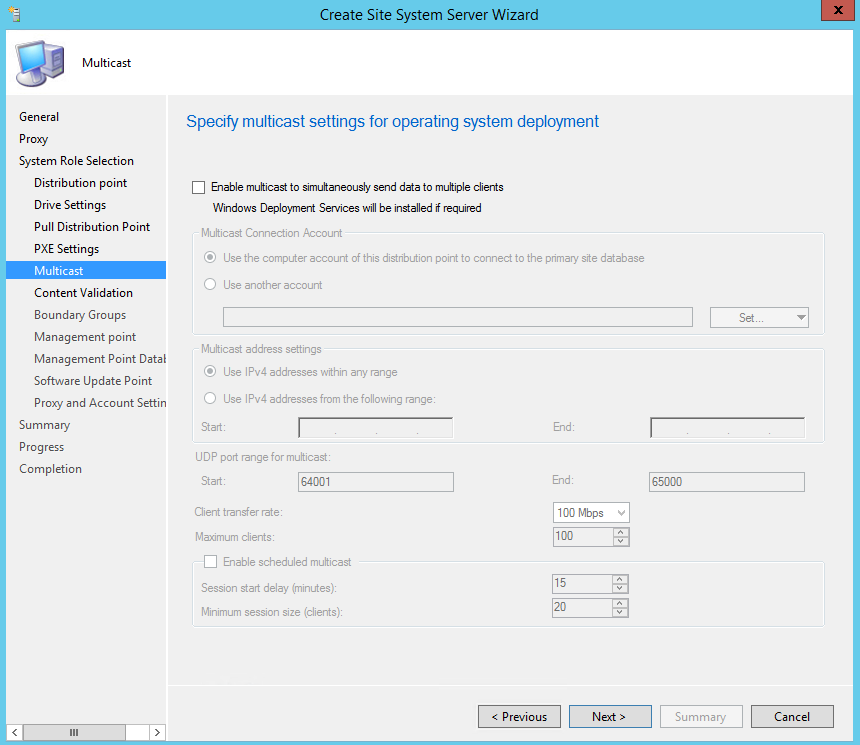
- On the Multicast tab, press Next

- On the Content Validation tab, set your schedule and press Next
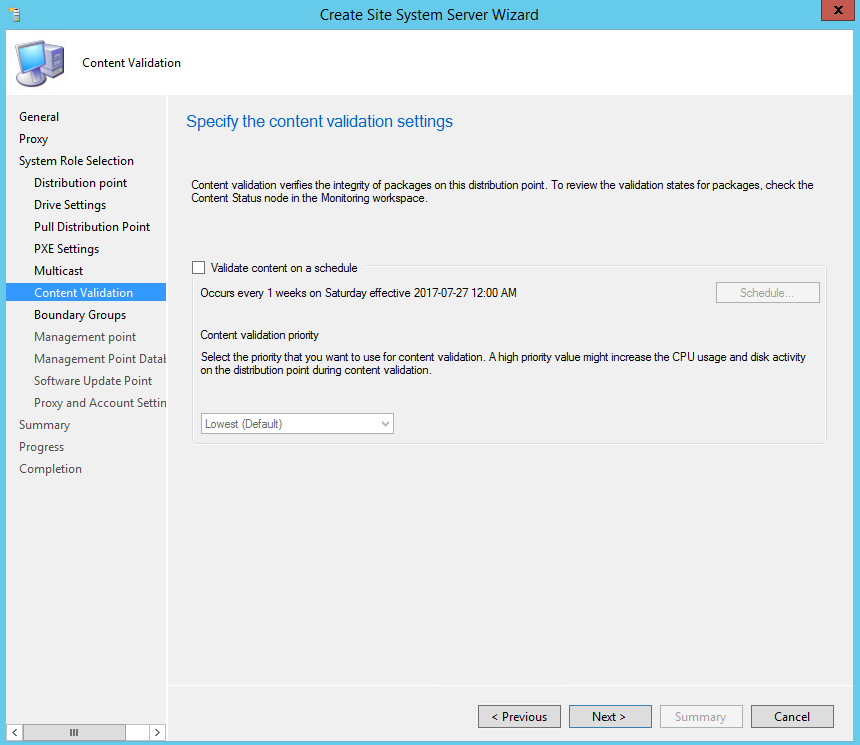
- On the Boundary Groups tab, set your boundaries. Press Next
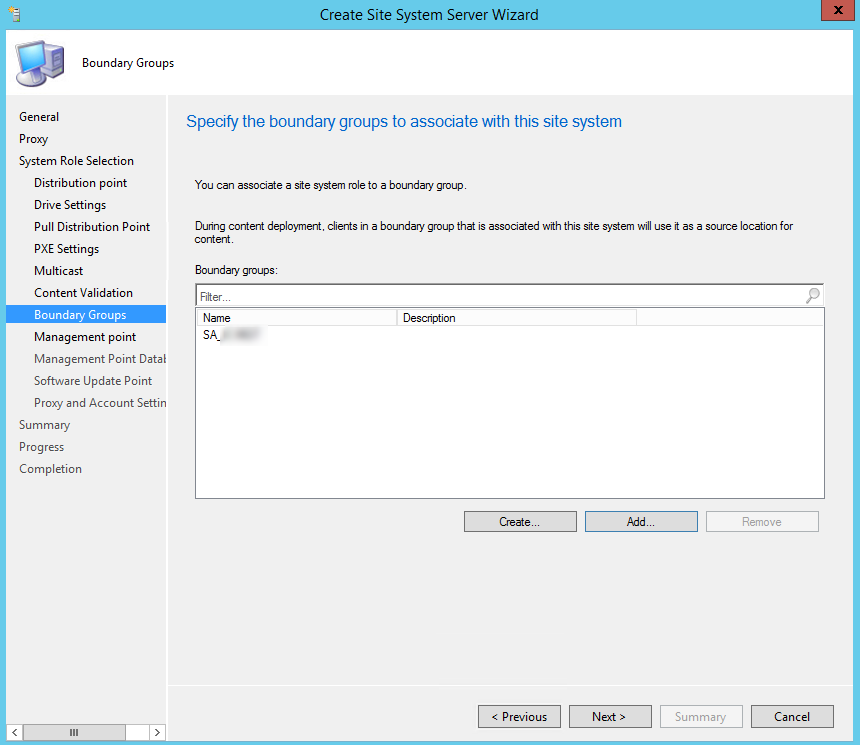
- On the Management Point tab, select HTTP. Press Next
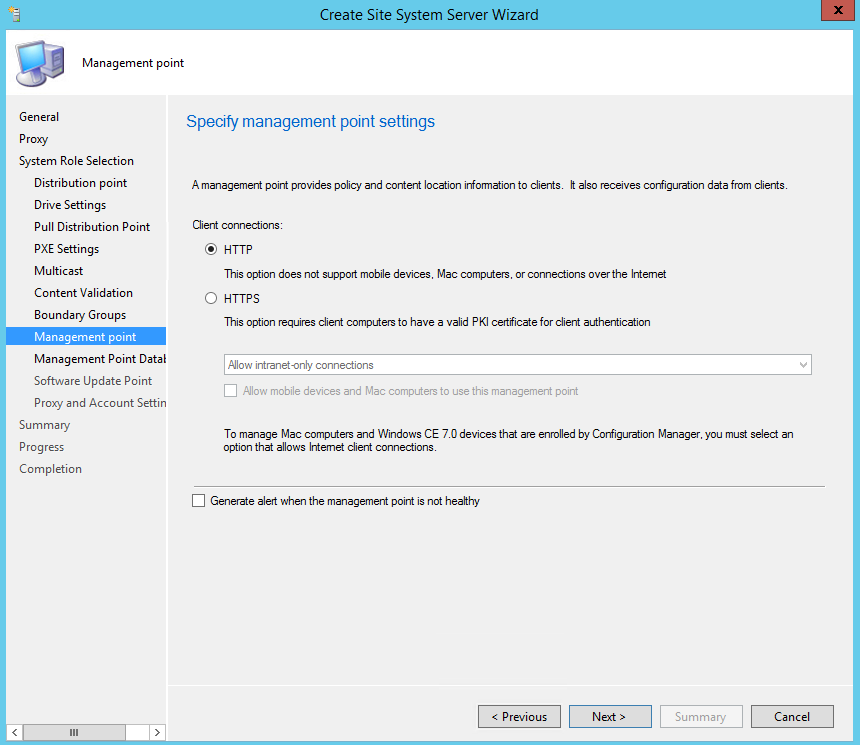
- On the Management Point database, under connection account, press Set and choose your internal NAA account. Press Next
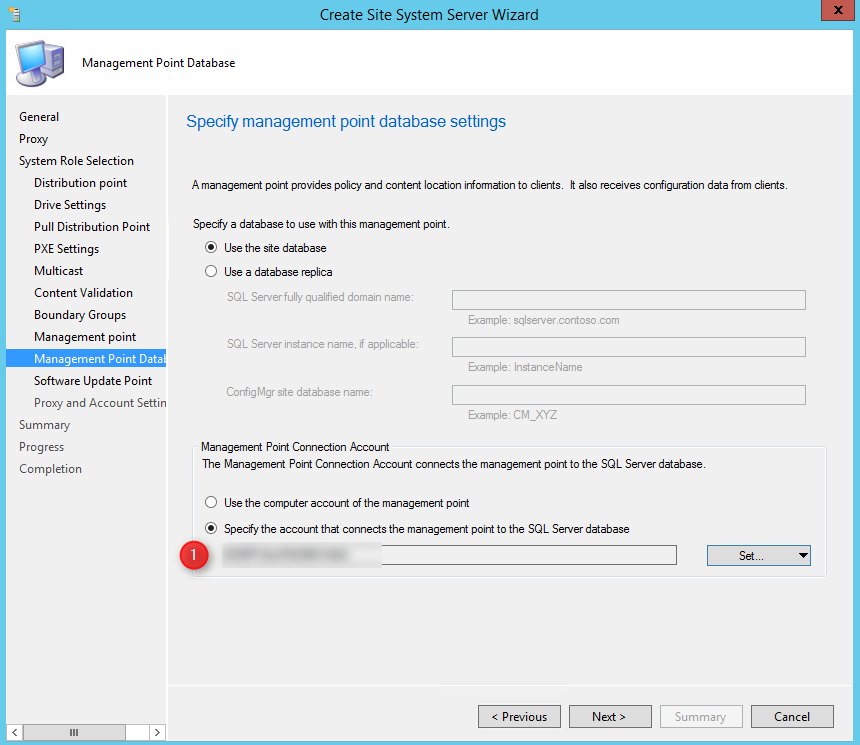
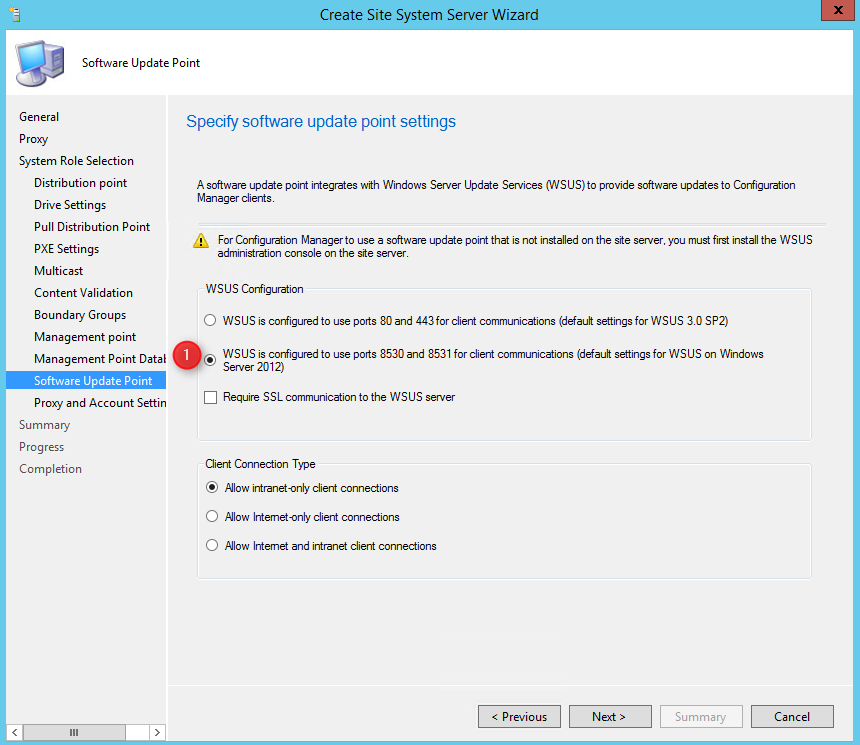
- On the Software Update Point tab, if you are setting up your server on 2012 or 2016, set your option to 8530 or 8531 and press Next.
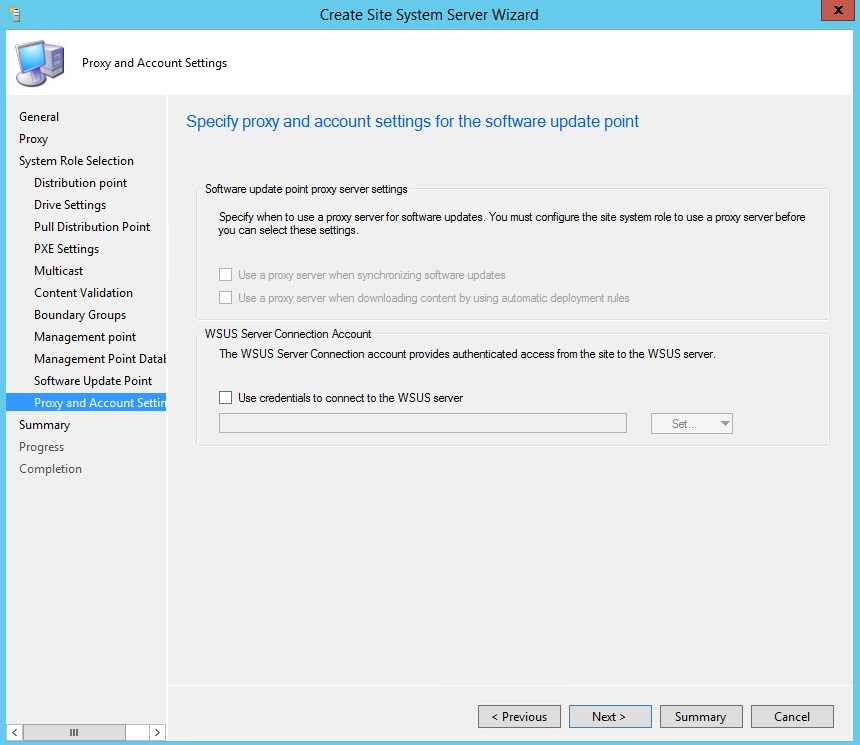
- Finally, on the Proxy and Account settings, press Next
- Complete the wizard
And if all went well, you should now have a completely functional SCCM infrastructure in your no-trust active directory. As you may have noticed, the SCCM installation portion of this guide stays mostly the same. What changes the most is the requirement part that is tweaked a bit and the accounts we used.
Have you setup any similar infrastructure? If so, feel free to share how you went about to do it.
VERIFICATION
You can verify the installation in the following logs:
ConfigMgrInstallationPath\Logs\mpMSI.log – Records details of about the management point installation
ConfigMgrInstallationPath\Logs\MPSetup.log.log – Records the management point installation wrapper process
ConfigMgrSetup\Logs\SUPSetup.log -Provides information about the software update point installation. When the software update point installation completes, Installation was successful is written to this log file
ConfigMgrSetup\Logs\WCM.log – Provides information about the software update point configuration and connecting to the WSUS server for subscribed update categories, classifications, and languages
ConfigMgrSetup\Logs\WSUSCtrl.log – Provides information about the configuration, database connectivity, and health of the WSUS server for the site
ConfigMgrSetup\Logs\Wsyncmgr.log – Provides information about the software updates synchronization process


svariell
05.11.2022 AT 10:48 AMbryan
09.01.2019 AT 11:27 PMRaj
04.24.2019 AT 02:33 PMRashedul
10.10.2018 AT 06:24 PMpoker online77
09.13.2018 AT 07:16 AMAdam
04.04.2018 AT 04:27 PMStephane Faubert
04.06.2018 AT 07:34 AMGihan
03.07.2018 AT 03:04 AMChristopher Moriarty
08.15.2017 AT 01:40 PMAlan Davis
08.01.2017 AT 07:39 AMPaul Wetter
07.27.2017 AT 09:07 PMStephane Faubert
07.28.2017 AT 03:48 PMJason Sandys
07.27.2017 AT 06:02 PMRoy
01.07.2019 AT 07:23 AMStephane Faubert
07.27.2017 AT 08:24 PM