
One of the challenges faced by workstation administrators, is to manage the local administrator account in large environment. One of the options was to use Group Policy Preferences, but that was before KB2962486 removed the possibility to set password using Group Policy Preferences. Since then, Microsoft as come up with a solution : Local Administrator Password Solution (LAPS).
Here’s the benefits of using LAPS :
- Unique password for local administrator per computer
- Password available from Active Directory, if needed to use local administrator account
- Remotly change the local administrator password
- Ability to use a custom administrator account
Limitation :
- Only the local administrator account can be managed or a custom local account as administrator.
In this post, we will detail how to install Local Administrator Password Solution (LAPS) to manage the local administrator password on a Windows 10 computer.
High-level steps to install Local Administrator Password Solution (LAPS)
- On management computers
- Install Management tools
- AD preparation
- Schema extension
- Edit permissions (ACL)
- Group policy configuration
- GP CSE (Group Policy Client Side Extension) Installation via MSI installation
- Targetting clients to be managed
Pre-requisite
- Download LAPS here
- Download both x86 and x64 version as this MSI will be deployed on clients to be managed
- Detailed documentation is also available from that link
- Active Directory requirement
- Windows Server 2003 SP1 and above
- Minimum OS requirement
- Vista with current SP and above
- Windows Server 2003 with current SP and above
- .NET Framework 4.0
- PowerShell 2.0 and above
Management Computer
First step is to install the management tools for LAPS on a computer.
- Execute LAPS.x64.msi from the downloaded files
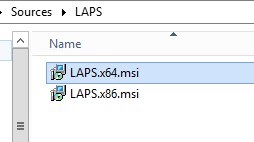
- Click Next
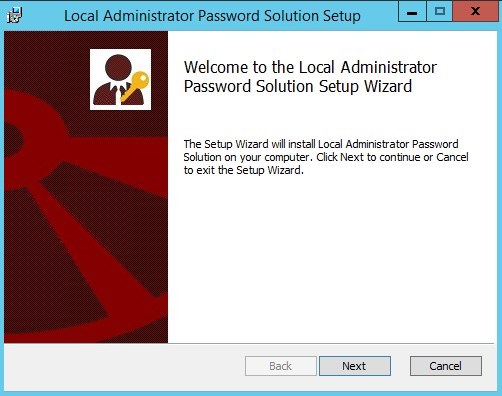
- Accept Terms and click Next
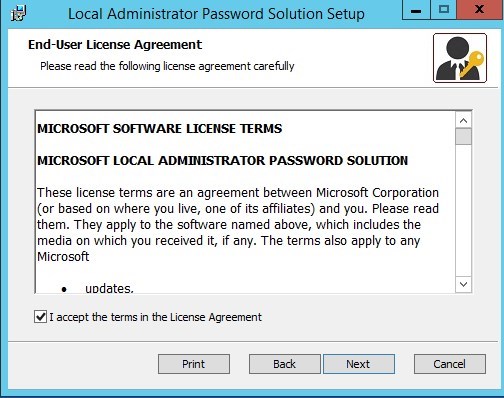
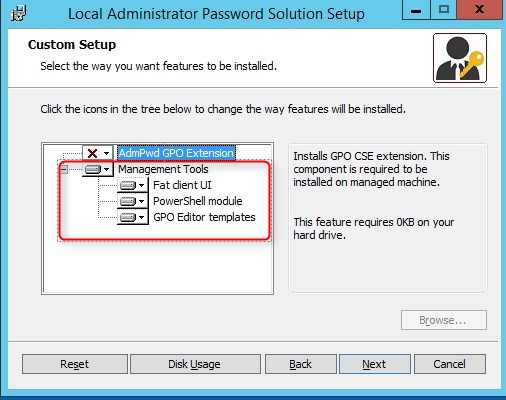
- Install all the Management Tools
- If you plan to manage this computer, you can also install the AdmPwd GPO Extension
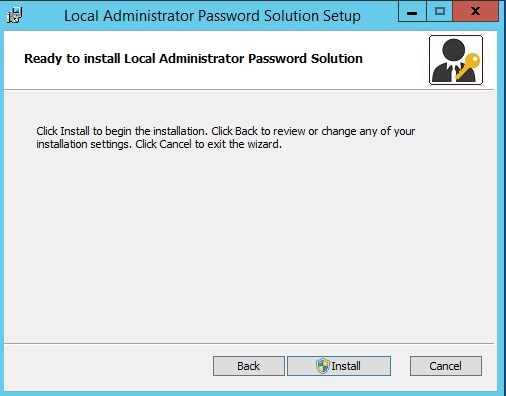
- Click Install
- Click Finish
- In the start Menu, LAPS UI is available

Active Directory preparation
Preparing the Active Directory for LAPS is a two steps configuration :
- Schema extension
- Edit permissions (ACL)
Schema Extension
The Active Directory Schema needs to be extended to add two new attributes that store :
- Passwords of the managed local Administrator account for each computer
- Timestamp of password expiration
Both attributes are added to the may-contain attribute set of the computer class.
ms-Mcs-AdmPwd – Stores the password in clear text
ms-Mcs-AdmPwdExpirationTime – Stores the time to reset the password
Update the Schema
- Open up an Administrative PowerShell window and use this command to import the module :
[su_box title=”Command” style=”glass” title_color=”#F0F0F0″]Import-module AdmPwd.PS[/su_box]

- To update the Schema, use this command :
[su_box title=”Command” style=”glass” title_color=”#F0F0F0″]Update-AdmPwdADSchema[/su_box]

Edit permissions
Active Directory permissions should be modified for the following reasons and needs :
- Remove the default permission
- Add Computers rights to update the password and expiration (write)
- Allow specific user or group to read the password
- Allow specific user or group to reset (write) the password for a computer
All of those needs are manageable on specific OU and child OU. This will be different for each organisation needs.
For an easy setup, use the PowerShell commands from the module AdmPwd.ps as it will do exactly what we need.
Remove default permission
By default, read permission could be available to many users trough the all extended rights on a Specific OU. This should be uncheck if needed :
- Open ADSIEdit
- Right Click on the OU that contains the computer accounts that you are installing this solution on and select Properties
- Click the Security tab
- Click Advanced
- Select the Group(s) or User(s) that you don’t want to be able to read the password and then click Edit
- Uncheck All extended rights
Allow computers to update password and expiration time
The Write permission on the ms-Mcs-AdmPwdExpirationTime and ms-Mcs-AdmPwd attributes of all computer accounts has to be added to the SELF built-in account. This is required so the machine can update the password and expiration timestamp of its own managed local Administrator password. This is managed per OU.
- Run the following command to add the rights to SELF built-in account to a specific OU
[su_box title=”Command” style=”glass” title_color=”#F0F0F0″]Set-AdmPwdComputerSelfPermission -OrgUnit “<DistinguishedName of OU>”[/su_box]

Allow specific user or group to read password
To allow users or groups to read the stored password of the managed local administrator account, the Control_access permission must be given to ms-Mcs-AdmPwd attribute.
- To do so, run the following Powershell command line :
[su_box title=”Command” style=”glass” title_color=”#F0F0F0″]Set-AdmPwdReadPasswordPermission -OrgUnit “<name of the OU to delegate permissions>” -AllowedPrincipals <users or groups>[/su_box]

Allow specific user or group to reset password
To allow users or groups to reset the password for a managed local administrator account, the write permission must be added on ms-Mcs-AdmPwdExpirationTime .
- To do so, run the following powershell command line:
[su_box title=”Command” style=”glass” title_color=”#F0F0F0″]Set-AdmPwdResetPasswordPermission -OrgUnit “<name of the OU to delegate permissions>” -AllowedPrincipals <users or groups>[/su_box]

Group Policy
LAPS is manageable by GPO using a new template.
The templates are located on the management computer :
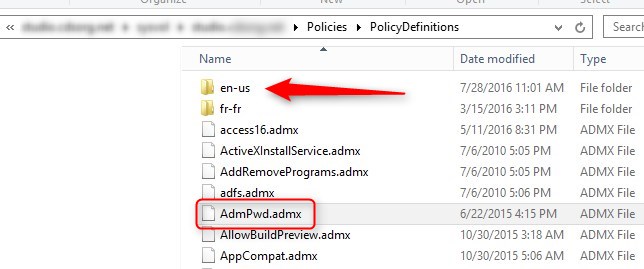
- %WINDIR%\PolicyDefinitions\AdmPwd.admx
- %WINDIR%\PolicyDefinitions\en-US\AdmPwd.adml
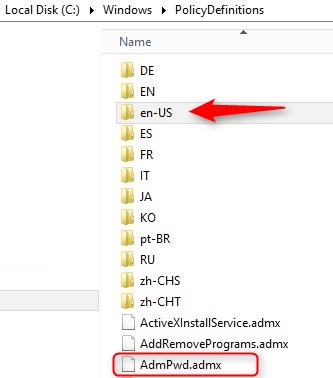
If you use the Central Store, you need to copy both files to \\domain\Sysvol\Policies\PolicyDefinition
The settings are located under Computer Configuration\Administrative Templates\LAPS
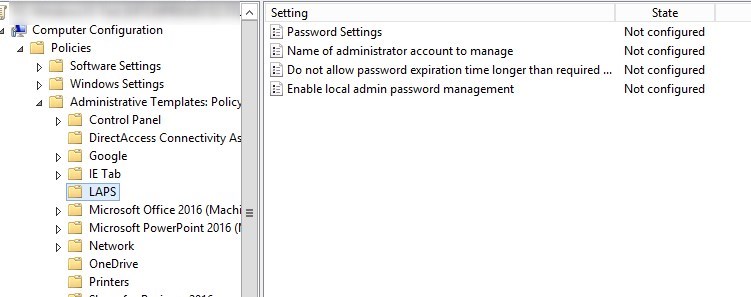
Available settings :
- Password Settings
- Complexity
- Lenght
- Age(days)
- Name of the administrator account to manage
- Do not configure if you use the default name
- Do not allow password expiration time longer than required by policy
- Enable local admin password management
- this must be enabled in order to manage the local administrator password.
[su_note note_color=”#f0f0f0″ radius=”8″]Configure and apply GPO just as any other GPO[/su_note]
Clients to be managed
To manage a client, we must install LAPS on it by using the same MSI files downloaded in the prerequisite section :
- Create a standard package in SCCM

- Add a program to that package with the following command line :
[su_box title=”Command” style=”glass” title_color=”#F0F0F0″]msiexec /i LAPS.x64.msi /quiet[/su_box]

- Deploy the package to the client you want to manage
- Package can also be deployed as part of Task sequence
How to read and reset passwords
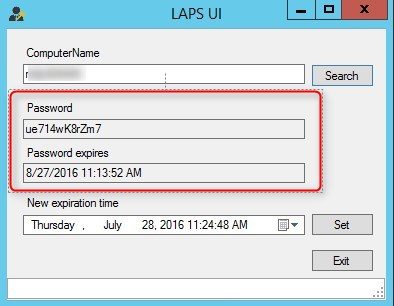
- Start LAPS UI from the Start menu

- Search for computer name
- Password is available with expire date and time
- To reset the password, select a new Expiration time and click Set
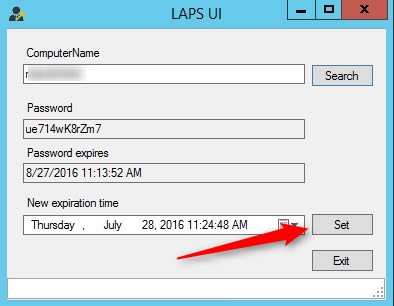
- Status of the request is displayed at the bottom
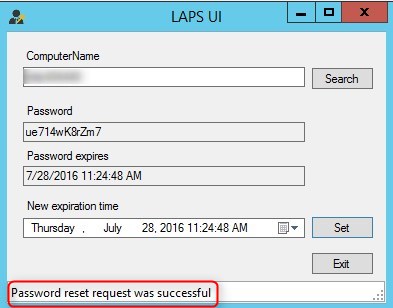
- Hit search after a minute or two, and a new password with expiration time will be available
Source : documentation of LAPS
Bonus – Add Laps to SCCM Console
Thanks to Mike -S- for this awesome LAPS Extension for SCCM console and it works just fine with Current branch (tested with 1602 so far).

Leave your LAPS experience in the comment section.


Hakim
07.31.2018 AT 12:15 AMJaime Arellano
10.27.2016 AT 04:25 PM