

How to configure SCCM Software Update point in SSL
Contributor of System Center Dudes. Based in Montreal, Canada, Senior Microsoft SCCM consultant, working in the industry for more than 10 years. He developed a strong knowledge of SCCM and MDT to build automated OS deployment solution for clients, managed large and complexe environment, including Point of Sale (POS) related projects.

Jonathan Lefebvre
Table of Content


Share


Get the latest insights and exclusive content delivered to your inbox
While the requirements of running SCCM/MEMCM in full SSL may be less required theses days with the Cloud Management Gateway being so effective with remote computers management, running the WSUS – Software Update point in SSL is likely to show up as a requirement whenever doing a security audit of your environment.
In this post, we will detail the required steps, from the certificate template creation to the client validation on enabling SSL for WSUS and the SCCM Software Update Point.
Enabling SSL on WSUS isn’t required when implementing a Cloud Management Gateway.
Using Internet-based client management would require such configuration to support Patch management while computer outside of the organization network.
This post focus only on configuring WSUS / Software Update point for SSL communication.
Requirements
- Any SCCM version
- Communication on port 8531 must be open on your Firewall
This post assume the the root CA is trusted by clients. This will be required since the certificate used should come from the same trusted source.
Certificate template Creation
The first step to enable SSL communication is to create a server certificate for your server.
- On the server that is running the Certification Authority, open the Certification Authority console (certsrv.mmc), right-click Certificate Templates and select Manage
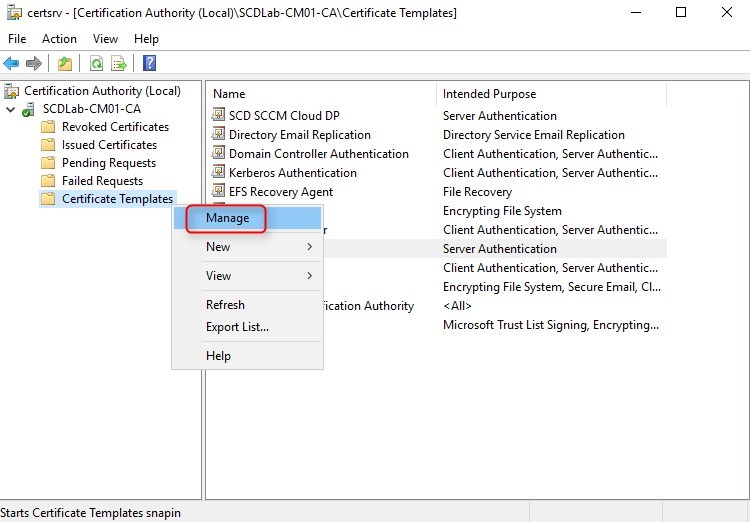
- The Certificate Templates management console opens
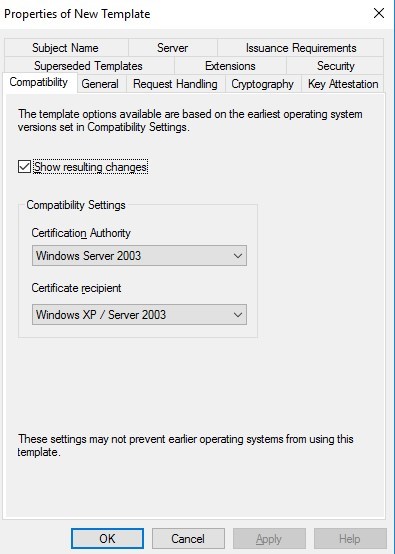
- Right-click the Web Server template and then select Duplicate Template

- In the Duplicate Template dialog box, ensure that Windows 2003 Server, Enterprise Edition is selected in Certification Authority
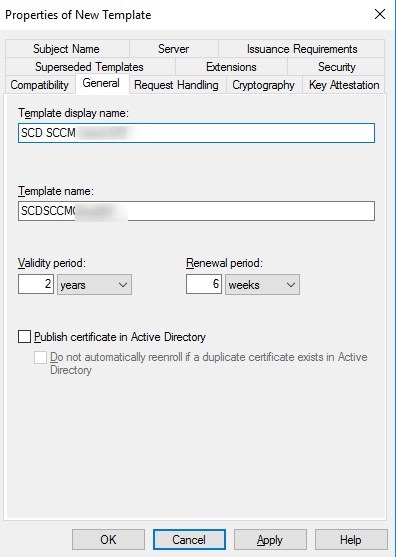
- In the General tab, enter a template name, like ConfigMgr Web Server
- Change the validity period if needed. As a best-practice, the longer the validity period, the less secure is your certificate
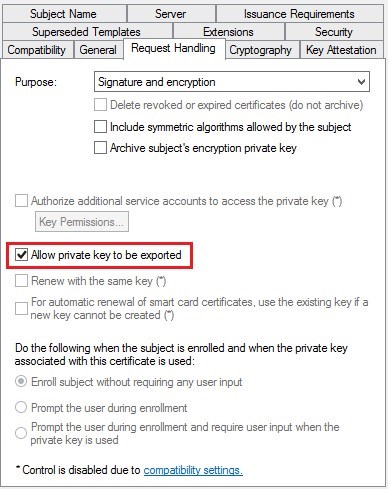
- In the Request Handling tab, select Allow private key to be exported
- While not mandatory, this could become useful depending on the environment
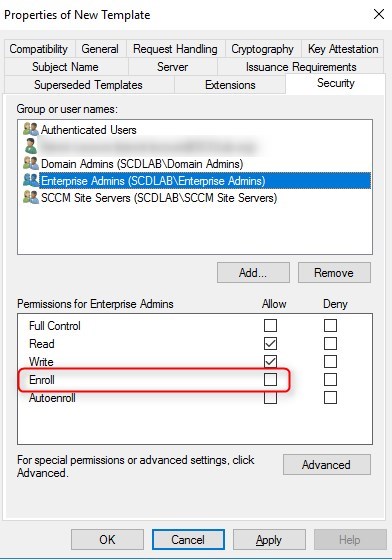
- In the Security tab, remove the Enroll permission from the Enterprise Admins security group
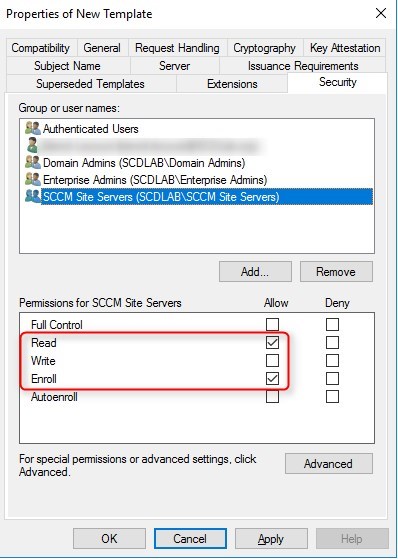
- Choose Add, enter a group that has the WSUS/SUP server in. It can be an existing SCCM Server group. Then choose OK
- Select the Enroll and Read permission for this group
- Choose OK, close Certificate Templates Console
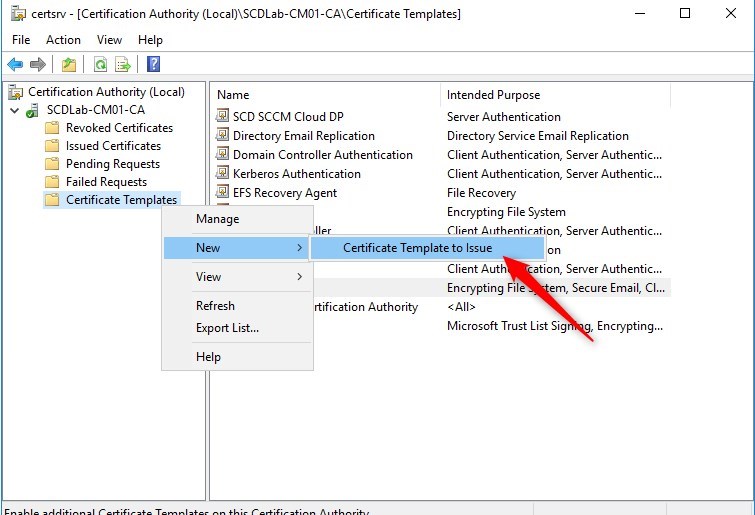
- Back in the Certification Authority (certsrv.mmc) console, right-click Certificate Templates, select New / Certificate Template to Issue
Request certificate
The following must be done in the WSUS/SUP server. No need for standalone server, if role is installed on the primary server, it is fine.
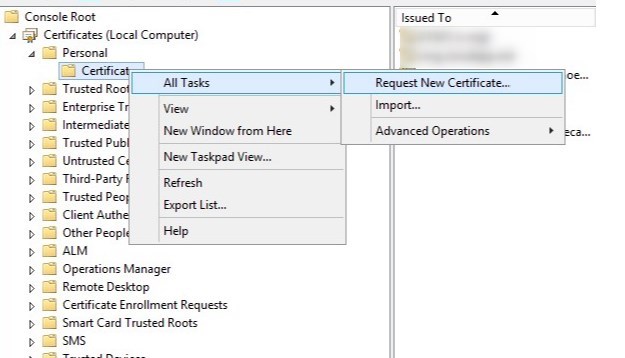
- Open the MMC console for a certificate of the computer
- Under Personal/Certificates, right-click and select All tasks /Request new certificate
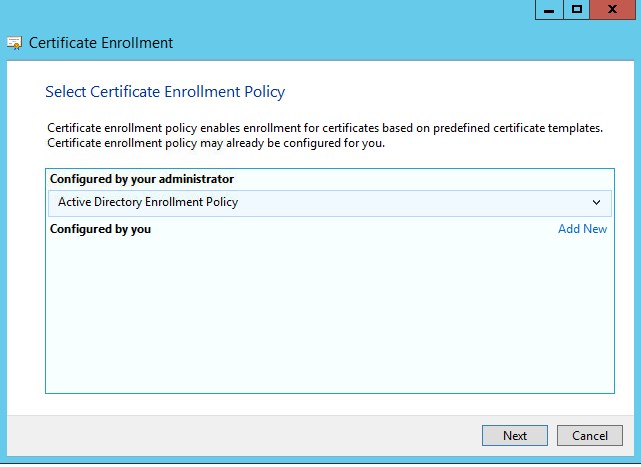
- Click next
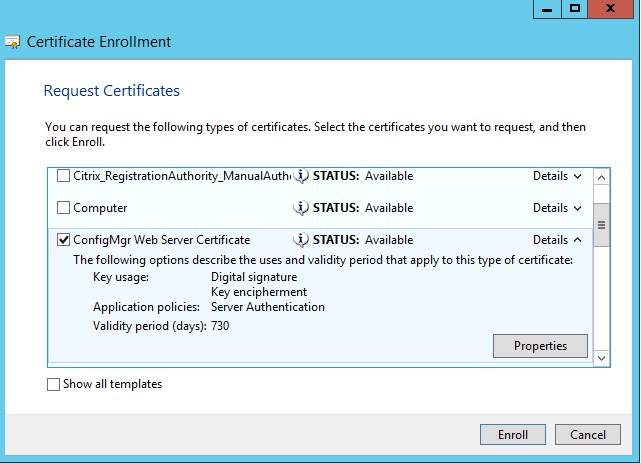
- Select the web server certificate template created earlier
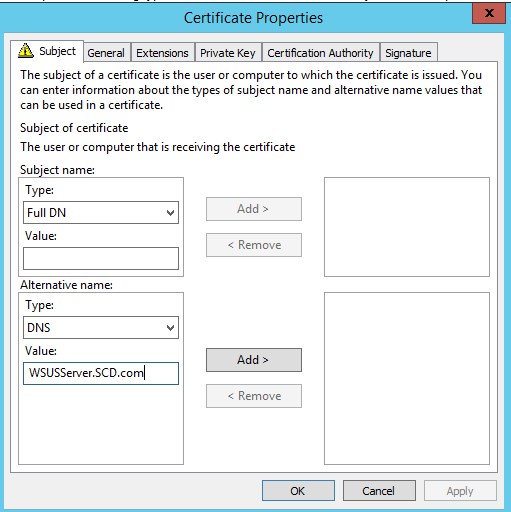
- Under Alternative name, select DNS and enter the FQDN of the WSUS/SUP server, then click Add
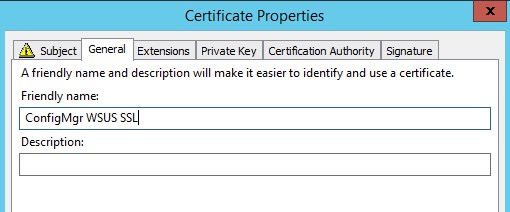
- Under General, it may be a good idea to add a Friendly name and description to ease management of certificates on the server
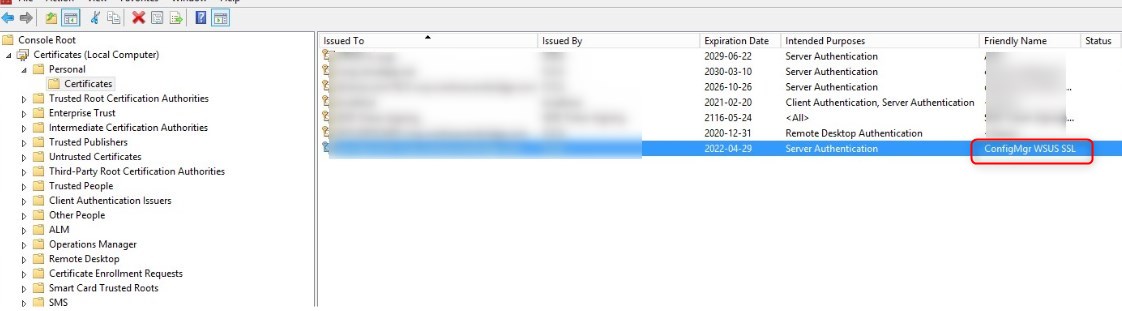
- Hit ok and complete the wizard to create the certificate.
Configure WSUS administration website to use SSL
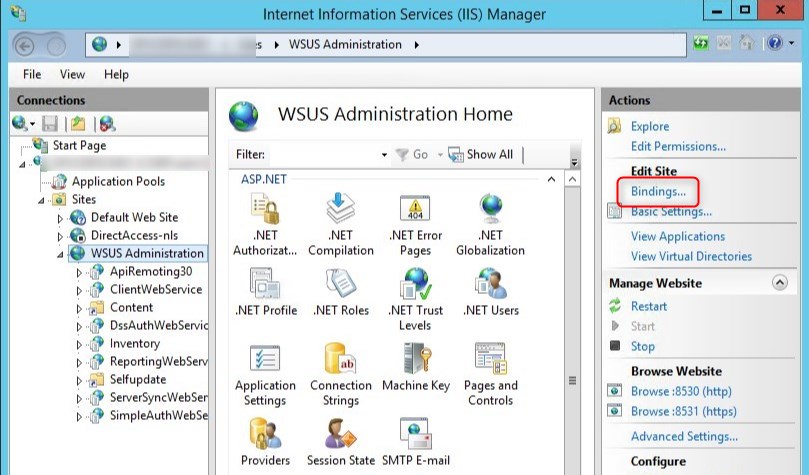
- Open IIS, select the WSUS administration site and click on Bindings
- Select HTTPS and click on Edit
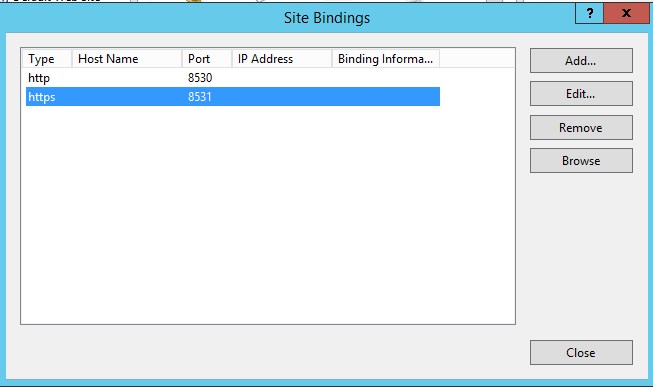
- From the select, chose the ConfigMgr WSUS SSL certificate enrolled earlier on the server
- The IP address can be left to default All Unassigned

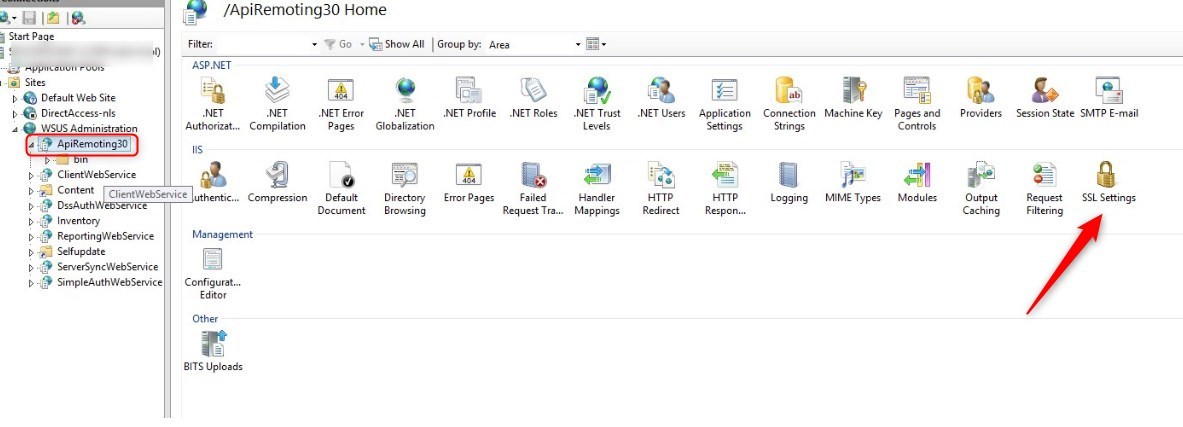
- Expand the WSUS Administration site and select API Remoting30, then select SSL settings
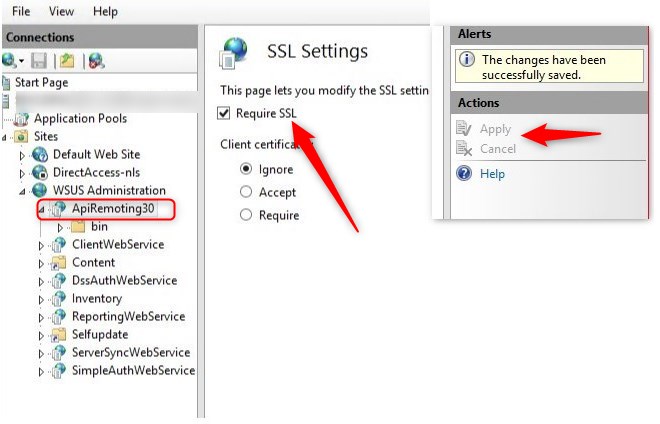
- Check the box Require SSL and hit Apply on the right side of the console
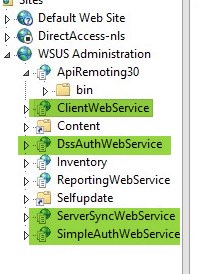
- Repeat this step for the following components
- ClientWebService
- DssAuthWebService
- ServerSyncWebService
- SimpleAuthWebService
- The last step, open a command prompt as admin, browse to the C:\Program Files\Update Services\Tools, and run the following command
- WSUSUTIL configuressl <fqdn or the WSUS server>

Configure SCCM Software update point in SSL
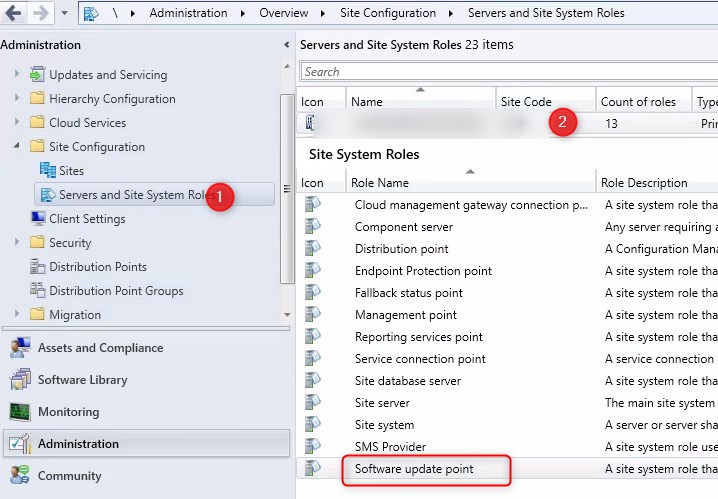
- Open the SCCM console, and browse to Administration/Site Configurations /Server and Site System roles, then select the Software Update point
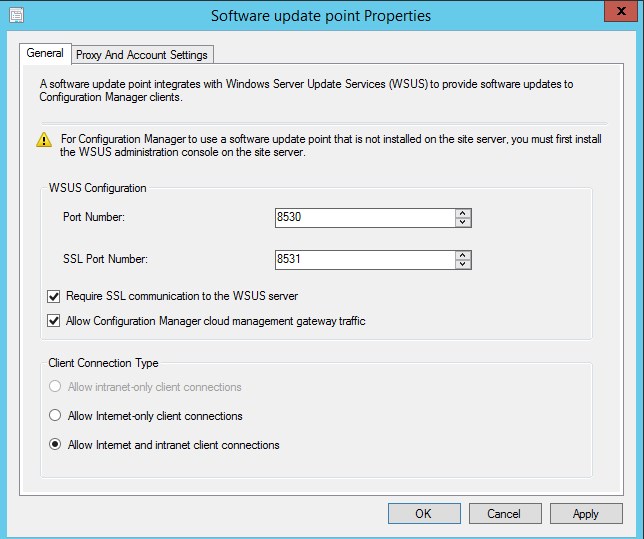
- Check the box Require SSL communication to the WSUS server
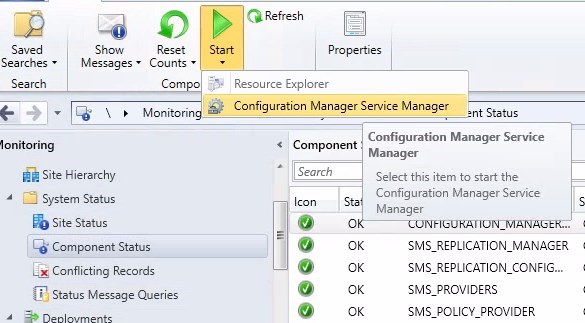
- Once completed, it is a good idea to restart the Software Update point service to ensure communications are good under SSL.
- To do so, browse to Monitoring/System Status/Component Status and start the Configuration Manager Service manager
- Find SMS_WSUS_Configuration_Manager and restart it
Server validation
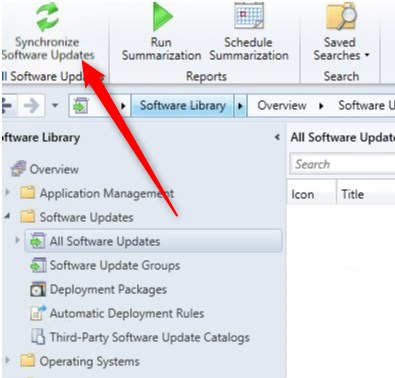
- Forcing a Synchronize is a good idea to confirm hierarchy is still working correctly
- On the Software Library node, select All Software Updates and click on Synchronize Software Update in the ribbon
Client Validation
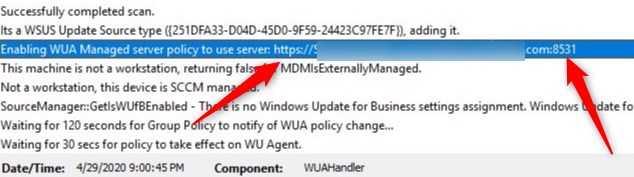
- On a client, run a Machine policy retrieval, followed by a Software Update scan cycle to validate client->server communication is working correctly.
- Once the Update scan is initiated, progress can be seen in the WUAHandler.log on that client. We can notice the change in the URL pointing the HTTPS://<fqdn of the WSUS/SUP server>:8531
Downstream Software Update point
If you are having multiple WSUS/Software Update point, here are some important notes
- When enabling SSL on WSUS, it should always be the parent WSUS/SUP that is configured first in SSL, before moving to downstream servers
- Downstream servers require the exact same steps as mentioned above in order to be configured to use SSL.
- Doing it only on the primary WSUS/SUP will not make clients communicate over SSL to downstream servers.
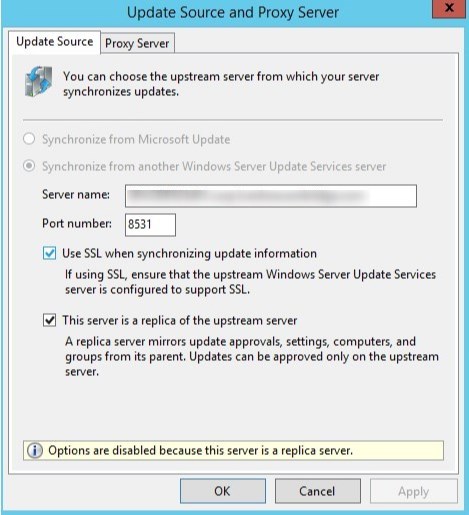
- When the primary Software Update point is forced to use SSL, downstream WSUS will automatically check the box Use SSL when synchronizing update information to sync using port 8531 to the parent WSUS.
For more details on enabling SSL for WSUS, see Microsoft Docs.
Share
Get the latest insights and exclusive content delivered to your inbox


WSUSN3RD
05.08.2020 AT 11:00 AMrodrigovarandas
05.07.2020 AT 03:44 AM