
The reason to Customize Windows Start Menu is a must for any organization to deploy a standard workstation and remove any unwanted software from it. Sometimes Microsoft makes small changes under the hood and can hardly be tracked unless an issue comes up to flag those changes. The configuration of the Start Menu and Taskbar for Windows 10 has been since the beginning a great challenge for administrators and it doesn’t look that this will change anytime soon. Windows 11 which came out recently share the same mechanism as Windows 10 when it comes to the Start Menu thus, this post can be used for Windows 11.
Microsoft added the following note to the start menu layout modification documentation after the 1703 release
In Windows 10, version 1703, Export-StartLayout will use DesktopApplicationLinkPath for the .url shortcut. You must change DesktopApplicationLinkPath to DesktopApplicationID and provide the URL.
A simple note, with great implication!
Following our previous posts on Windows 10 Customization and how to modify the taskbar configuration, we will detail how to configure the start menu and taskbar with the latest indication from Microsoft.
Prerequisites
- Windows 10 1703 and above
- The following procedure works for Windows 11 as well
Configure Start Menu Windows 10
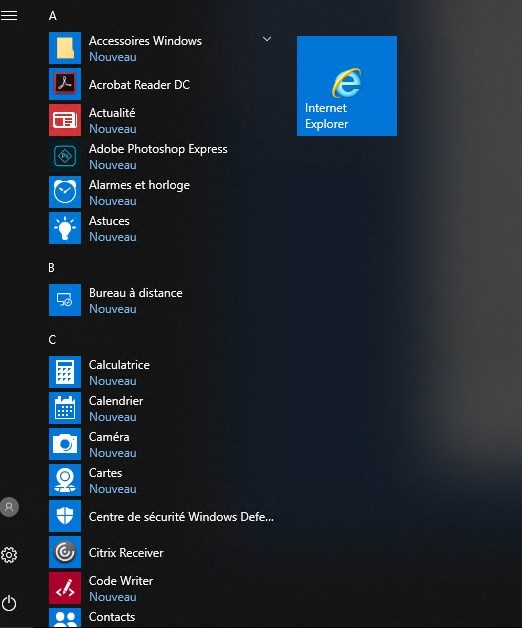
The first step to building a nice Start menu is to customize it manually :
- Setup a Windows start menu as we would like to have
- Remove all unwanted link
- Classify your folder
- Pin your important apps

- Once your start menu is ready :
- Start a PowerShell command window as an administrator
- Enter the following command line to export the Start Menu
- Export-StartLayout -path C:\temp\StartMenu.xml
- A StartMenu.xml file is generated in the specified directory
- Application links are using the DesktopApplicationLinkPath

- In Powershell, enter the following command :
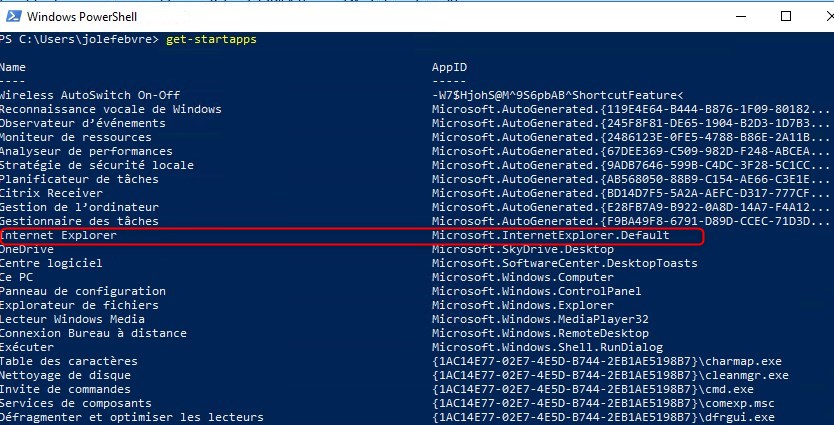
- Get-StartApps

- This returns the list of all applications in the Start Menu
- Locate the application that uses the DesktopApplicationLinkPath and take note of the AppID

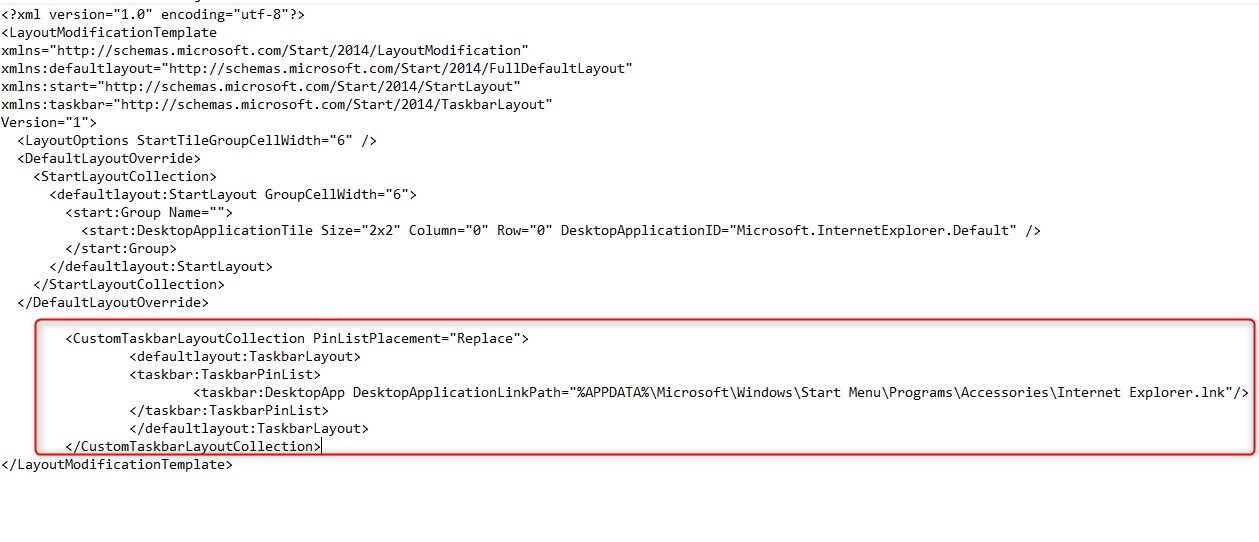
- Go back to the XML exported previously and replace the DesktopApplicationLinkPath by the DesktopApplicationID

Once this is completed it can be added to your SCCM task sequence like we explain in our previous posts.
If you wish to manage the Taskbar like we explained in our previous post, note that the DesktopApplicationLinkPath must be used as the DesktopApplicationID will not work.

More details about Customize Windows Start Menu are available on Docs.Microsoft.com


Daniel Schindler
10.24.2022 AT 05:39 AMChris
04.30.2019 AT 10:32 PMJamesFromWesleyan
07.31.2018 AT 07:42 AMMelQu
05.26.2018 AT 03:03 PMMsambaa
05.16.2018 AT 09:59 AMMelQu
05.26.2018 AT 03:27 PMJean-Sébastien
05.07.2018 AT 07:07 AMJoel
05.06.2018 AT 07:52 PMNick L
05.05.2018 AT 05:47 AMJonathan Lefebvre
05.09.2018 AT 08:57 AMNick L
05.05.2018 AT 05:43 AMErich
05.04.2018 AT 08:58 AMMichael
05.04.2018 AT 08:46 AMDaniel Christensen
05.04.2018 AT 06:41 AMJonathan Lefebvre
05.04.2018 AT 07:13 AMDaniel Christensen
05.09.2018 AT 06:58 AM