
The PDF file is a 162 pages document that contains all informations to install and configure SCCM Current Branch. Use our products page or use the button below to download it . |
This blog post has been updated. Please refer to the new SCCM Current Branch Installation Guide. |
This blog article will explain how to create a custom SCCM 2012 client settings and how to deploy it.
In the first parts of SCCM 2012 and SCCM 1511 blog series, we covered the complete SCCM 2012 R2 and SCCM 1511 installation. In the final parts, we will cover the basic SCCM configuration starting with client settings.
Client settings are used to configure your deployed agents. This is where you decide any configuration like :
- Enabling hardware inventory agent
- Enabling power settings options
- Set scan schedules
- BITS throttling
- Ect..
In previous versions of SCCM, client settings were specific to the site. You had 1 client settings that applied to all your hierarchy. In SCCM 2012 you can specify clients setting at the collection level. You can have different settings for specific collections, overlapping settings are set using a priority setting.
When you modify the Default Client Settings, the settings are applied to all clients in the hierarchy automatically. You do not need to deploy the Default Client Settings to apply it. By default it has a 10000 priority value (This is the lower priority). All others custom client settings can have a priority value of 1 to 9999 which will always override the Default Client Settings. (The higher Priority is 1).
We won’t explain each client settings and their descriptions. The Technet documentation is pretty clear and many of the client settings are self-explanatory. We cannot make any recommendation either as each environment has its own needs and limitations. If you have any questions concerning a specific setting, use the comment section and we’ll try to help you so you can make the right decision for your organisation.
How to Create Custom Client Device Settings
When you deploy a custom client settings, they override the Default Client Settings.
Before you begin, ensure that you created a collection that contains the devices that requires these custom client settings.
For our blog post, we will set the Client Policy polling interval to 15 minutes.
- Open the SCCM console
- Go to Administration / Client Settings
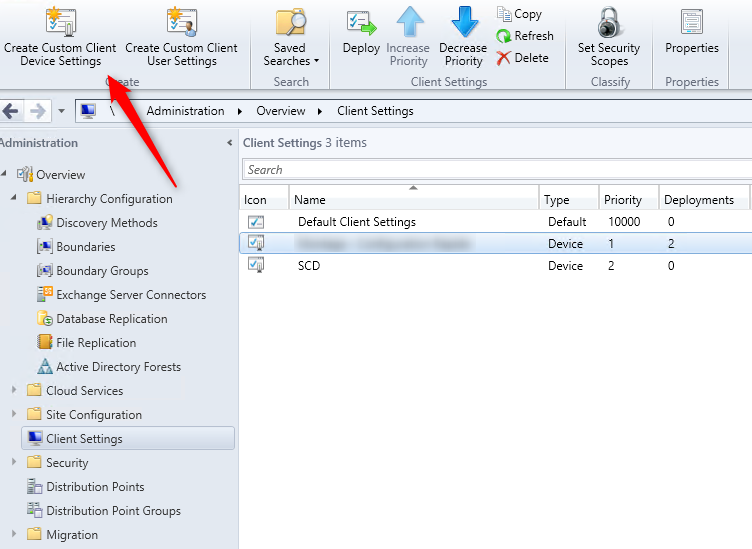
- On the top ribbon, click Create Custom Client Device Settings
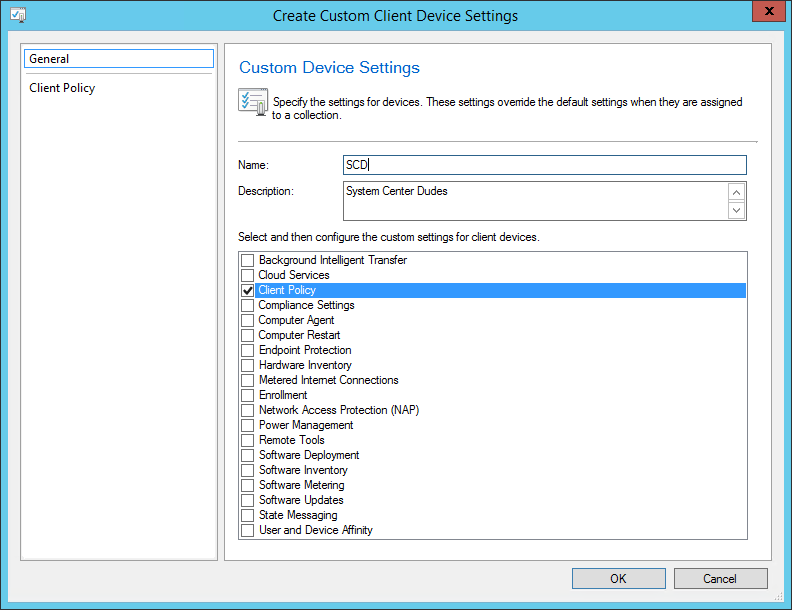
- In the Create Custom Device Settings page, specify a name for the custom settings and description
- Select one or more of the available settings. We will select Client Policy

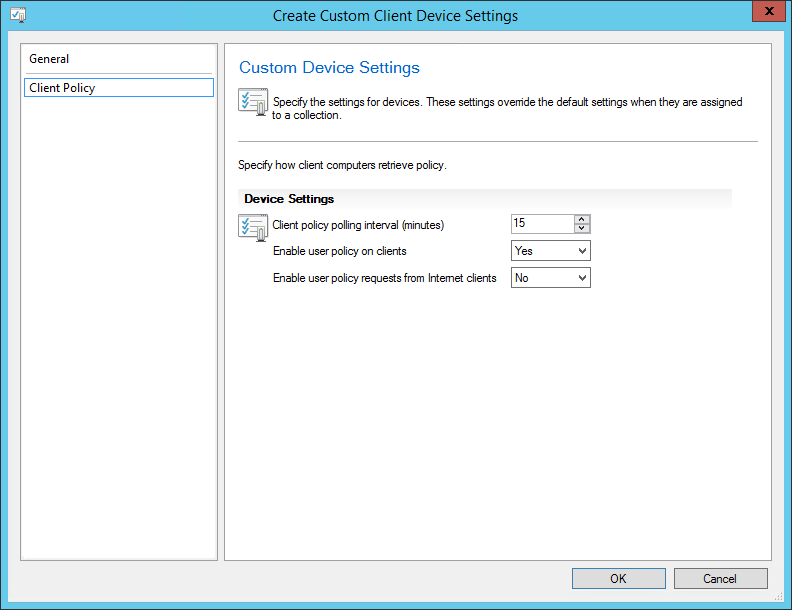
- On the left pane, Client Policy will be displayed, click on it
- We will set the Client Policy polling interval to 15 minutes
- Click Ok
- Your newly created setting will be displayed in the console
Set the Client Settings priority
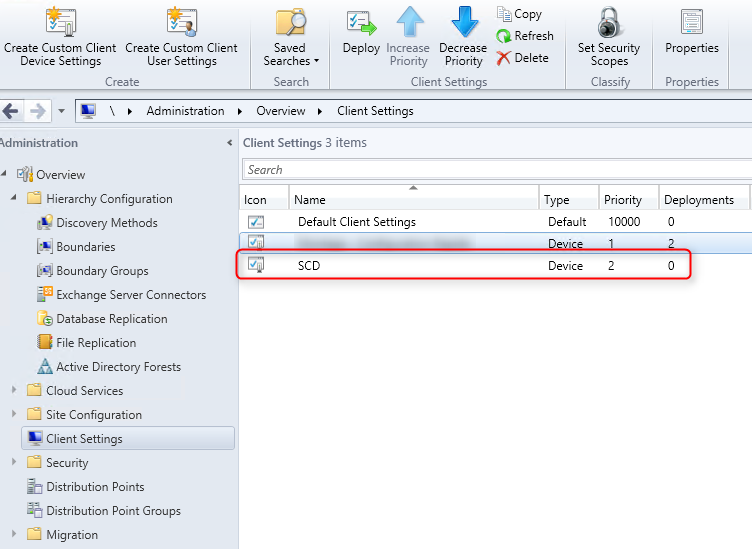
When you create a new client settings, it automatically take the next available priority. (Beginning with 1) Before deploying it, make sure that your priority is well set for your needs. A higher priority (1) will override any settings with a lower priority. (9999). Don’t get confused 1 is higher !
To change the priority number :
- On the top ribbon, select your client settings and click Increase Priority or Decrease Priority
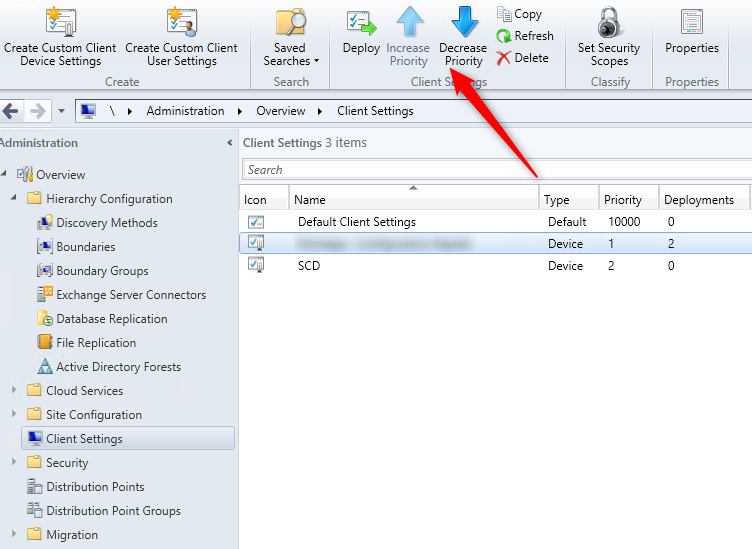
- You can see each client settings priority and if they are deployed in the same section

How to deploy
Now that your client settings is created, you need to deploy it to a collection. This new client settings will apply to only this collection and depending of the priority, will override the settings.
- Select the custom client settings that you have just created
- On the top ribbon, click Deploy
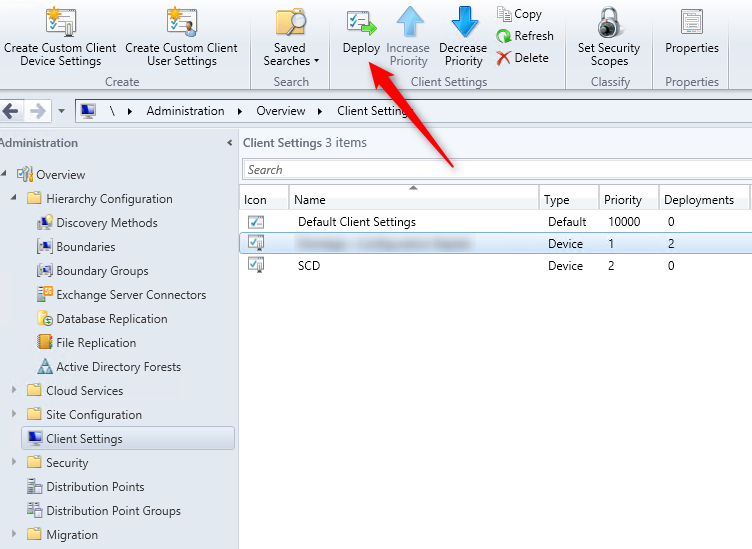
- In the Select Collection dialog box, select the collection that contains the devices to be configured with the custom settings, and then click Ok
- You can verify the selected collection if you click the Deployments tab on the bottom of the console
How to apply
Client computers will apply your custom settings when they download their next client policy. You can trigger it manually to speed up the process.
Manually on the client
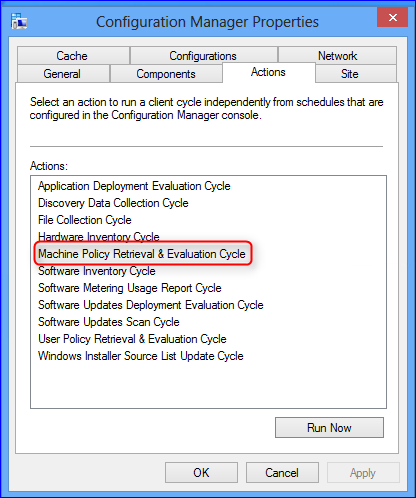
- In Control Panel, click on the Configuration Manager icon
- In the Action tab, select Machine Policy Retrieval & Evaluation Cycle
- Click Run now
Using the SCCM Console
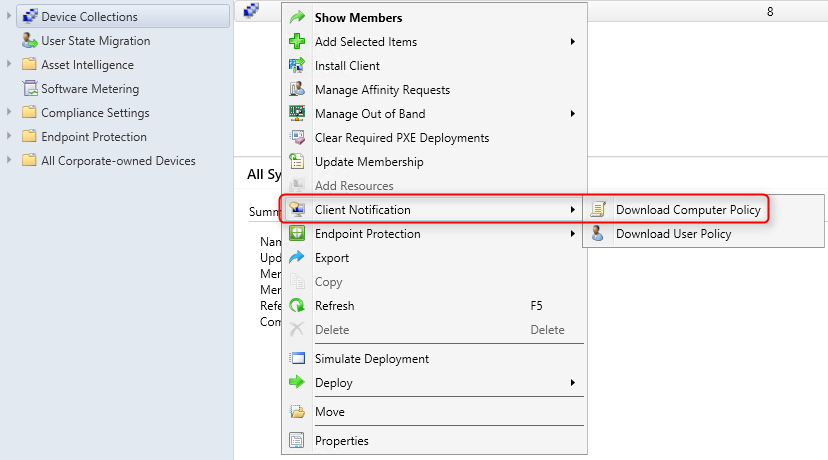
To initiate client policy retrieval by using client notification (Configuration Manager SP1+ only)
- In the SCCM console
- Go to Assets and Compliance / Device Collections
- Select the device collection containing the computers that you want to download policy
- Right click a single device or the whole collection and select Client Notification and then Download Computer Policy
How to verify
It’s possible to see which client settings are applied to a specific client. You must use the Resultant Client Settings function in the SCCM console.
We already cover this in a previous article.
That’s it, you’ve created your first SCCM 2012 client settings, use the comment section to leave a question or comment.




Manish
10.12.2018 AT 12:53 PMJonathan McGrail
03.19.2018 AT 11:35 AMEd
03.12.2018 AT 07:14 PMEd
03.26.2018 AT 09:57 AMNeville
09.04.2017 AT 02:35 AM