
With the latest updates Microsoft released to Intune and Autopilot, it is becoming more realistic to leave the task sequence behind in favour of using Autopilot with Intune to deliver the computer standards required by an enterprise. While it will not be possible for all scenarios, a standard PC used for administrative tasks can be delivered with many, if not all, of the required windows 10 intune autopilot customization.
While many of our previous Windows 10 Customization tricks are still gonna be useful, the delivery will be different from simply running various scripts from a Task Sequence.
In this post, we will go over multiple Windows 10 customization all done with Intune in order to leverage Windows Autopilot. The ultimate goal is to be able to replicate a standard deployment made with a Task sequence from SCCM or MDT
This post is part of a series on Windows Autopilot that will be published in the following weeks. In the next posts, we will cover the following subjects :
Windows 10 Intune Autopilot Customization – SCD Guide
- Getting started with Windows Autopilot | Step-by-step guide
- How to deploy Win32 Applications in Microsoft Intune
- How to customize Windows 10 with Microsoft Intune and Autopilot
- How to join Autopilot devices to Hybrid AD
- How to use Windows Update for Business
- How to GPO with Microsoft Intune
How to deploy applications with Autopilot
Our previous post covers everything on how to package Win32 apps with Intune. Assigning those applications to a group that leverage Autopilot, will provide installations as soon as possible following the Autopilot process.
If you are using multiple groups in a task sequence to deliver applications per type of user, this can be also matched with Intune. Creating assignment to groups of users will have also the ability to easily refresh or replace a users’ computer.
As we covered in our Autopilot guide, using the Enrollment status page allows us to prevent the user to use the computer while the original setup completes. This includes Office installation and MSI applications. Win32 applications will complete even after this section of Autopilot, as the Enrollment status page doesn’t include Win32 app support yet.
Also, note that Win32 applications dependencies are coming soon to Microsoft Intune. This would then allow us to even more possibilities to match how a task sequence deliver mandatory applications.
How to customize Start menu with Intune
While there are some great solutions (like this one from Aaron Parker) out there to push the start menu in the same way as within a Task sequence, meaning that you apply a default without enforcing any part of it, we prefer to use the built-in way. This will mean that we’ll push out a partially locked start menu by using device restriction.
- Begin by following our previous post to configure the StartMenu.xml
- Use you have a customized StartMenu.xml, you can go to the next step
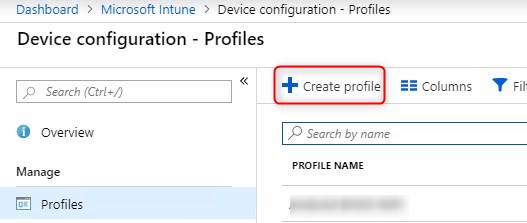
- Go to Intune/Device Configuration – Profiles, and Create a new Profile
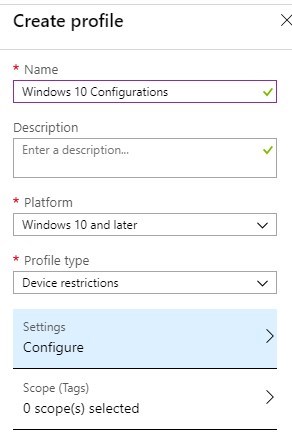
- Give it a name, select Windows 10 or Later and Device Restrictions for the profile type
- Under the Start section, upload the StartMenu.xml under the Start menu Layout section.
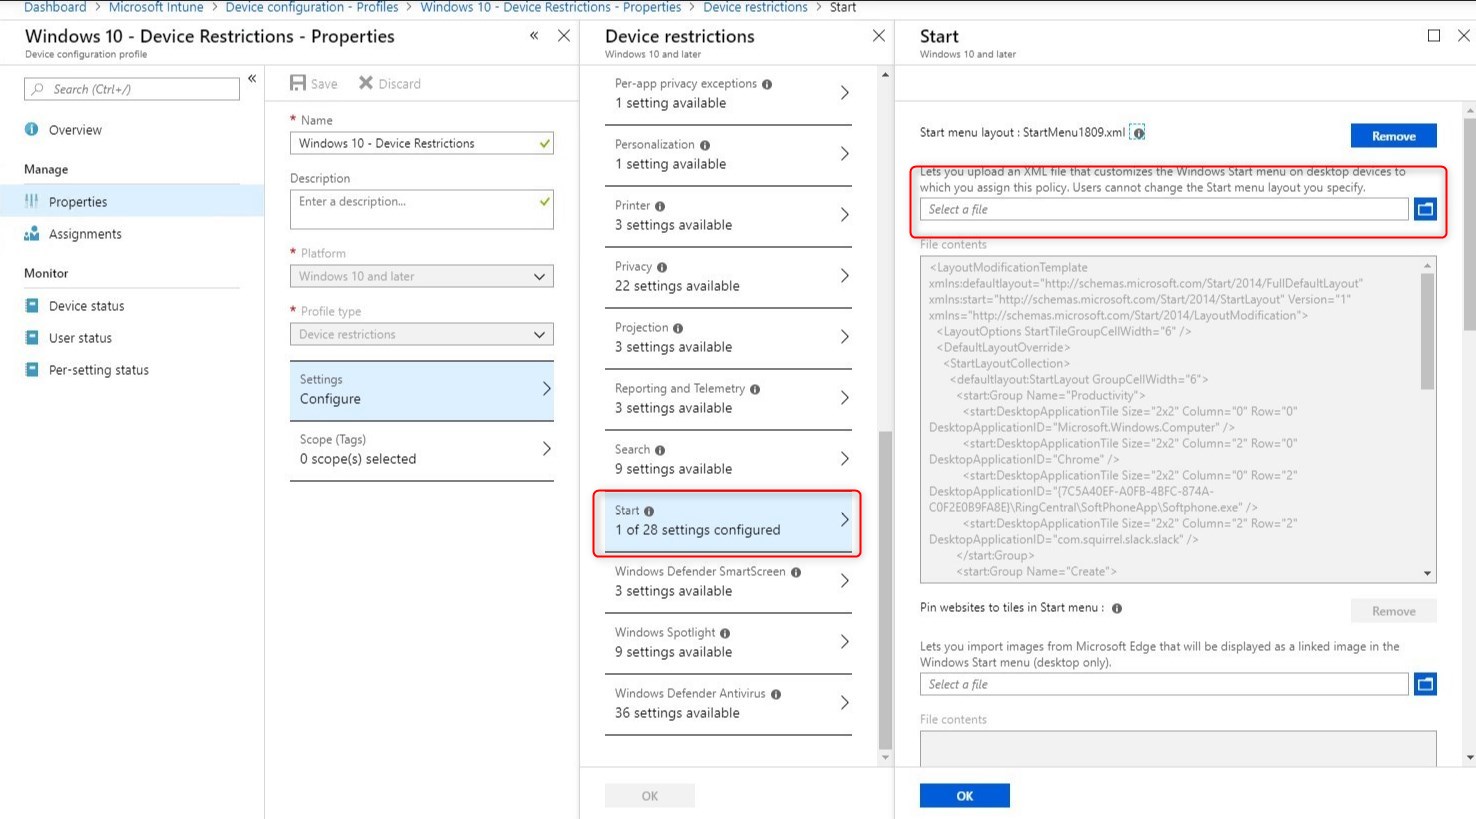
- Make sure to save it, and also do not forget to create the assignments so the configuration can be pushed out.
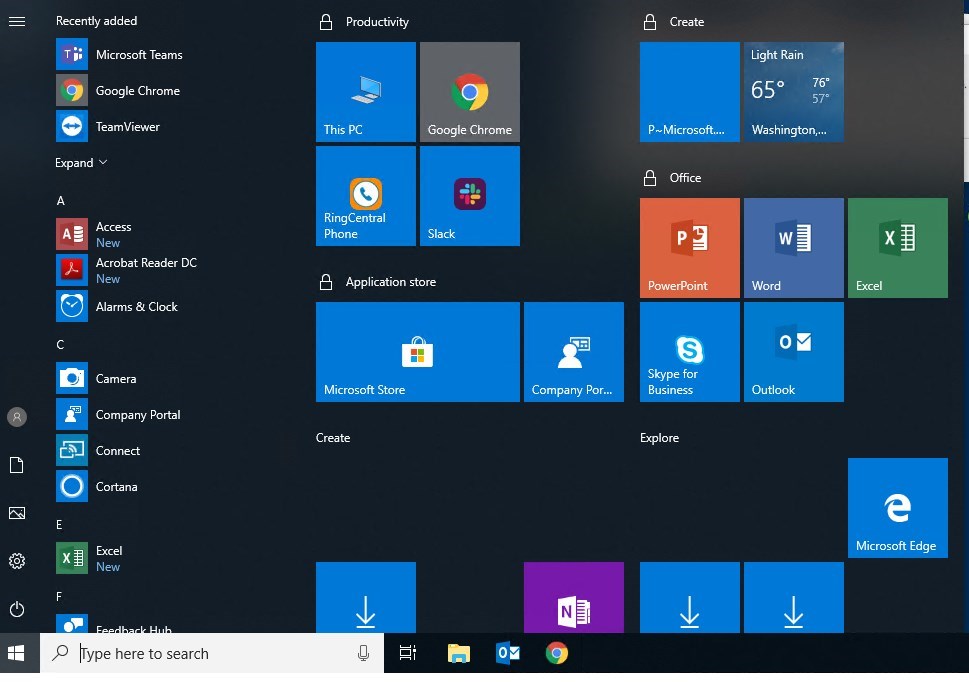
- Doing this configuration matched with an Autopilot deployment will deliver a customized start menu at the first login of the user!
We wrote a post a while back about the change to the Start Menu configuration to use DesktopApplicationID instead of the DesktopApplicationLinkPath.
We had issues to deliver a partially locked Start Menu, along with task back configuration when using the DesktopApplicationID. Changing it all back to DesktopApplicationLinkPath fixed it for us!
Also, note that Microsoft as again updated the documentation on that subject. Beginning with Windows 10 1809, it is now possible to export the start menu configuration with the parameter -UseDesktopApplicationID.
This would give a command line like this :
- Export-StartLayout -UseDesktopApplicationID -Path layout.xml
For more details about Windows 10 start menu with Intune, see Microsoft Docs
How to customize file association with Intune
Peter Van Der Woude as done an excellent job of documenting how to customize the file associations with Intune. To date, this is still accurate.
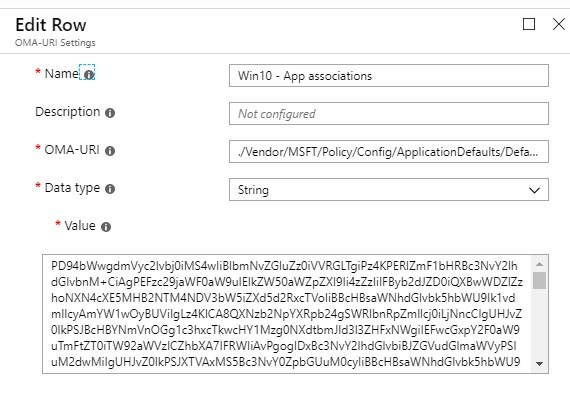
Remember the following : Always export the file association from the destination version of Windows 10 you plan to use. We’ve seen issue in the past about that!
How to customize background and logon screen
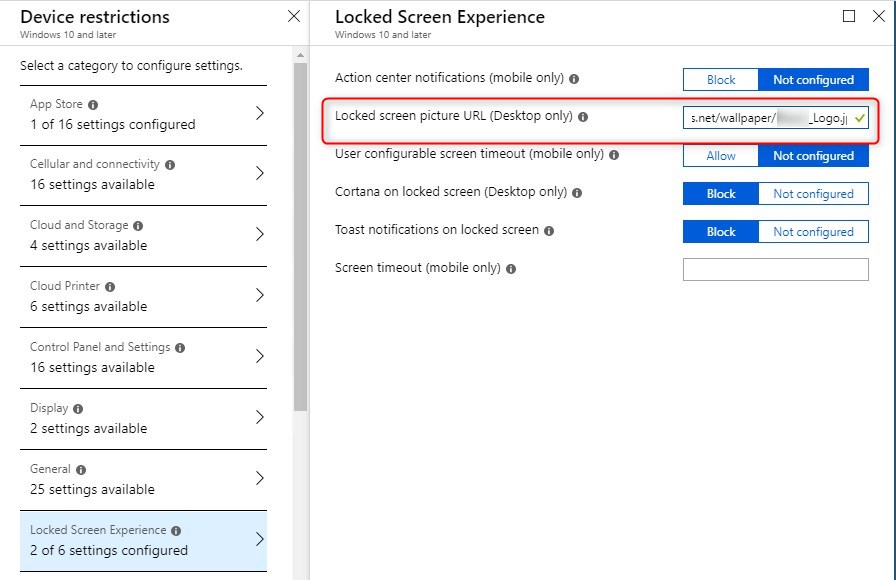
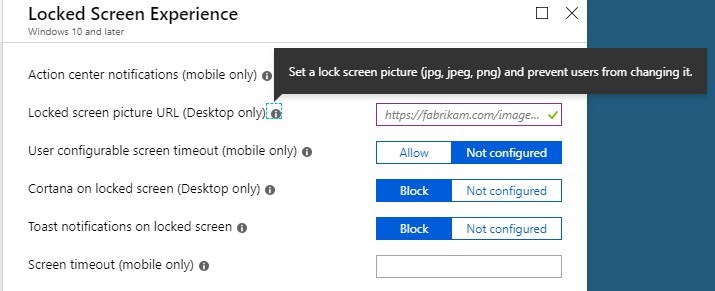
This one is an interesting one. While it is possible to provide the wallpaper and login screen images through Intune, they both require the image to be hosted on a web address.
One of the ways to easily host the file is to use Azure Blob storage. (Big THANKS to @Per Larsen for the help on this one!)
Note that hosting the file on SharePoint and sharing with everyone/anonymous will not work. This still requires a LiveID authentication to access files.
To host the image on an Azure blob, follow theses steps :
- Browse to Azure/Storage Account. Select an existing or create a new one.
- Select Blobs and click +Container
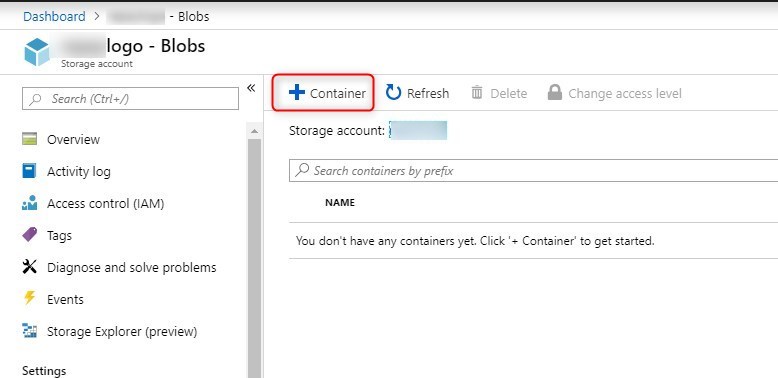
- Set a name, in lower case only, and select Blob(Anonymous read access for blobs only)
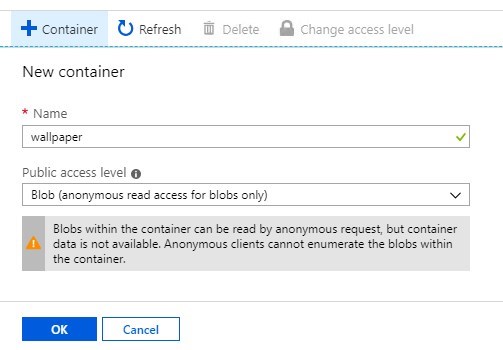
- Double click on the newly created Blob, select Upload
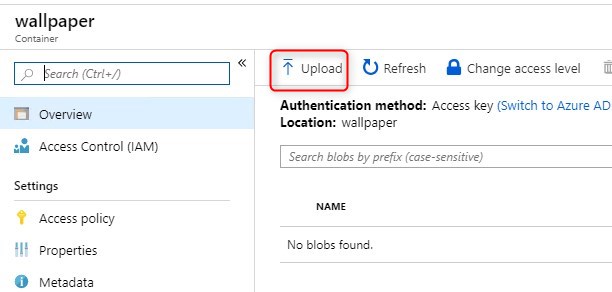
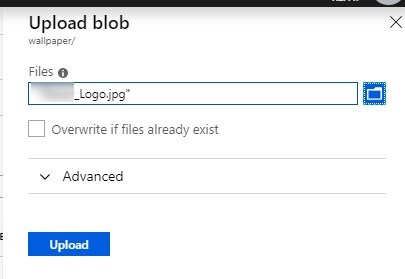
- Select your image and click Upload
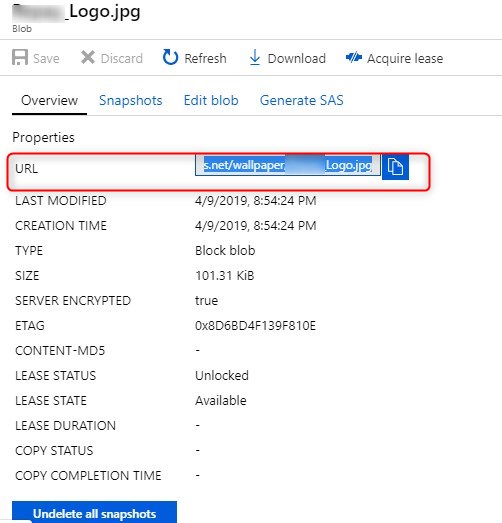
- Once uploaded, click on the file, an URL is available. This will be the URL we provide into the Intune configuration. It’s a good idea to test the path using In-Private to validate that the anonymous access works.
- Browse to Intune/Device Configuration/Profiles and under the properties of a Windows 10 device restriction profile, the 2 settings are available. Simply paste the blob path


- To validate if the computer as received the configuration, browse the registry to Computer\HKEY_LOCAL_MACHINE\SOFTWARE\Microsoft\Windows\CurrentVersion\PersonalizationCSP

Note that the computer will only download it once to apply it. It would download it again if a change is necessary. In that case, changing the name could ease follow up.
How to turn of Windows Spotlight
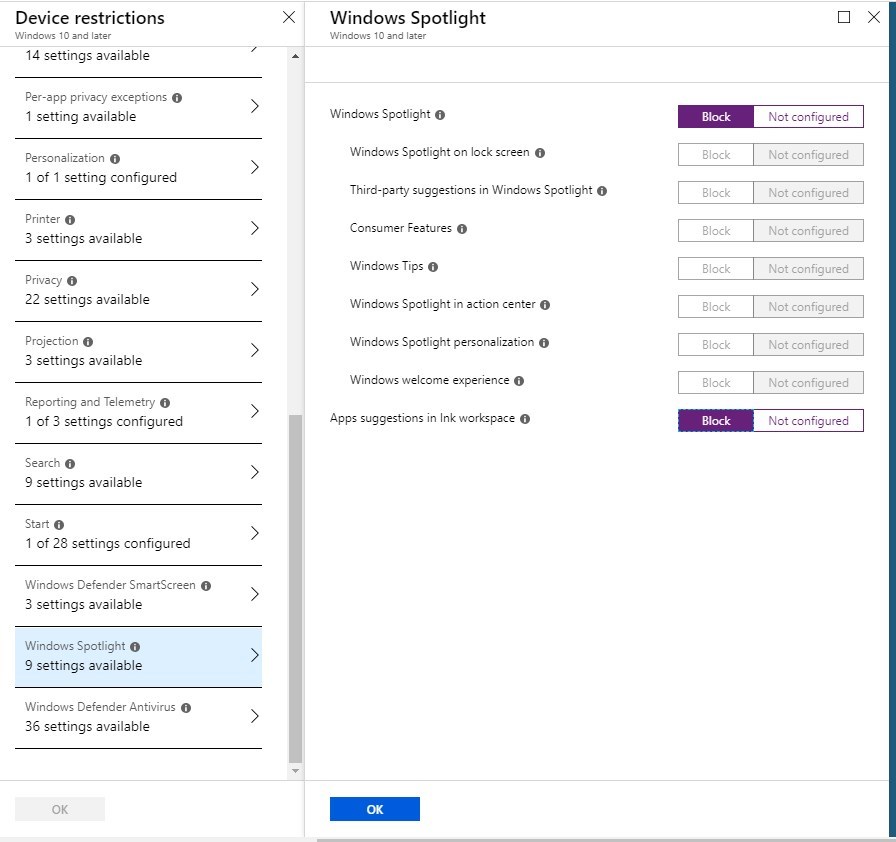
Windows Spotlight is one of those “not so enterprise” features that we often disable as part of a Windows 10 configuration. It gives dynamic lock screen images, suggested apps and services in the start menu of lock screen.
This is only available for Windows 10 Education and Enterprise edition. If you are running Pro edition, this can’t be disabled.
To disable Windows Spotlight, under Device restrictions for Windows 10, select Windows Spotlight. Simply toggle Block on the desired configurations.
How to remove default appx installed
This task worked the exact same way as within a task sequence. Jörgen Nilsson, from CCMExec did a great post about it to run in task sequence.
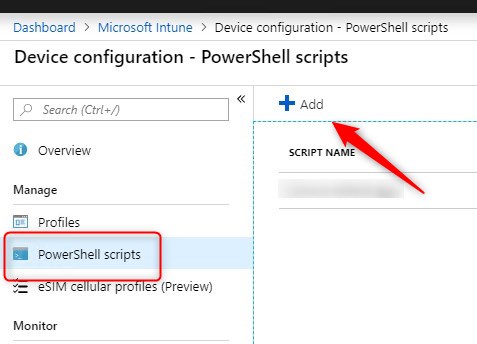
To add it to Intune/Autopilot, follow these steps:
- Browse to Intune/Device configuration – Profiles and select Powershell Scripts
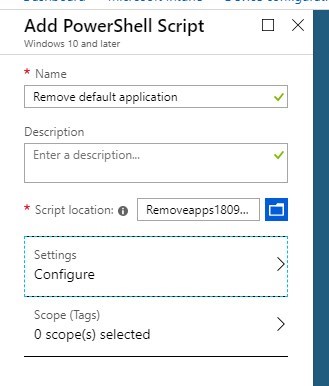
- Provide a name and the Powershell script.
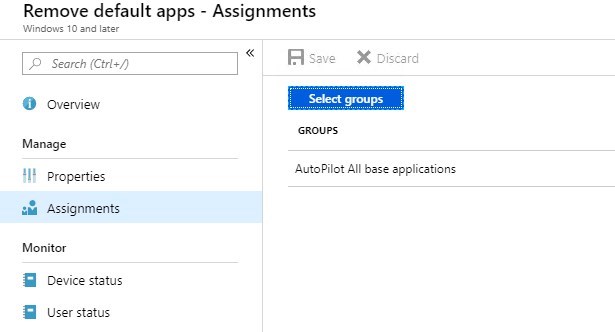
- Once created, make sure you assign the script to a group processed at the Autopilot time.
How to upgrade Windows Pro to Enterprise
The first option is to promote Windows 10 to Enterprise with providing the cd-key with Intune. This option is well detailed in the following blog post by Microsoft.
The second option is to promote it to Windows 10 Enterprise, is to use Windows 10 Subscription activation. This simply consists of providing a valid license, that includes Windows 10 Enterprise such as Microsoft 365 E3, to the user.
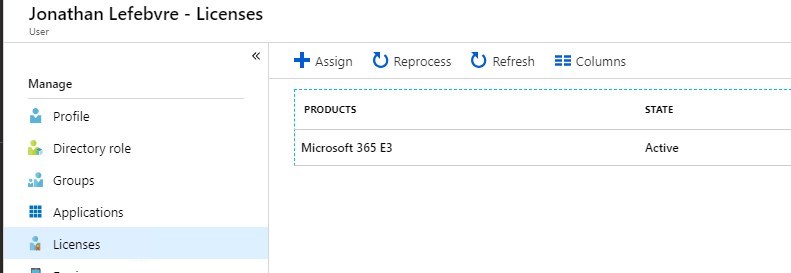
Without doing anything more, the computer serviced with Autopilot will be automatically upgraded to Windows 10 Enterprise.
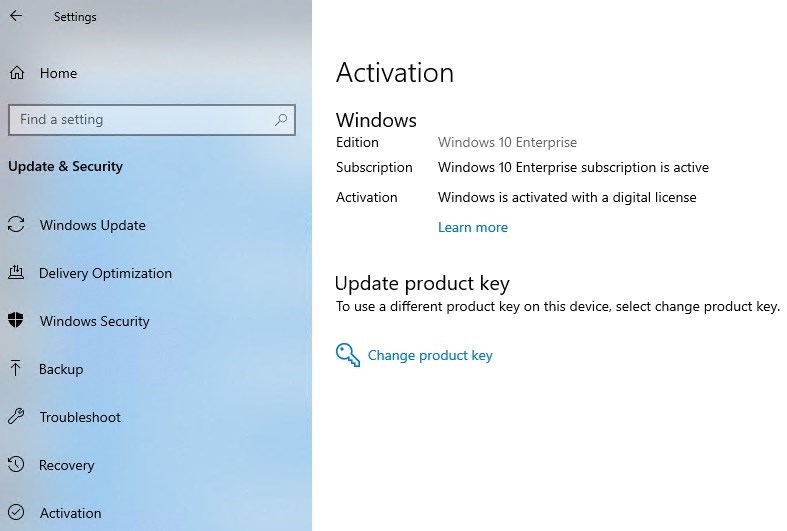
For more details about Windows 10 Subscription, see Microsoft docs
How to enable BitLocker
The following blog post by Courtenay Bernier gives it in details. Even if it dates a bit, it’s still accurate for most parts!
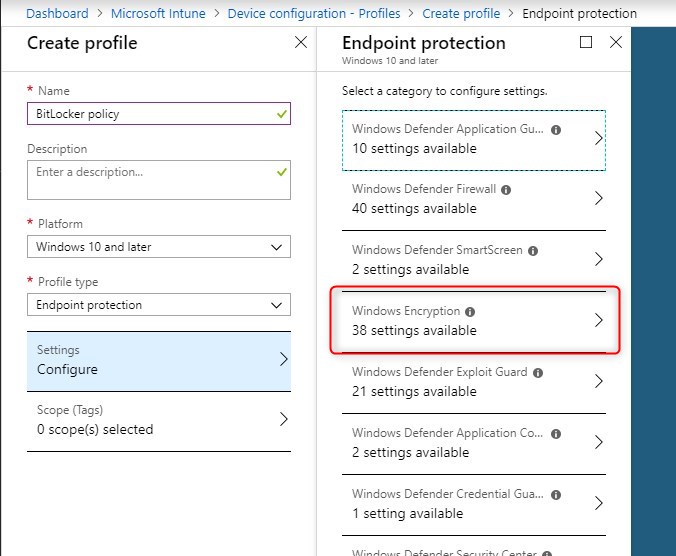
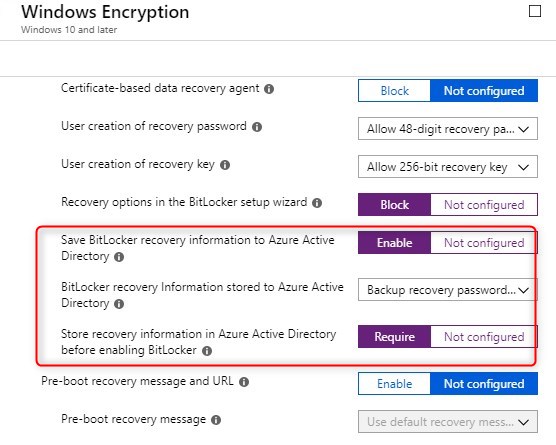
To enable the encryption, set Encrypt devices to Require.
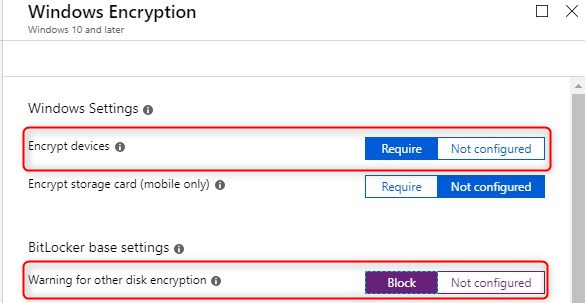
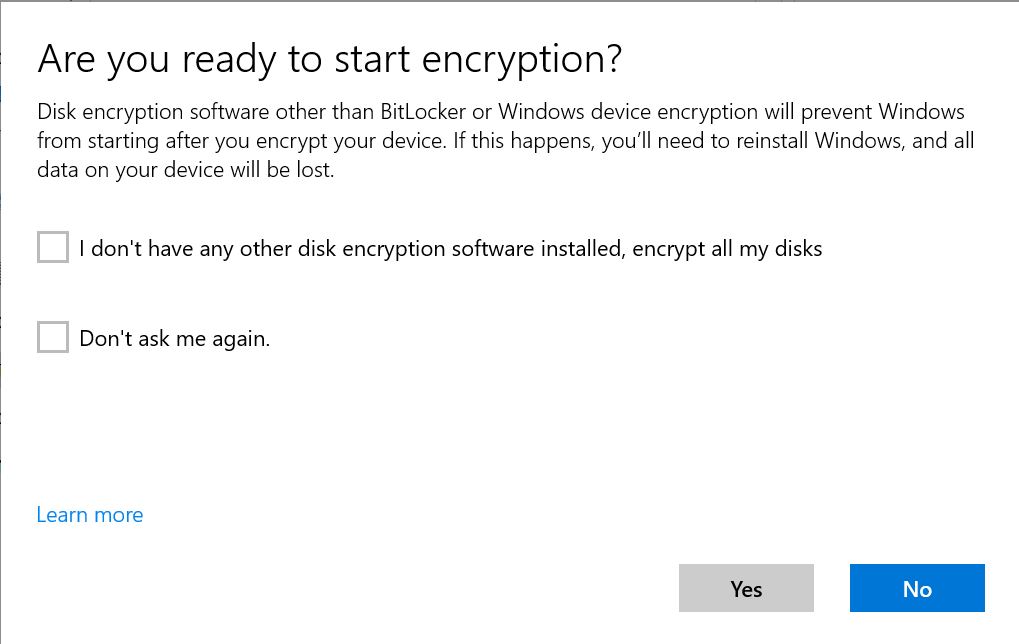
Make sure to select Warning for other disk encryption to Block. This will prevent a user warning to hold off the automatic encryption of the disk.
Two key configurations are the ability to Save BitLocker recovery information to Azure Active Directory and to Store recovery information in Azure Active Directory before enabling BitLocker. This brings BitLocker configuration to pretty much the same level as on-prem solutions.
As for those who used Microsoft BitLocker Administration and Monitoring(MBAM), Microsoft just released, in public preview, the Encryption report and BitLocker recovery keys to provide a similar approach in terms of administration and monitoring.
To access the Encryption report, browse to Intune/Device Configuration under the Monitoring section.
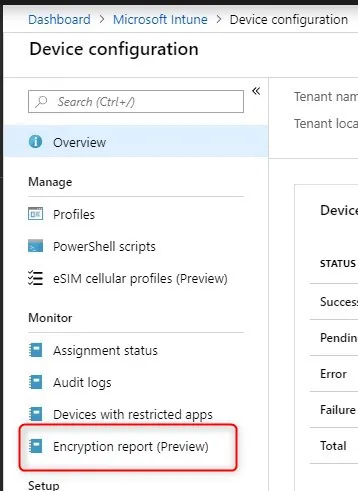
The report will give details about the OS version, TPM version, encryption readiness, and status.

To access the Recover keys, browse to Intune/Devices – All devices and select a device. It is located under the Monitor section.
Windows 10 intune autopilot customization – Conclusion
We will later cover other aspects of computer customization like Windows Updates and GPO in upcoming blog posts.
To conclude, Windows Autopilot is still a young technology compared to SCCM/MDT Task sequences that have been around for years. With the support of Win32 Apps, and being able to do all those customizations, it gives us a great idea that it is now possible to leverage Windows Autopilot to standardize computer configurations.
Leave us a comment below if we forgot some classic OSD modifications that are show stopper to move to Windows Autopilot.
[ratings]




Alexandre Ignatenko
04.24.2019 AT 09:59 AMDbdmora
04.23.2019 AT 08:30 PMAlex Ignatenko
04.23.2019 AT 04:48 PMWeb Page
04.15.2019 AT 07:34 PMAlex Durrant
04.15.2019 AT 12:38 PMJonathan Lefebvre
04.15.2019 AT 02:17 PM