
The Operations Management Suite is a cloud-based IT management solution that helps IT organizations to manage and protect the on-premises and cloud infrastructure. IT organizations can use the Microsoft Operations Management Suite (OMS) Connector to import data of collections from SCCM to Operations Management Suite. This makes data from the SCCM environment visible in the Operations Management Suite. For now, only collection membership information can be imported but I wouldn’t be surprised if more features are added in the near future.
Microsoft Operation Management Suite (OMS) Connector was introduced as a pre-release feature in SCCM1606. With the 1706 release, there’s improved integration of SCCM and Azure Services. These improvements streamline how you configure the Azure services you use with Configuration Manager. We thought this was a good opportunity to describe how to configure SCCM with the OMS connector.
Prerequisite for SCCM OMS Connector
Before starting you need a couple of components :
- Have a valid Azure Subscription
- Have an OMS Portal (If you don’t have one, the post will describe how to create one)
- SCCM 1706+
For now, only collection memberships can be imported to Operation Management Suite.
SCCM OMS Connector – Configuration steps
To connect SCCM to Operations Management Suite the following steps are required :
Register SCCM as web application in Azure AD
This step will create an application in Azure AD for the SCCM OMS Connector.
- Open the Azure Management portal (https://portal.azure.com)
- Select Azure Active Directory / App Registrations
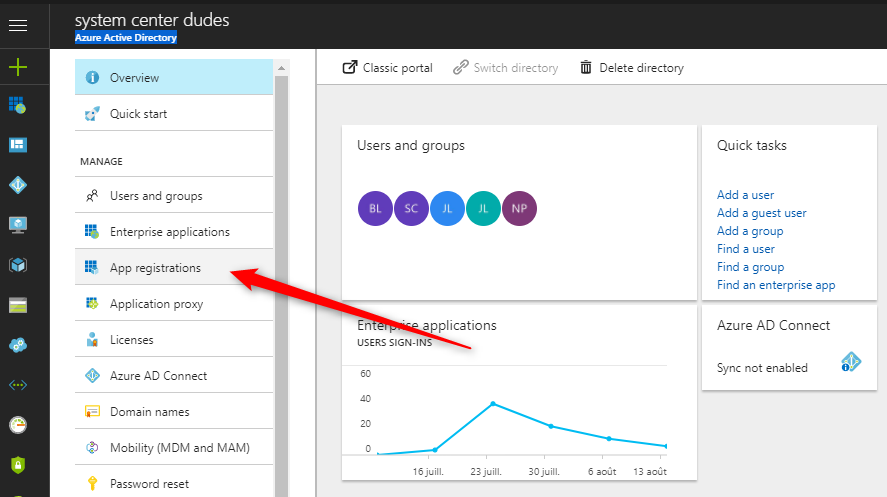
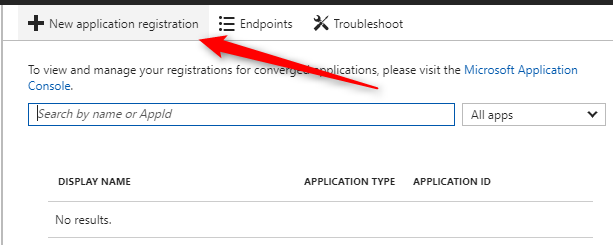
- click New Application Registration
- Enter the following information :
- Name: Specify a name for the application
- Type: Web app / API
- Sign-on URL: Specify any URL. (This URL doesn’t need to resolve)
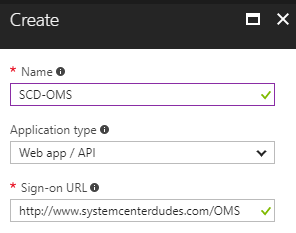
- Click Create at the bottom to create the application
- Select your application and click on All Settings
- Click on Keys, enter a name, select a duration and click Save. The key will be created after clicking Save and can only be retrieved on this page.

- Copy the Key and Application ID from this page. It will be needed later.
- Still in your application, click on General / Properties and copy the App ID URI

Create OMS Workspace and give SCCM Application permission
We will now create the OMS workspace and provide the Azure AD App permissions to access the Operations Management Suite. This will allow us to use the Azure AD app to connect SCCM to the Operations Management Suite.
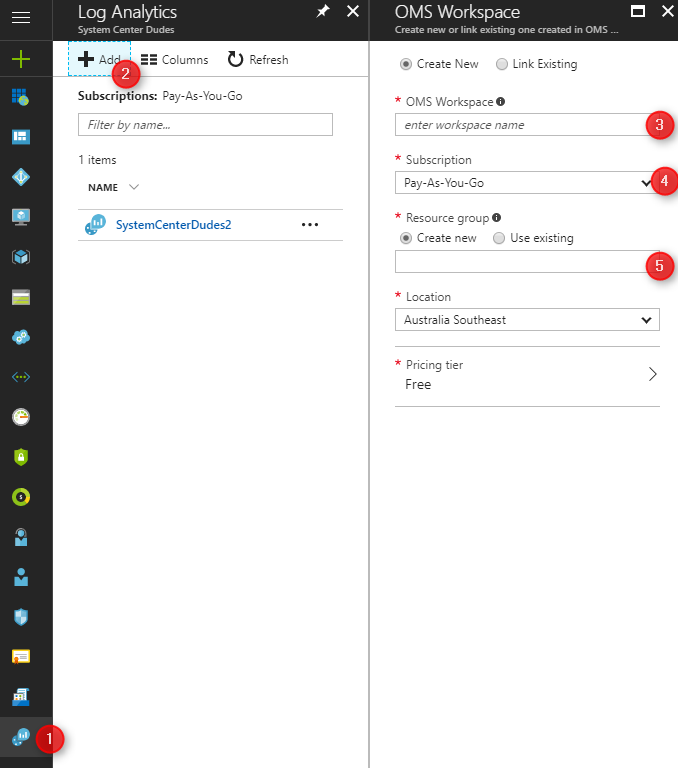
- Open the Azure portal, go to Log Analytics (OMS)
- In the Log Analytics (OMS) blade, click Add
- Provide the following information and click Ok
- OMS Workspace: Specify a name
- Subscription: Select the subscription
- Resource group: Create new or use existing
- Location: Select a location
- Pricing tier: Select a pricing tier
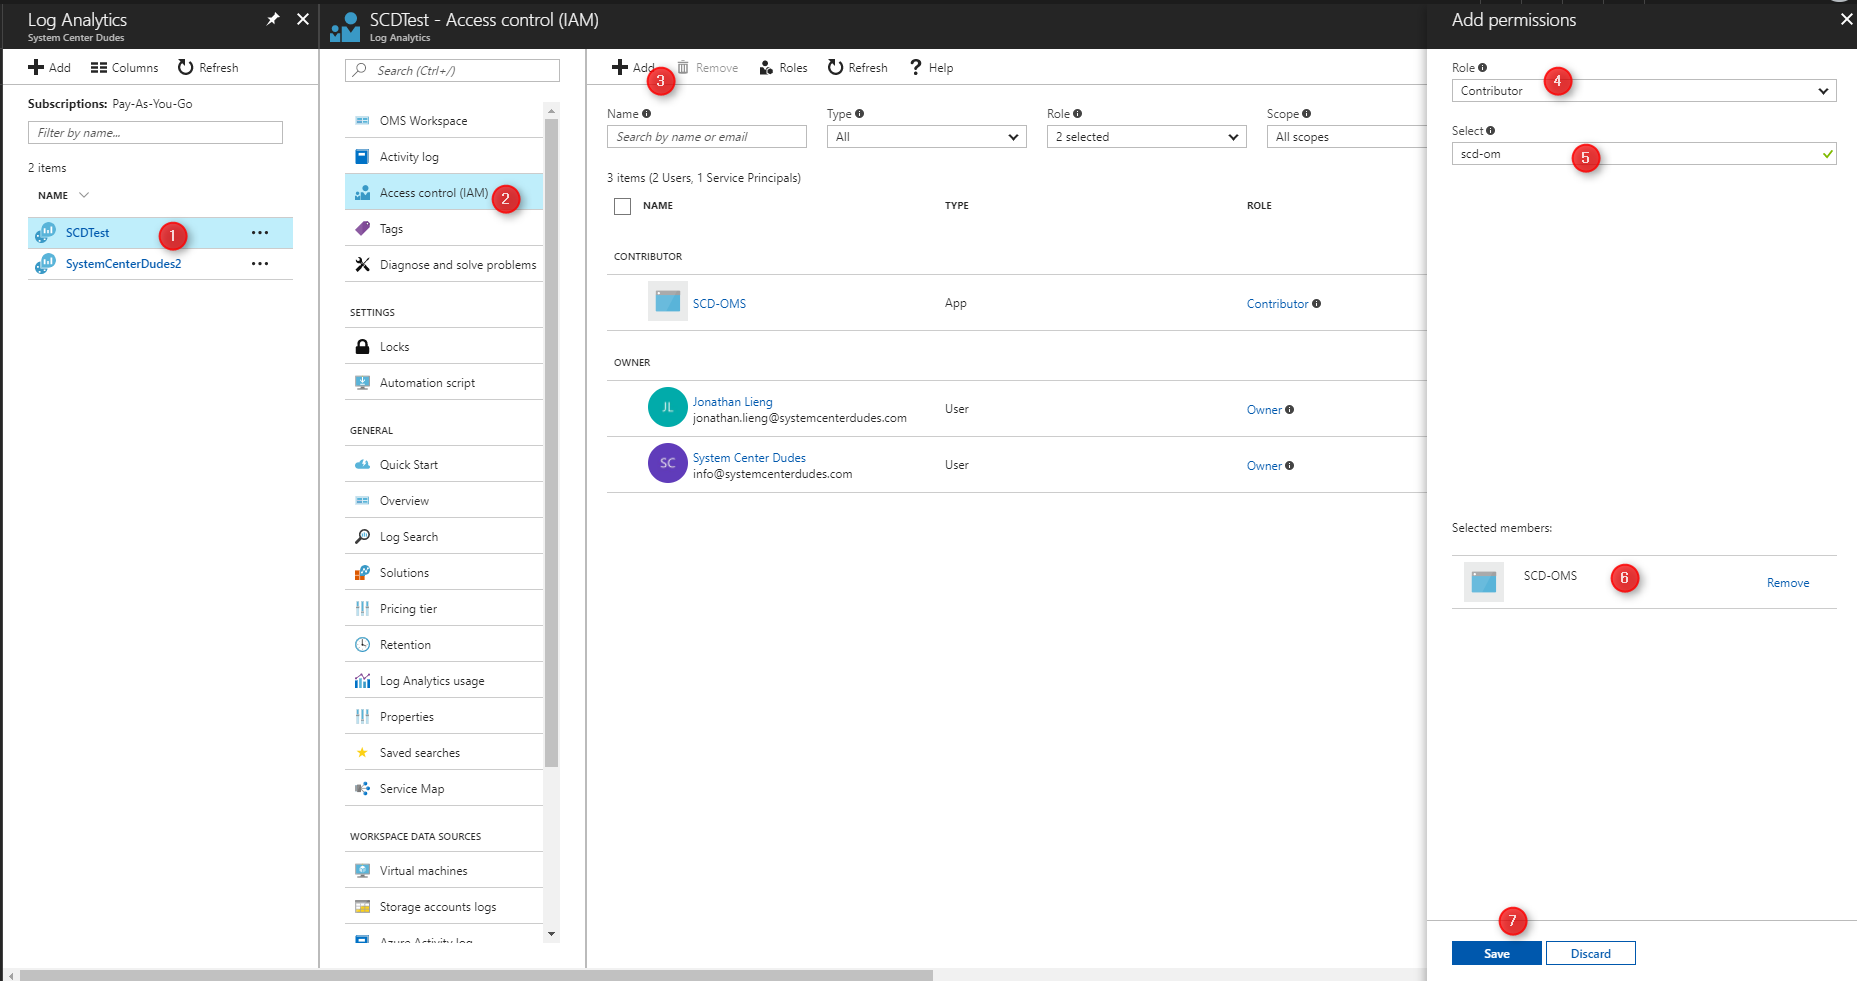
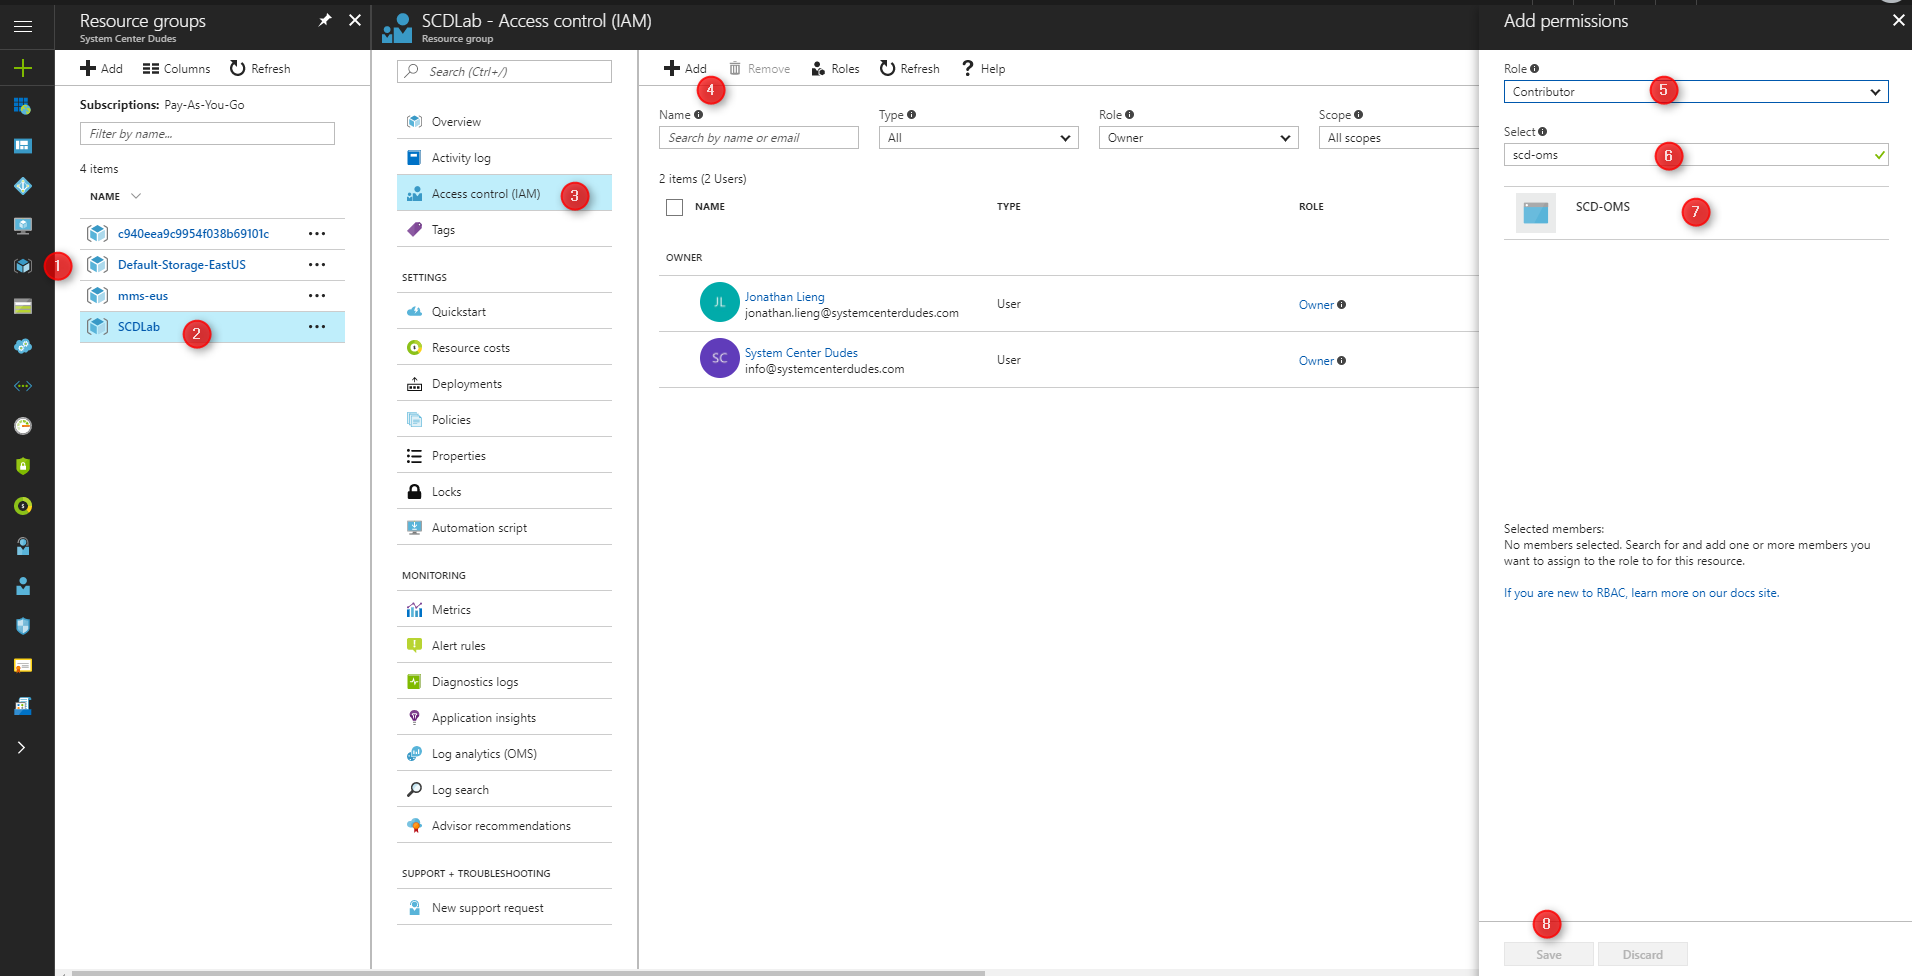
- Once created, click on Access Control (IAM), on the top click Add
- On the right, select the Contributor role
- Search for the Azure AD App you just created, select that app and click Save
- Go to Ressource groups, select the resource group in which you create your OMS Workspace
- Select Access Control (IAM)
- Click Add
- Select the Contributor Role and select your application, click Save
Enable feature in ConfigMgr
We will now make sure that the OMS feature is enabled in our SCCM hierarchy.
- Open the SCCM console
- Go to Administration / Updates and Servicing / Features
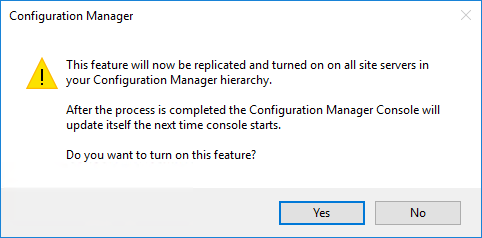
- Right-click Microsoft Microsoft Operation Management Suite (OMS) Connector and select Turn on

- On the warning, click Yes
Create connection to Operations Management Suite in ConfigMgr
The fourth steps is to create the connection to the Operations Management Suite in SCCM. To create the connection, you’ll need the information of the Azure AD App you just created.
- Open the SCCM Console
- Go to Administration / Cloud Services / Azure Services
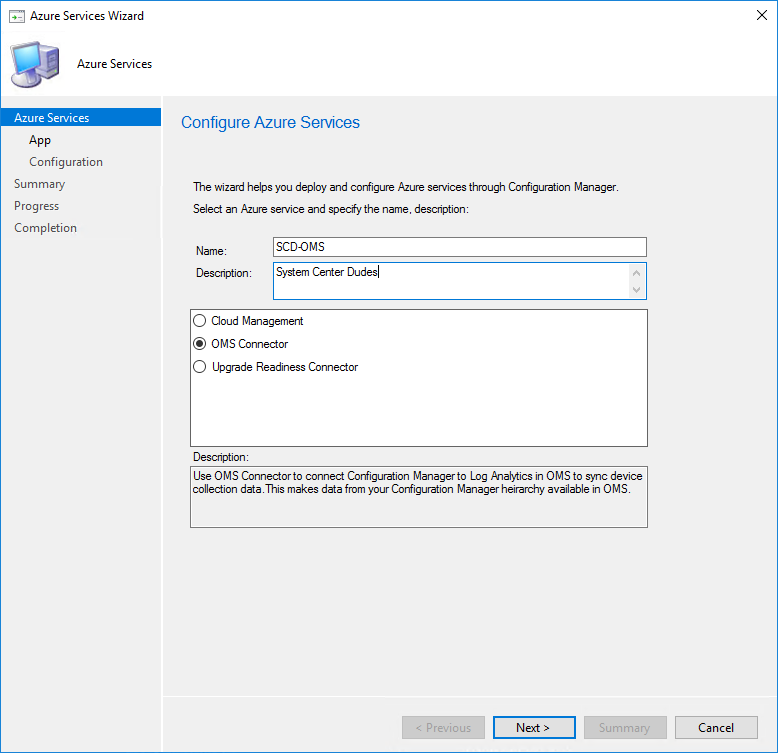
- Right-click Azure Services and select Configure Azure Services

- On the Azure Services tab, name your connection and select OMS Connector
- On the App page, select your Azure environment and click Import
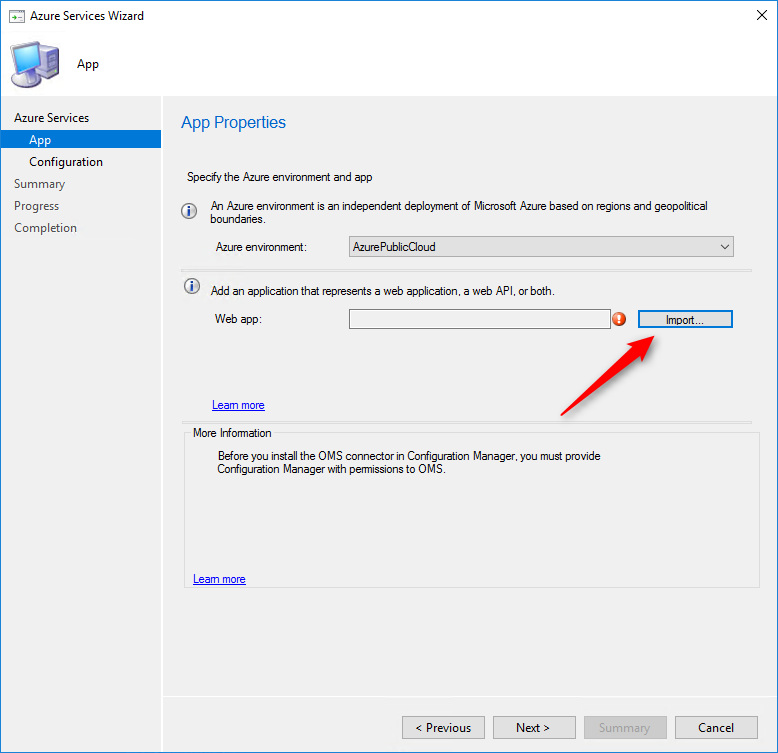
- On the Import Apps page, specify the following information :
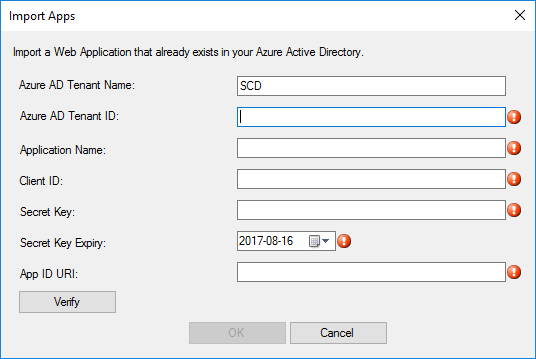
- Azure AD Tenant Name : Specify any name
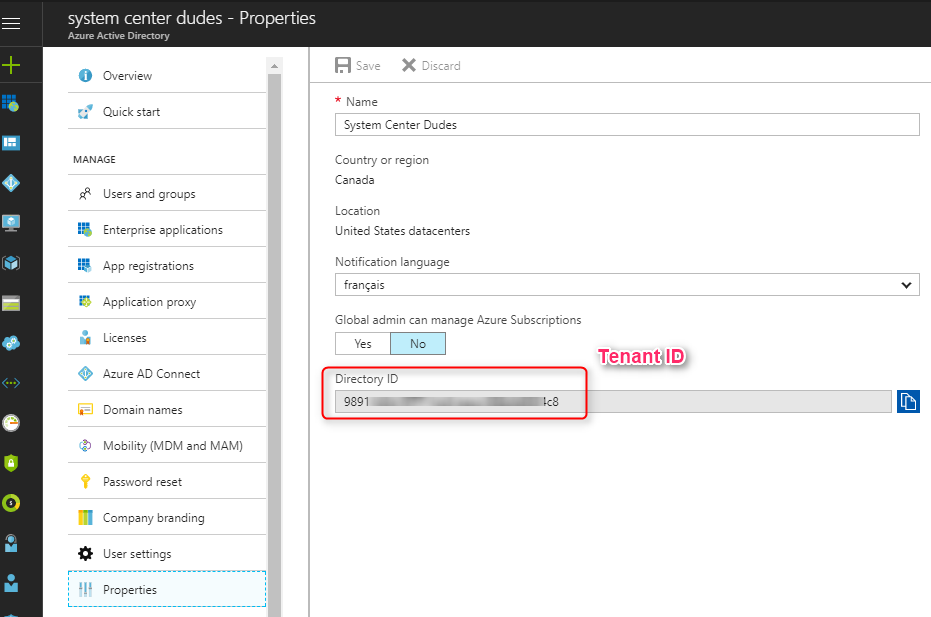
- Azure AD Tenant ID: Specify the Azure AD tenant – You can find this information under Azure Active Directory / Properties
- Application Name – Specify your application name
- Client ID: Specify the Application ID of the created Azure AD app. You can see where to find this information in the previous steps
- Secret key: Specify the Client secret key of the created Azure AD app. You can see where to find this information in the previous steps
- Secret Key expiry: Specify the expiration date of your key
- App ID URI: Specify the App ID URI of the created Azure AD app. You can see where to find this information in the previous steps
- Click on Verify then Ok
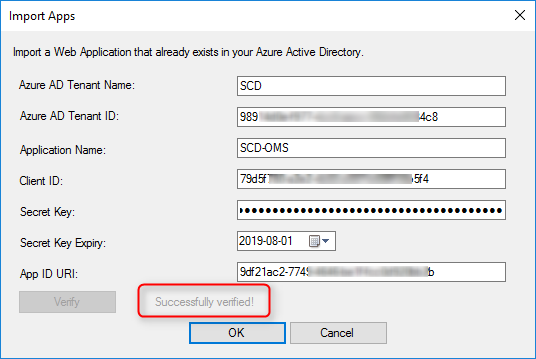
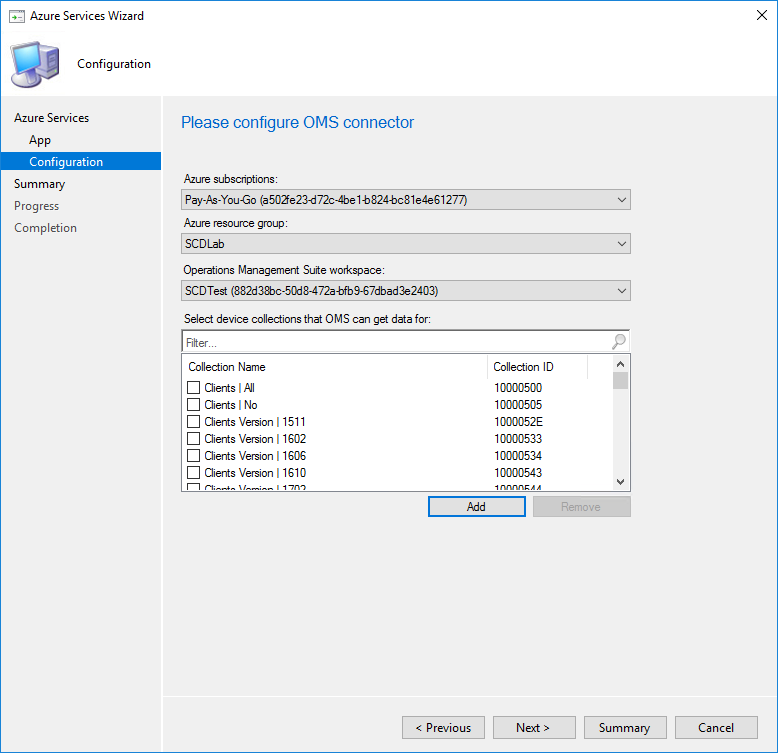
- On the configuration page, the information will be pre-populate once the Azure AD app has enough permissions on the resource group. If the fields are empty, your application doesn’t have the necessary rights.
- Select the desired collection by clicking on the Add button
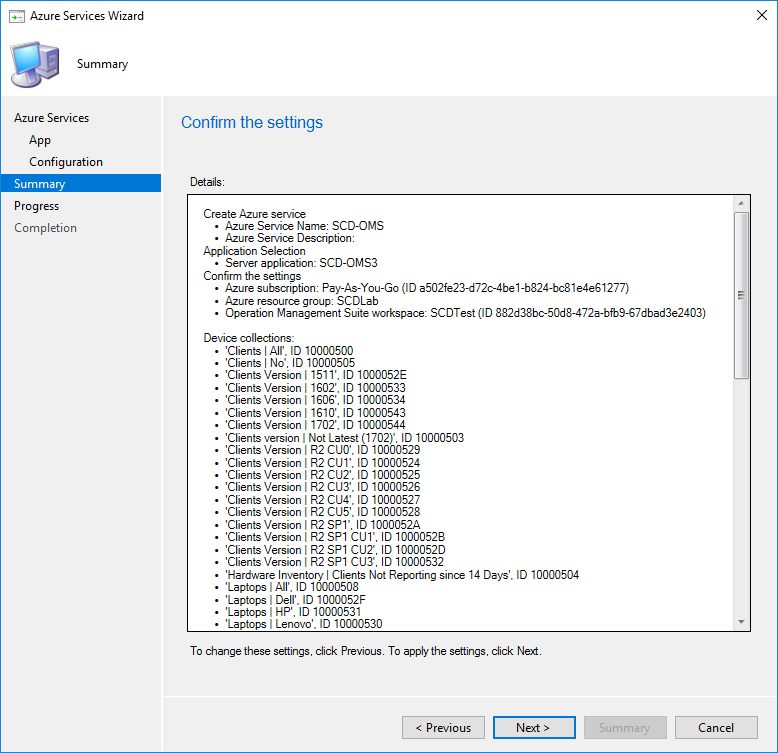
- On the Summary page, click Next
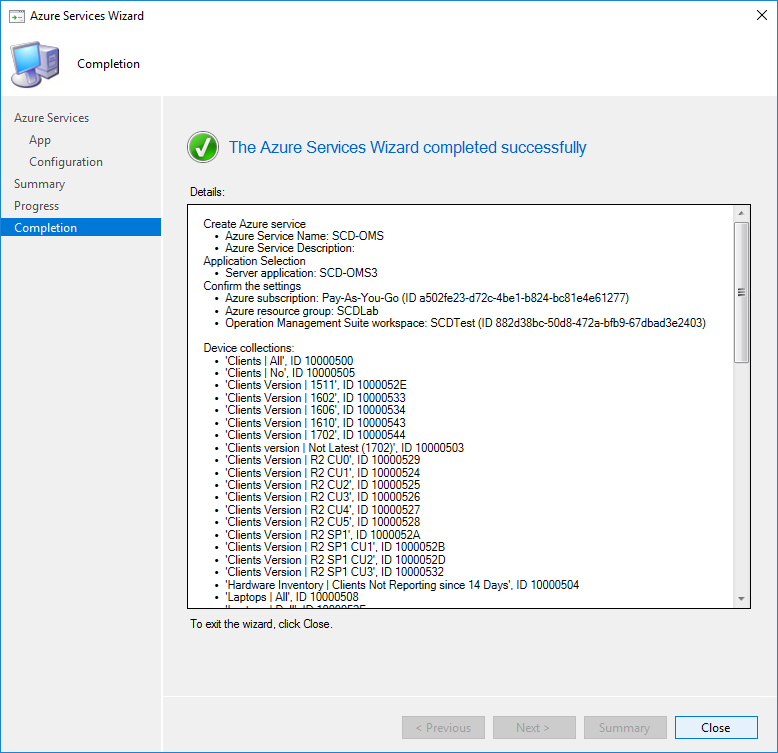
- On the Completion page, click Close
Verification
After the configuration is completed you can view the configuration details in Administration / Cloud Services / Azure Services. You can use the Properties button to add additional collections to the configuration.

OMS Configuration
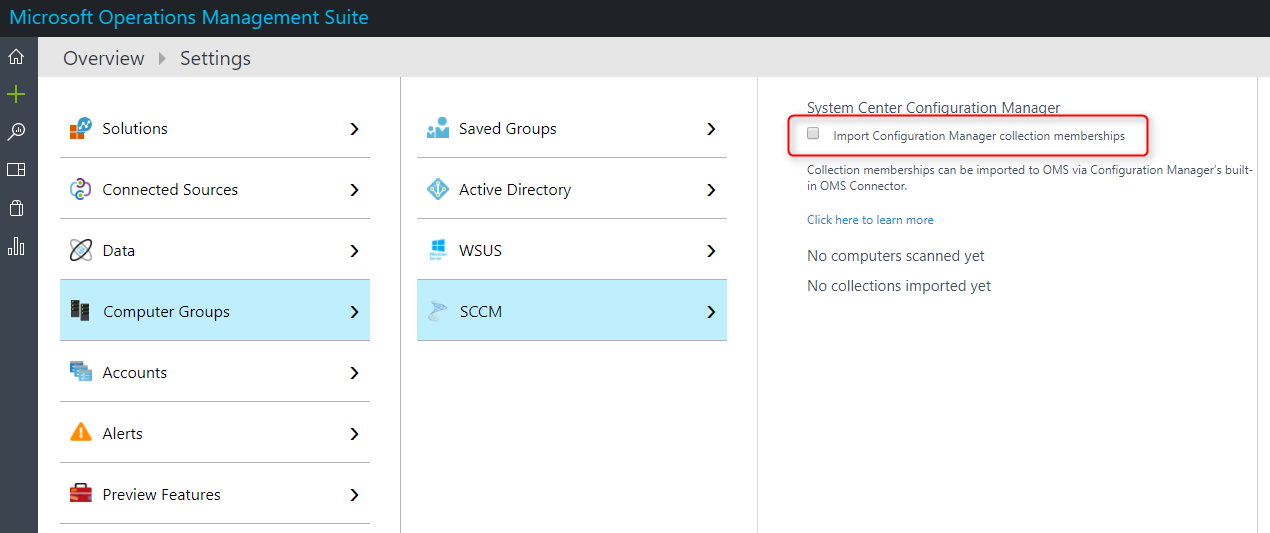
To start importing information about the collection memberships, there’s still one configuration to do in Operation Management Suite.
- Open your OMS Console – https://YourPortalName.portal.mms.microsoft.com
- Go to Settings / Computer Groups / SCCM
- Select Import Configuration Manager collection memberships

That’s it, wait for the synchronization to complete and you should see your collection information in your OMS workspace.




JY
09.05.2018 AT 07:25 PMMatthew
04.11.2018 AT 03:08 PM