

With the recent problems caused by monthly Windows Update, knowing how to massively uninstall Windows Update with SCCM is a must! This action is not available by default in SCCM.
There are 2 ways to uninstall a Windows Update. Both solutions require the command line utility WUSA.exe, that as been around since Windows Vista/Windows Server 2008 era.
In this post, we will detail both solutions to uninstall a Windows Update with SCCM.
If you are looking for how to manage Windows update with SCCM, see our SCCM Software Update Management Guide for complete instructions.
Prerequisites
- SCCM any version
- Windows 7 and up
- Windows 2008 R2 server and up
SCCM Uninstall Windows Update
One method is to use a Custom Task Sequence with a run command line. The advantage of using this method is the ability to use the same task sequence on both OS Architecture.
On a 64-bits system, since SCCM is a 32 bits application when a WUSA.exe is called, it will attempts to access %windir%\System32 but will be redirected to %windir%SysWOW64
Using a task sequence will work on both OS architectures because we can prevent a Run Command line to redirect file system on x64 clients.
Additional details can be fond on this MSDN article
The second method involves having a script per OS architecture. Nowadays, x64 is pretty much the main OS architecture used on workstation and server. However, there’s still some softwarethat require x86 OS Architecture to run. Using this method will require the right script to run on the right OS architecture. The advantage of this method is to use a simple package/program instead of a Task sequence.
Custom Task Sequence to Uninstall Windows Update
Create a new custom task sequence
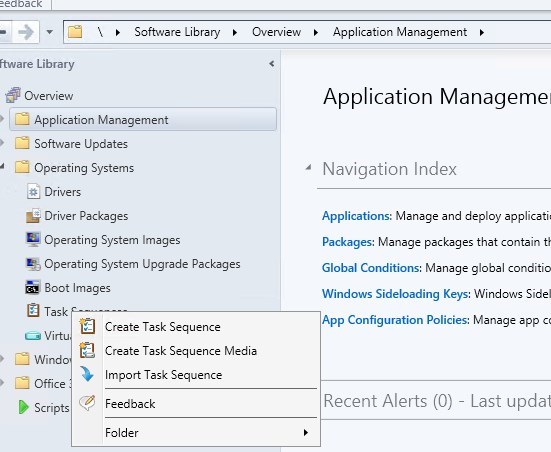
- Under Software Library / Operating System / Task Sequence, right-click and Create Task Sequence
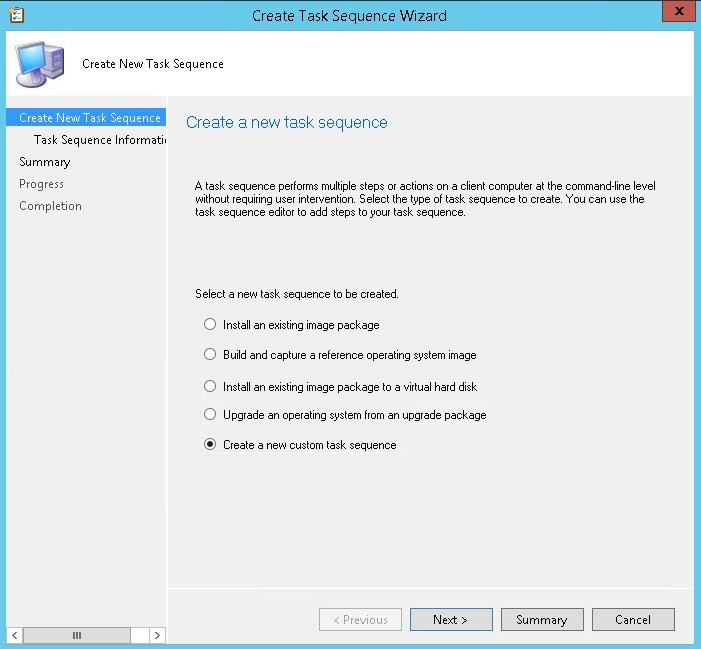
- Select Create a new custom task sequence, click Next
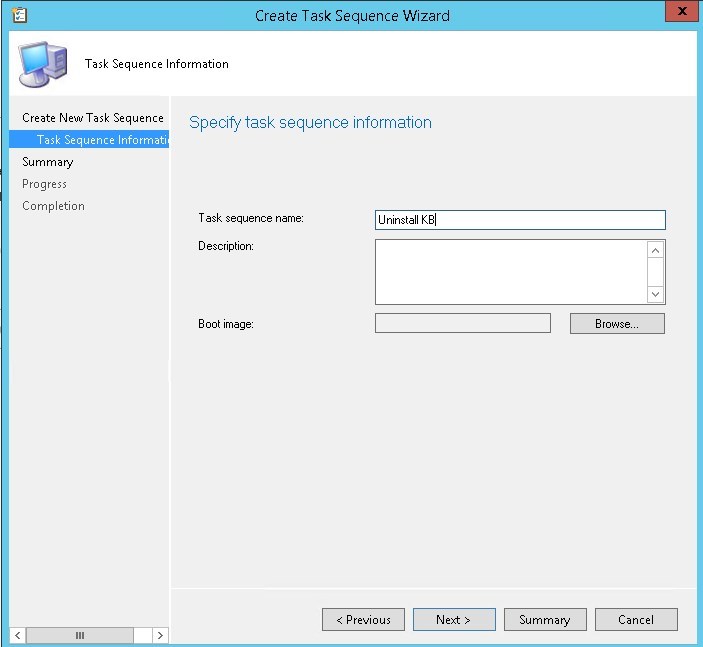
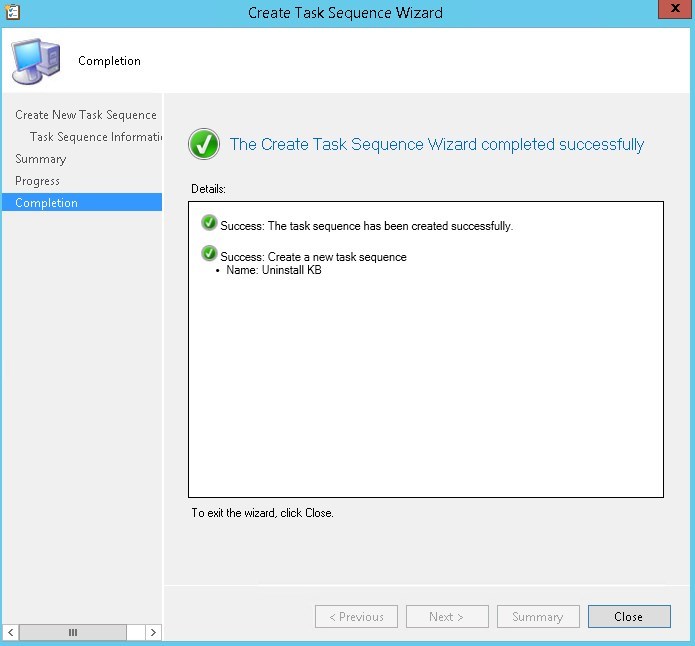
- Name: Uninstall KB, click Next
- Do not select boot image as we don’t need it
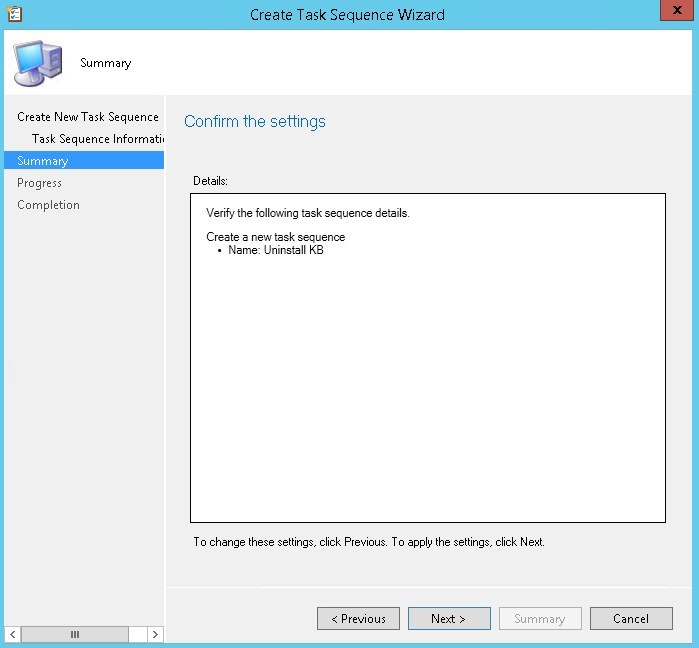
- Summary, click Next
- On the Completion screen, click Close
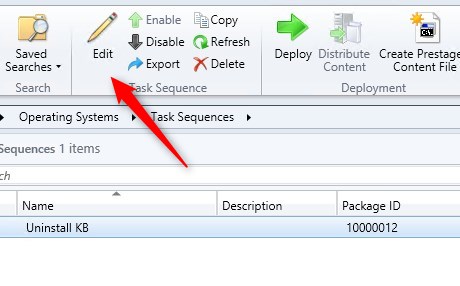
- Edit the task sequence
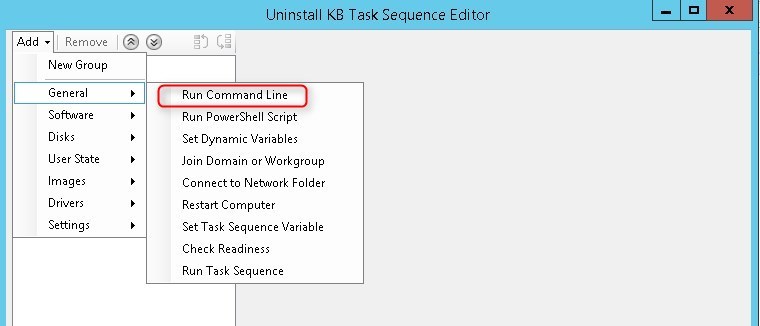
- Click Add, General / Run Command Line
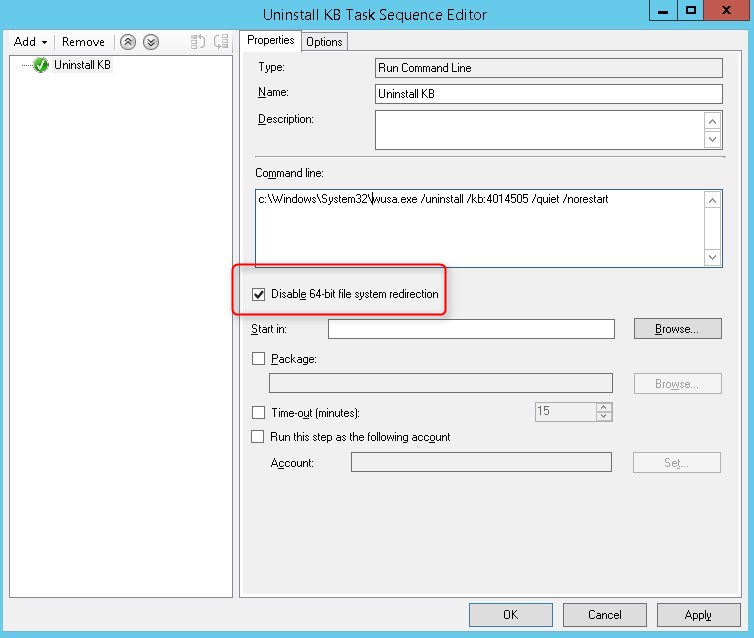
- Provide the needed information needed. (Change KB number based on the need)
- Command Line : C:\Windows\System32\wusa.exe /uninstall /kb:4014505 /quiet /norestart
- Check: Disable 64-bit file system redirection
- Note that even with the /norestart, the task sequence will trigger a restart. This is because the run command line returns a 3010 error code, which means Restart Required
Deploy custom task sequence
- Create a Device Collection to target your systems
- Right-Click your Task Sequence and select Deploy
- Select your collection, click Next
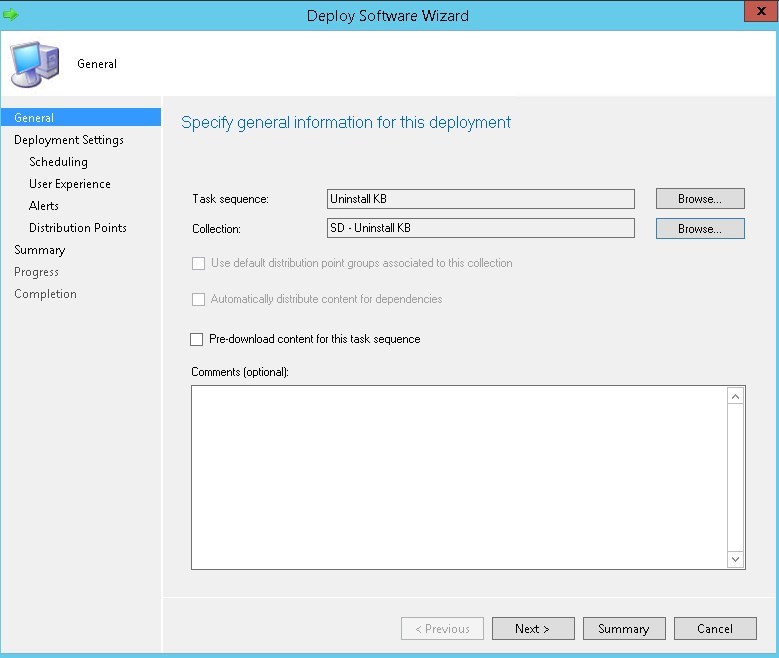
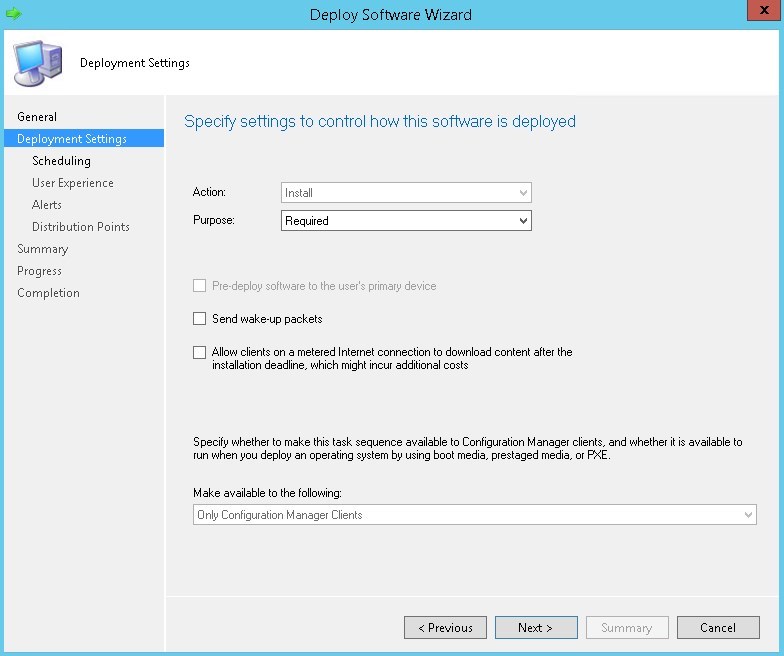
- Select Required, click Next
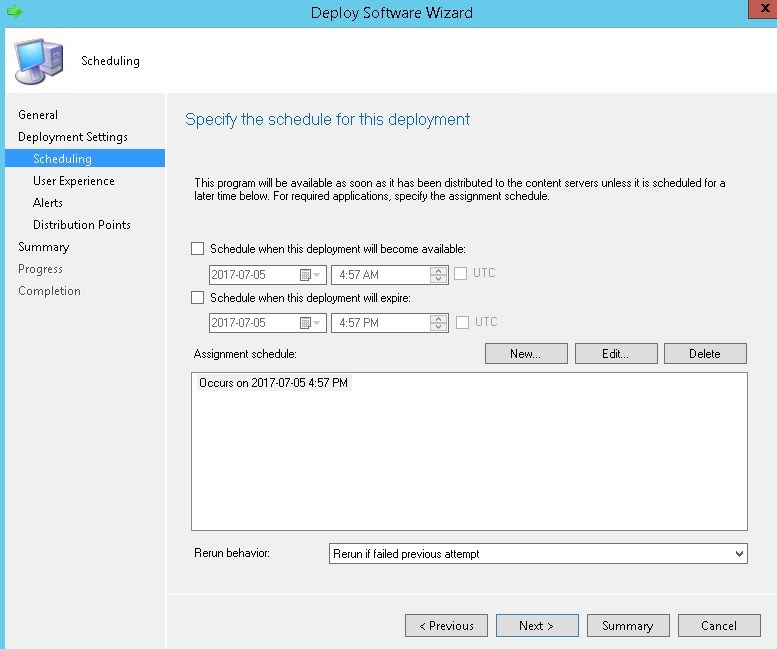
- Define your Schedule, click Next
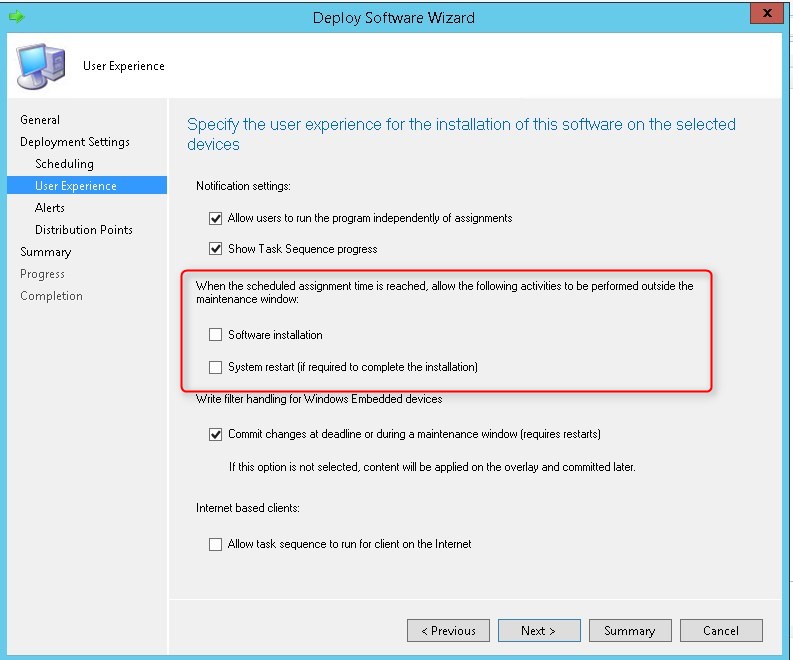
- Select the desired User Experience, click Next
- Remember that a restart is required. Plan accordingly and use Maintenance Window if needed
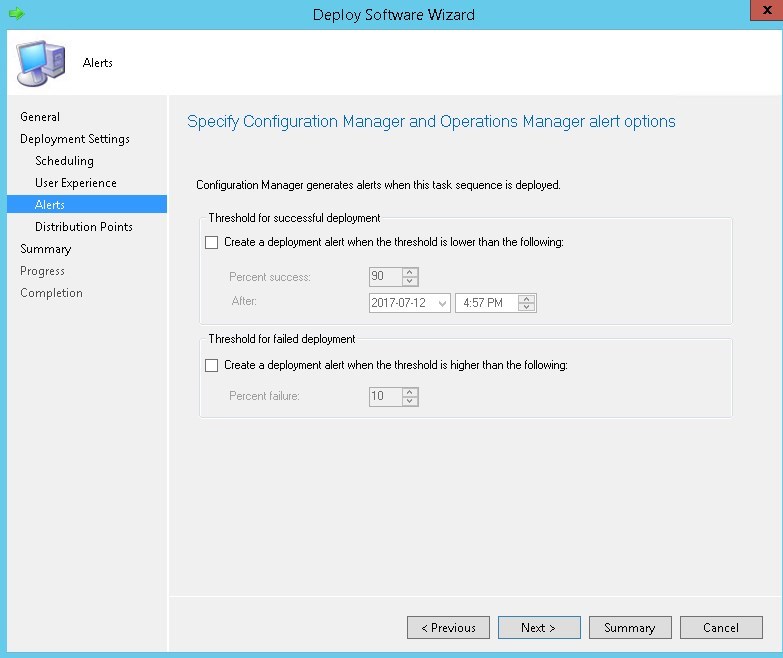
- Set Alert, click Next
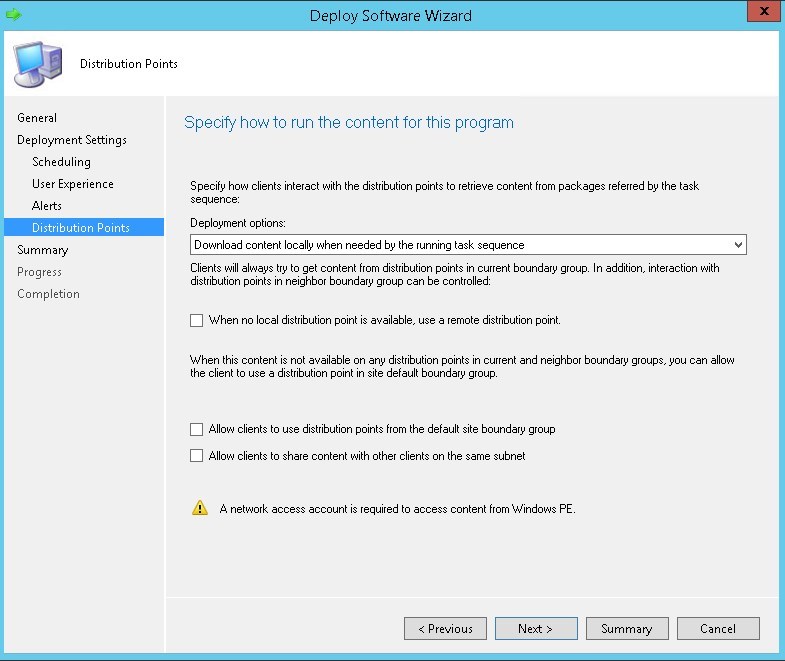
- Leave default option, as there is no download required, click Next
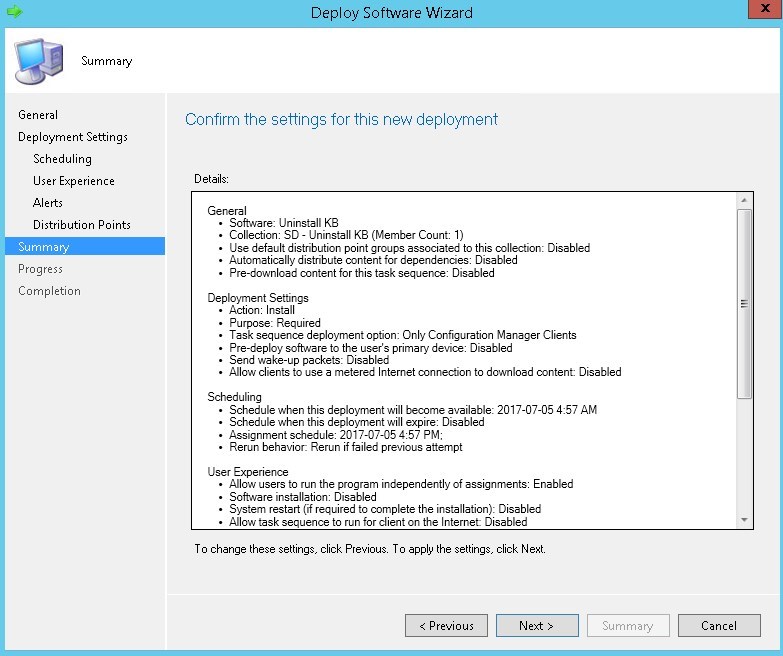
- Summary, click Next
- Completion
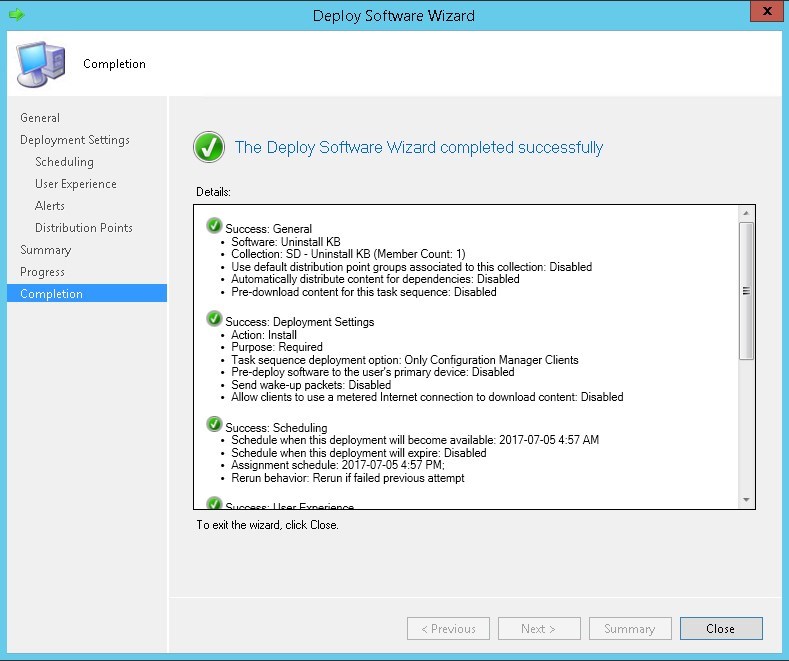
Once deployed, the Task sequence will uninstall the KB and reboot the computer.
Custom Script to Uninstall Windows Update
A simple batch file can do the trick to remove a Windows Update. As stated earlier, a special consideration must be done for x64 systems.
Create Scripts
For x64 system we will point the script to %Windir%\Sysnative.
cd /d %windir%\sysnative
wusa.exe /uninstall /kb:4014512 /quiet /norestart
For x86 system, we will use %Windir%\System32.
cd /d %windir%\system32
wusa.exe /uninstall /kb:4014512 /quiet /norestart
Save both script under the same folder.
Create SCCM Package
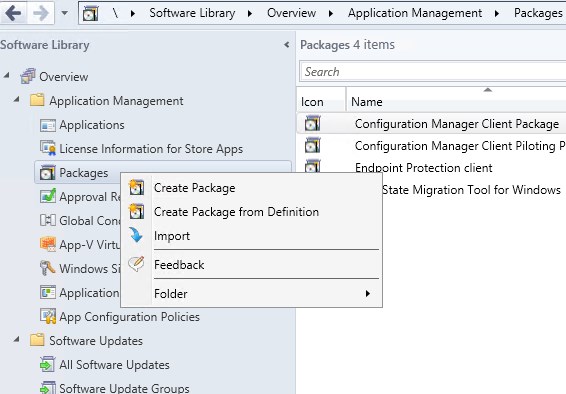
- Under Software Library / Application Management / Packages, select Create Package
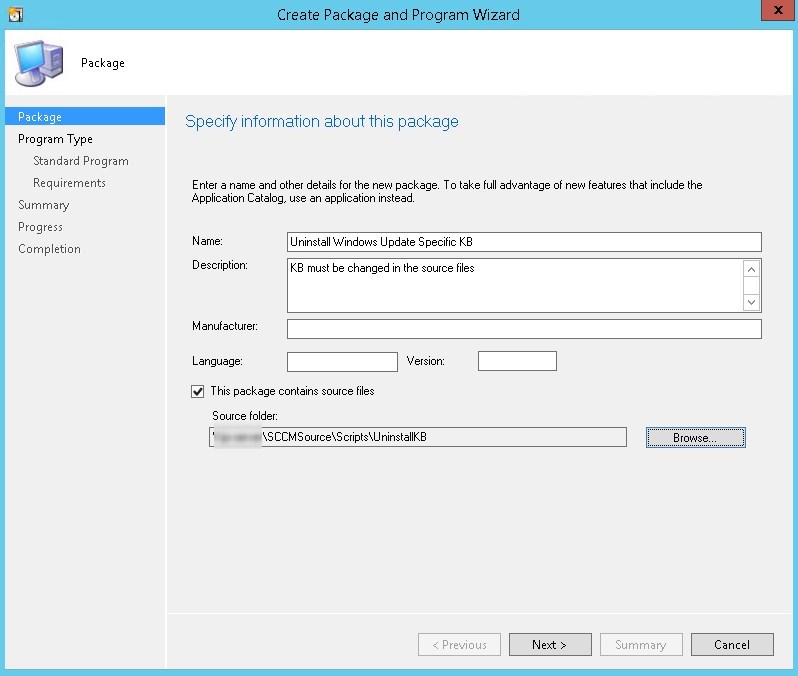
- Enter Name, Description and Source Path (where you saved your script)
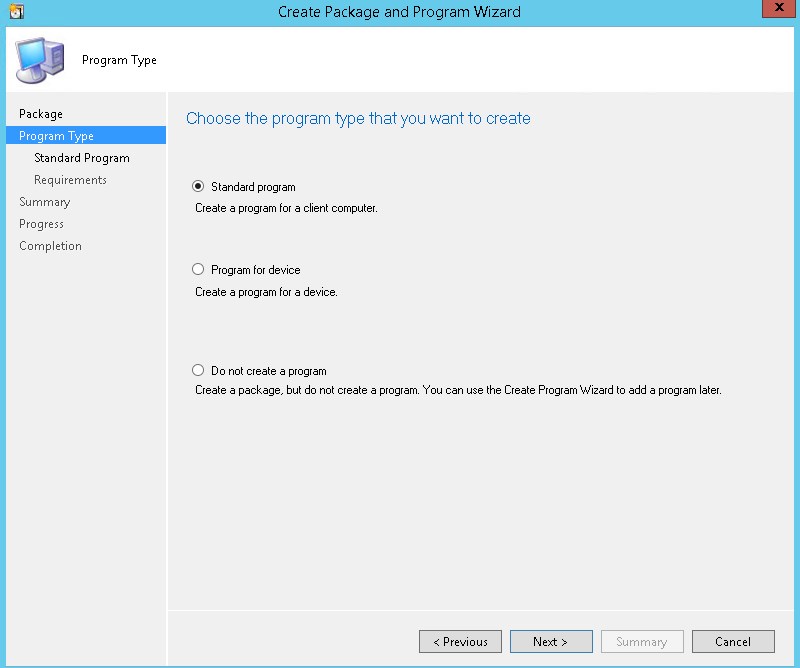
- Select Standard Program, click Next
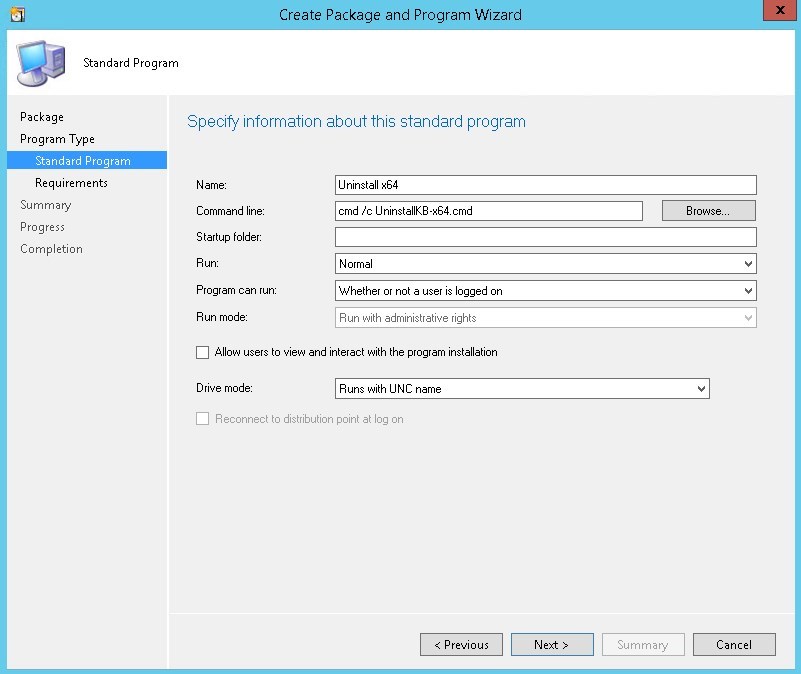
- Enter information
- Name: Uninstall x64
- Command line : cmd /c Uninstall-x64.cmd
- Program can run: Whether or not a user is logged on
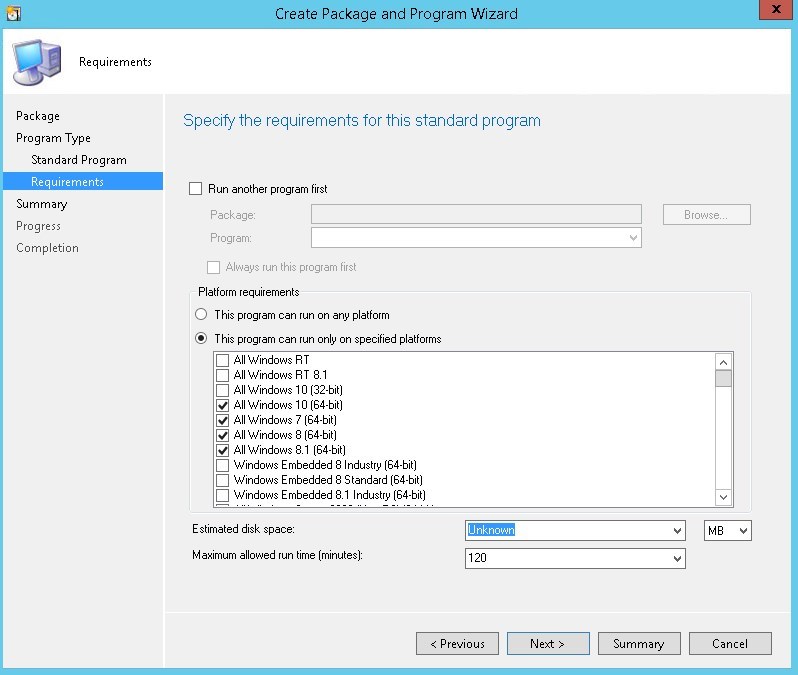
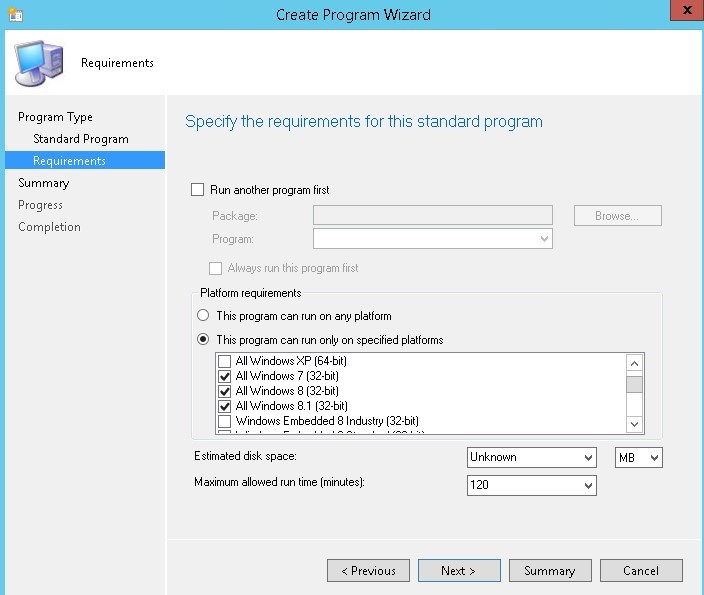
- Limit platform to all X64 OS
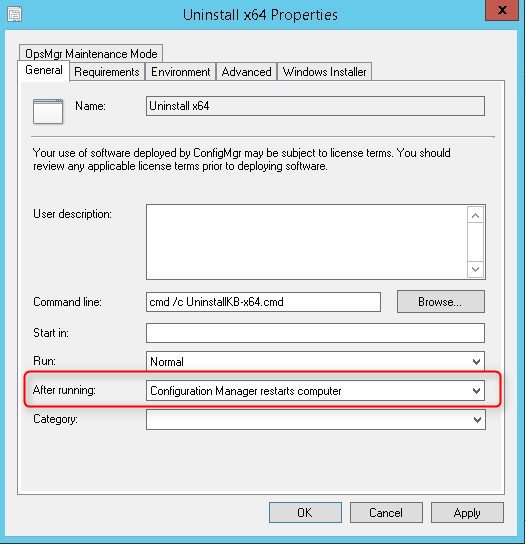
- Under the Uninstall x64 program Properties, change the After running for Configuration Manager restarts computer. Click OK
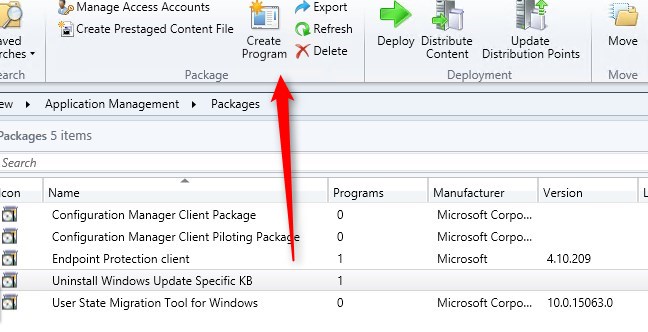
- On the package, click Create Program
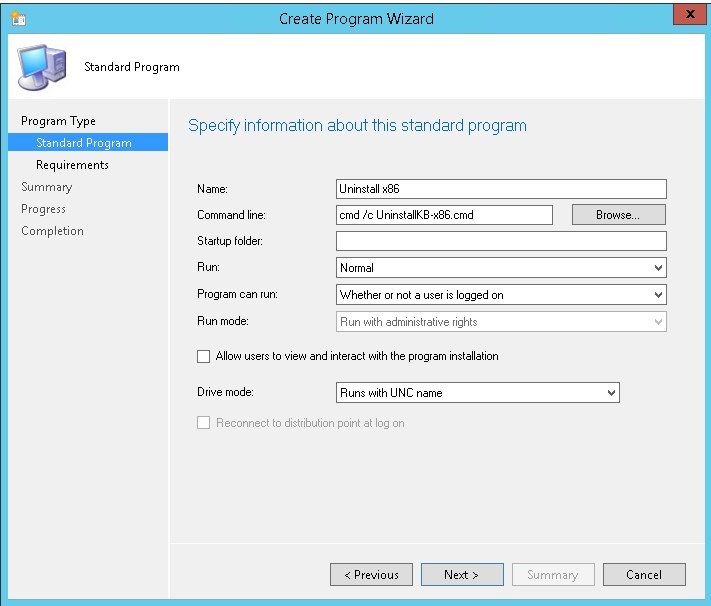
- Enter information
- Name: Uninstall x86
- Command line : cmd /c Uninstall-x86.cmd
- Program can run: Whether or not a user is logged on
- Limit platform to all X86 OS
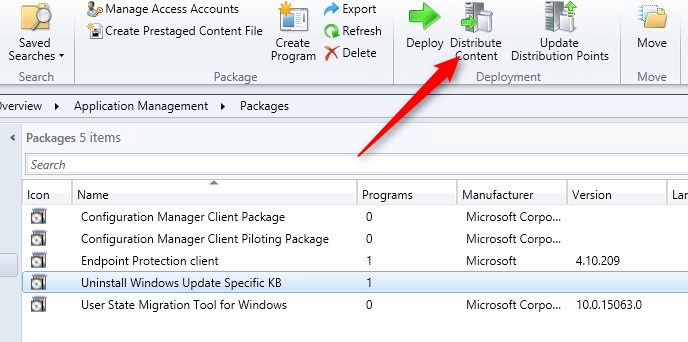
- Don’t forget to Distribute Content
Now you have 2 programs that can be deployed on all systems while the OS Architecture limitation will take care of which computer runs which OS architecture!


somi singh
01.21.2020 AT 03:14 AMimam
10.30.2019 AT 09:56 PMkelly
10.21.2018 AT 01:03 AMMS Surface Support Service
10.15.2018 AT 03:54 AMMicrosoft Surface Pro Screen Replacement
10.11.2018 AT 04:08 AMNarendra
10.03.2018 AT 01:12 AMNarendra
10.01.2018 AT 02:12 AMJonathan Lefebvre
10.02.2018 AT 09:54 AMemni petro
08.16.2018 AT 12:13 AMemni petro
08.16.2018 AT 12:12 AMsyed khairu
08.13.2018 AT 07:56 AMkaushal singh
01.31.2018 AT 09:16 AMAndrew
01.11.2018 AT 12:40 PMAndrew
01.11.2018 AT 12:39 PMPS Raju
09.29.2017 AT 08:58 AMRyan Steele
07.11.2017 AT 01:23 PMStefan
11.28.2017 AT 10:34 AMPär
07.12.2017 AT 06:22 AMLassiol
07.11.2017 AT 11:27 AM