
Beginning with SCCM 2006, you can now create a new boundary type. The SCCM VPN Boundary type helps to manage your remote clients. An upgraded SCCM client now sends a location request which includes information about its network configuration.
Your management point can determine if the client is on a VPN connection based on this new information. You may want to use the SCCM VPN Boundary to set some options to differ when your clients are on a VPN connection. For example, redirect your VPN client on different site servers, disable Peer download or prefer cloud-based sources.
If you’re not familiar with boundary and boundary groups, let’s define it this way: a boundary is a network location that can contain one or more devices that you want to manage. By using boundary groups, clients can find an assigned site and locate content when they have to install software, such as applications, software updates, and operating system images.
There is no prioritization with boundaries or boundary groups. A client falling inside multiple boundaries will apply all settings applicable to the boundary groups that those boundaries are members of.
SCCM vpn boundary type Requirement
Before you can benefit from this new feature, you need to upgrade your servers and client to SCCM 2006.
Once you upgrade your SCCM server, you need some information on your clients connected to a VPN connection. Once you have this information, you create a new boundary in SCCM. Let’s see how to do that.
How to Configure
You may wonder how does SCCM will define if a client is on a VPN or not?
Well, it’s pretty simple, it can use 3 different methods :
Auto Detect any VPN solution that uses the point-to-point tunnelling protocol (PPTP).
If this solution doesn’t work for you, you can create a VPN boundary based on the Connection Name. To use this option simply use the name of the network adapter in Windows for the VPN connection.
- On a client connected to VPN
- Run an ipconfig /all on a command line window
- In our example the Connection Name is SCD

As per the Microsoft doc: SCCM will match the first 250 characters of the string, but doesn’t support wildcard characters or partial strings
You can also use the Connection Description field. To use this option simply use the Description of the network adapter in Windows for the VPN connection.
- On a client connected to VPN
- Run an ipconfig /all on a command line window
- In our example the Connection Description is SCD

As per the Microsoft doc: SCCM matches the first 243 characters of the string but doesn’t support wildcard characters or partial strings.
Now that we have this information we can head to the SCCM Console and create a new VPN Boundary based on the desired option.
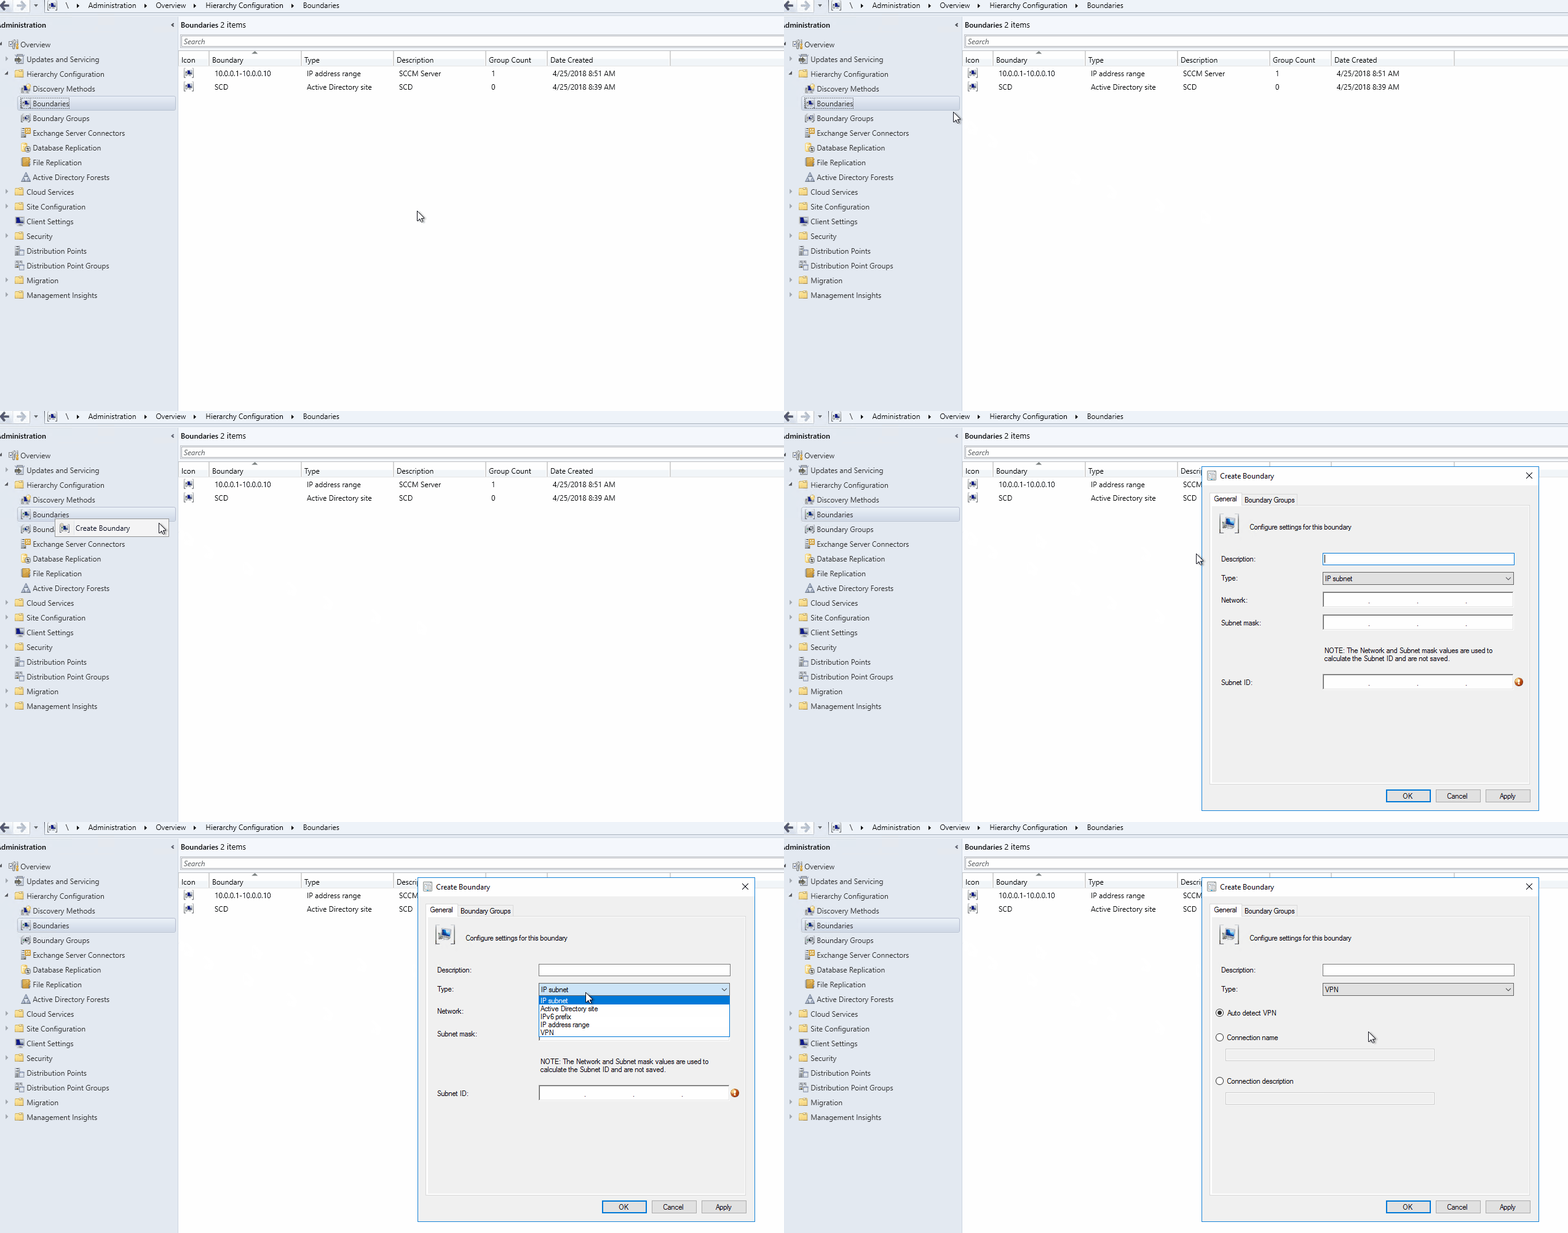
- Go to Administration / Hierarchy Configuration / Boundaries
- Right-click Boundary and select Create Boundary
- In the Create Boundary window, select VPN as Type

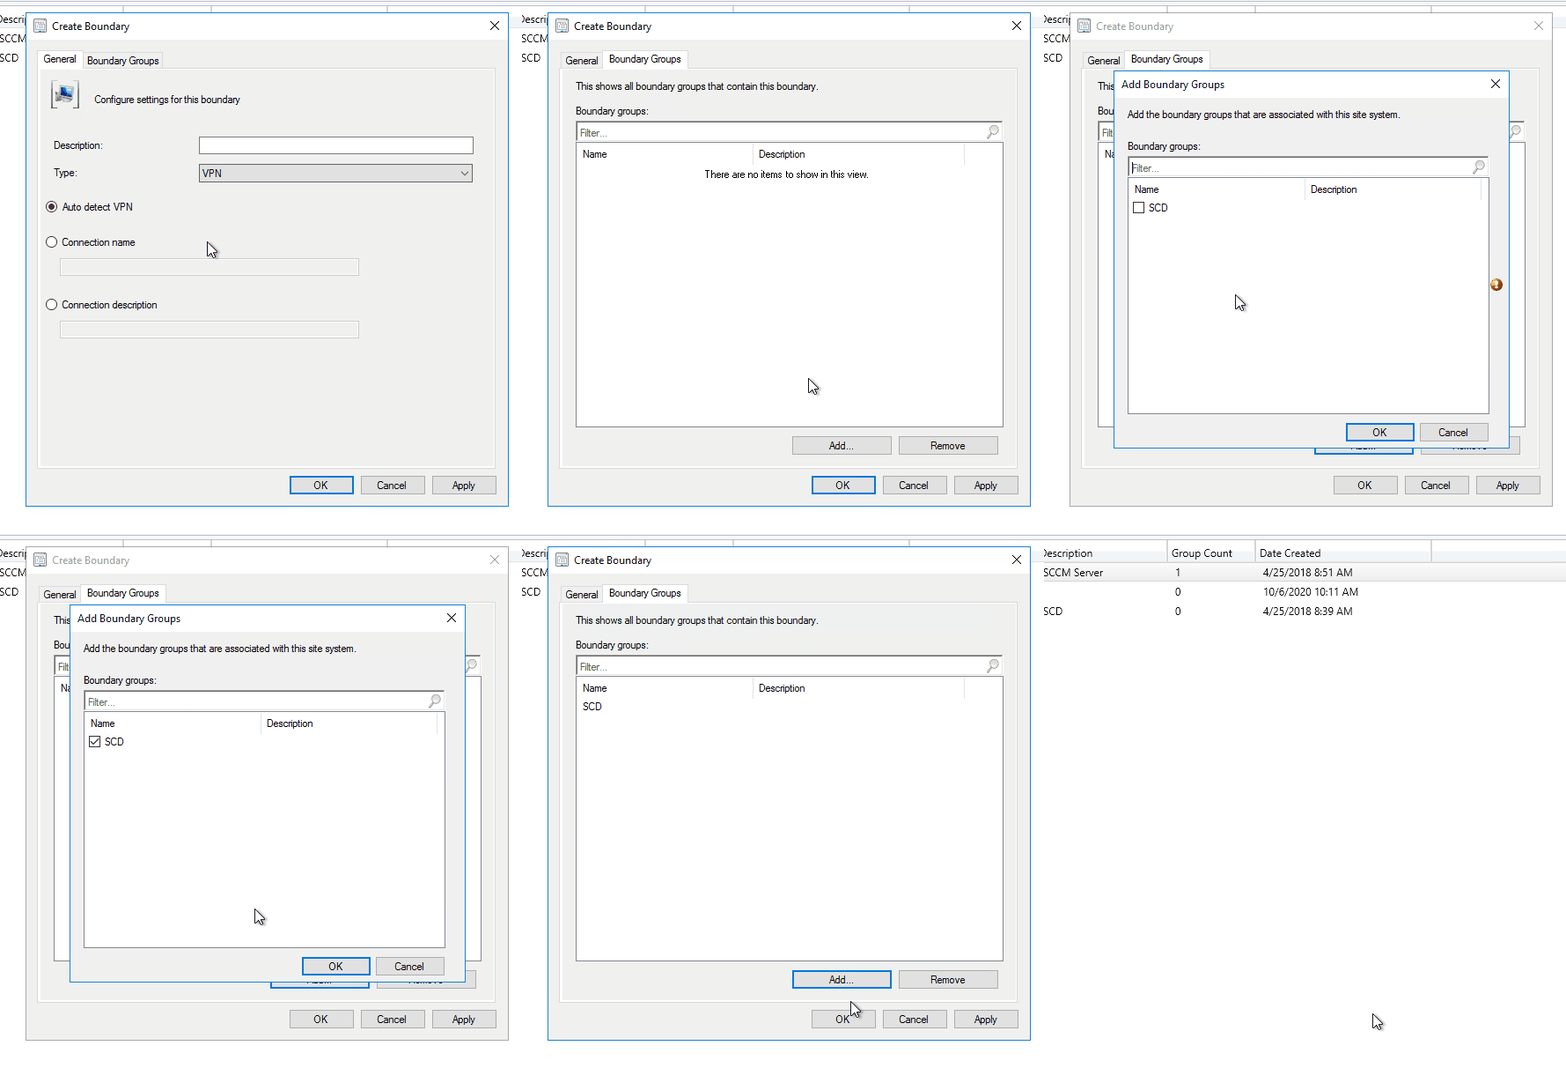
- Create your VPN boundary based on the desired option. (Auto Detect, Connection Name or Connection Description)

- On the Boundary Group tab
- Click Add to assign your new boundary to an existing Boundary Group. You can select more than one if needed.
- If you need to create a new Boundary group, click Ok and create your Boundary Group in the Boundary Group pane
- Once the Boundary Group is set, click Ok

That’s it, you’re all set to manage your remote client using the new SCCM VPN Boundary type.
If you need to monitor your clients and know in which boundary and boundary group they are configured, we have built a report just for that.

Let us know if you have any questions using the comment section.


Chris
03.11.2021 AT 11:39 AMLaurenth
12.17.2020 AT 09:41 AMJonathan Lefebvre
12.18.2020 AT 08:30 AM